
Import Customers and Tickets from a CSV File
Not every support history lives in a help desk with an API. Some of it sits in a spreadsheet, an export from an older tool or a list of customers your accountant keeps. Retyping it isn’t an option, and a half-finished copy is worse than none.
The CSV file tab on Core Support → Import reads 2 kinds of file: customers, one row per person, or tickets with their conversations, one row per message. It reads columns by name, keeps the upload encrypted until the import finishes and can undo the whole import afterwards.
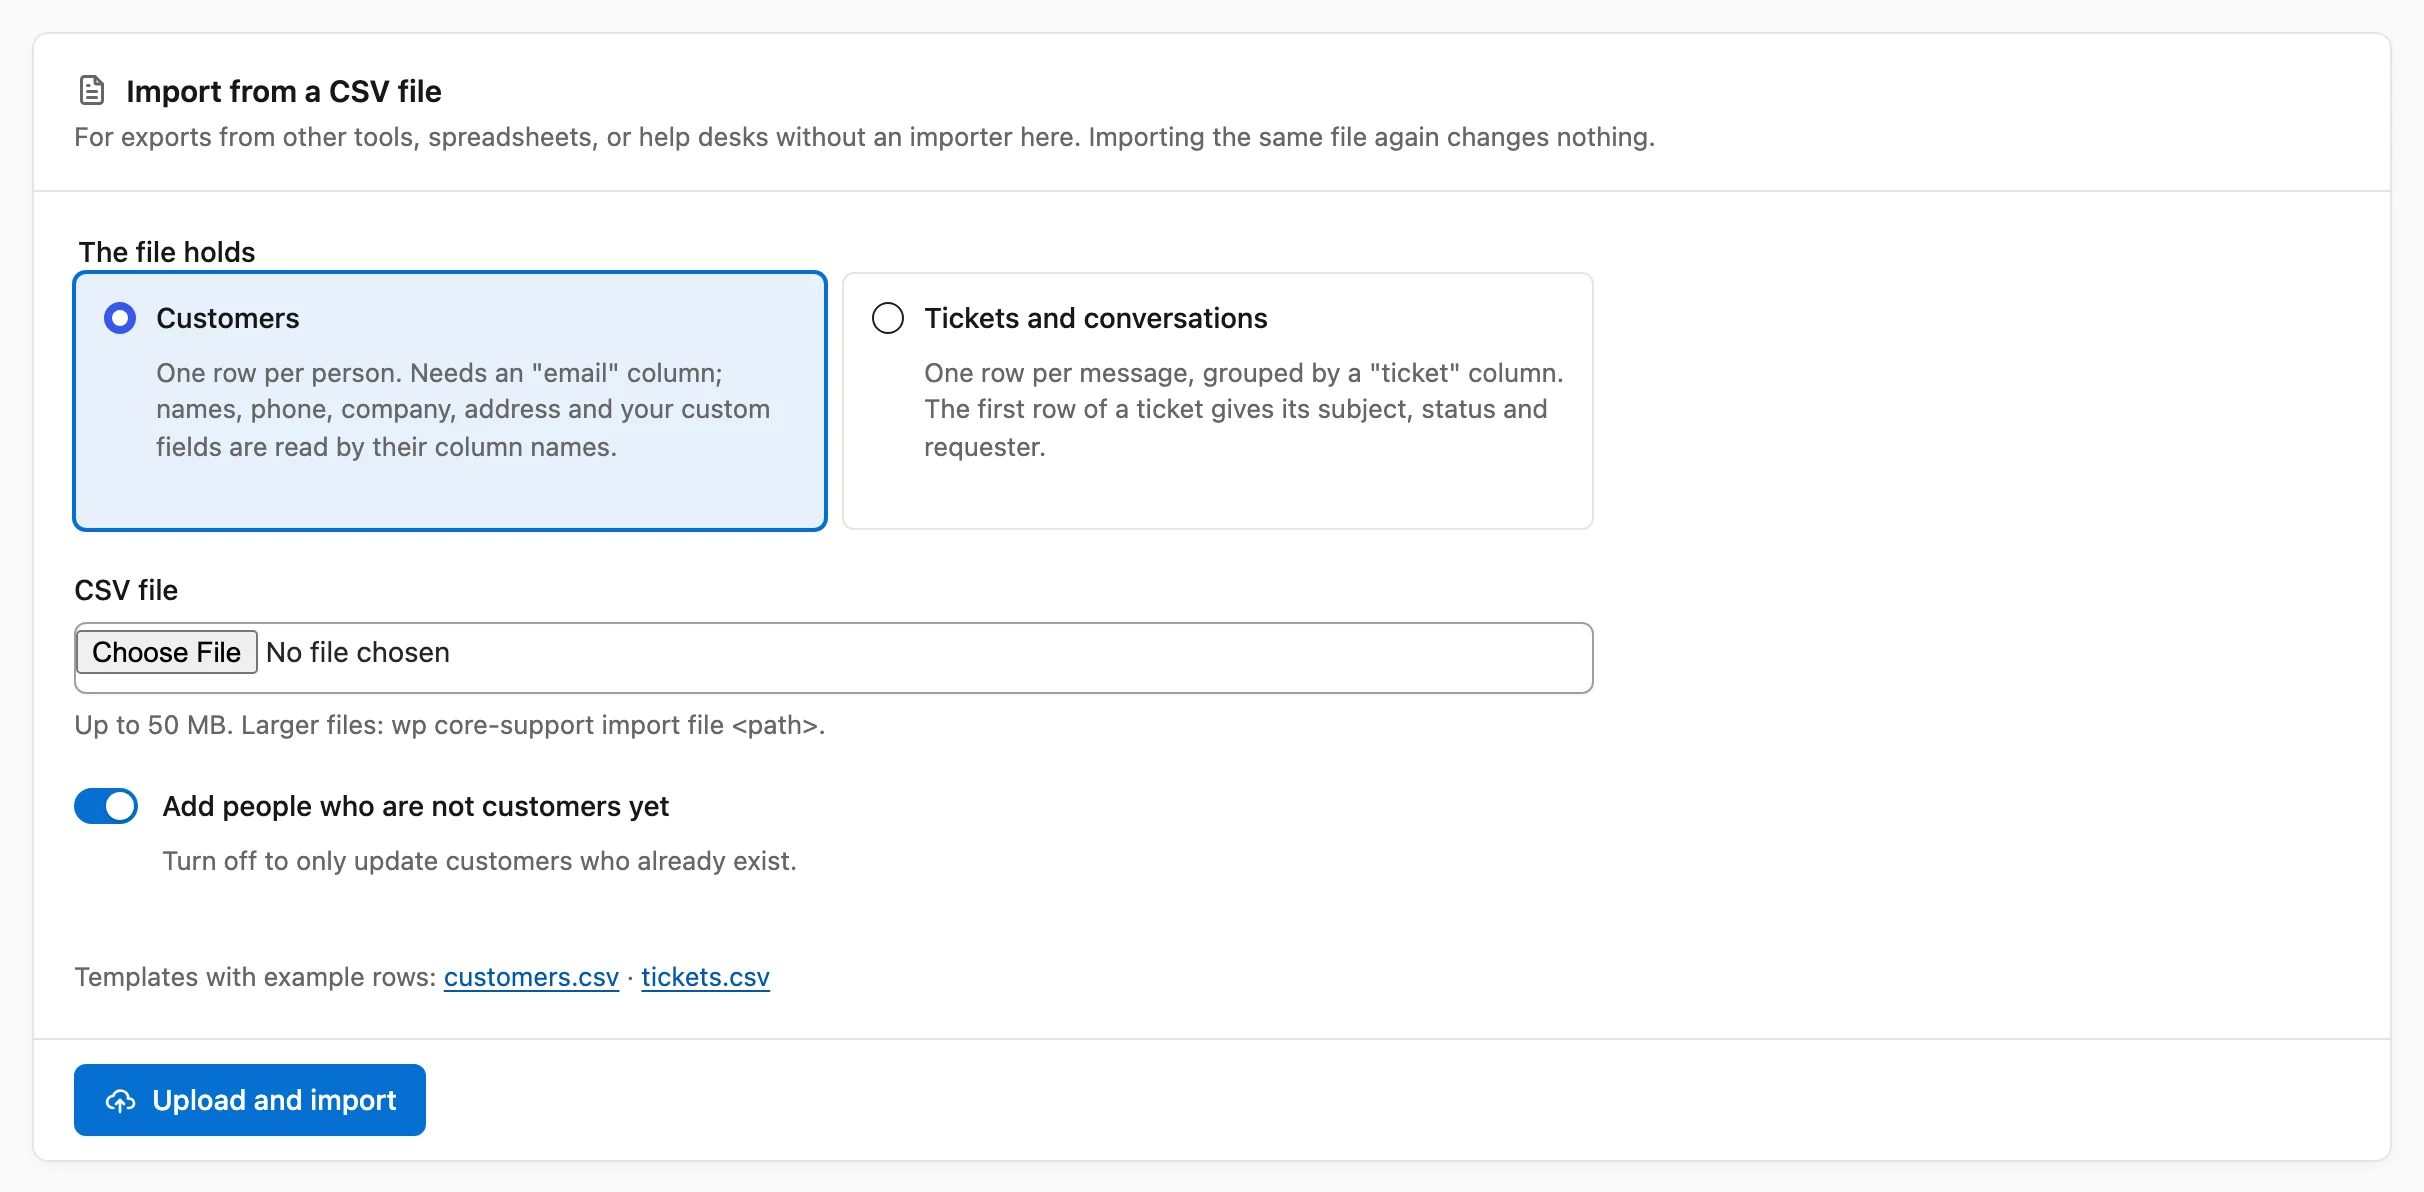
Upload a File
The Import screen is for managers: Support Managers and administrators.
- Go to Core Support → Import and choose the CSV file tab.
- Under The file holds, pick Customers or Tickets and conversations.
- Choose the file in CSV file.
- For a customers file, leave Add people who are not customers yet on, or turn it off to only update customers who already exist.
- Pick the mailbox in Replies to imported tickets go out from, when you import tickets. It shows once you have a mailbox set up.
- Choose Upload and import.
The file must be a .csv file with commas between the values. The upload limit is the smaller of your server’s upload limit and 50 MB, and the screen shows it under the file field. Larger files go through the command line, as shown below.
Download a Template
The tab links 2 templates with example rows, customers.csv and tickets.csv. Starting from one is the quickest way to get the column names right. The first row of every file must name the columns.
Customers Files
A customers file has one row per person. It needs an email column, and every other column is optional:
email,first_name,last_name,phone,company,address_1,city,state,postcode,countryCore Support reads columns by name, without regard to letter case, spaces or punctuation. Common names work too:
- email: “E-mail”, “Email address” or “Customer email”
- first_name: “First”, “Firstname” or “Given name”
- last_name: “Last”, “Lastname”, “Surname” or “Family name”
- full_name: “Name”, “Fullname” or “Customer name”
- phone: “Phone number”, “Mobile” or “Telephone”
- company: “Organization”, “Organisation” or “Company name”
- address_1 and address_2: “Address”, “Street”, “Address line 1” and “Address line 2”
- state: “Region”, “Province” or “County”
- postcode: “Zip”, “Zip code”, “Postal code” or “Post code”
- country: “Country code”, as a 2-letter code such as
US
A column named like one of your custom fields, by its key or its label, fills that field. Other columns are ignored. An empty cell never clears a detail a customer already has.
Each row is matched to an existing customer by address. With Add people who are not customers yet off, rows for anyone else are skipped and listed as “Not a customer yet, and adding people was off”.
Tickets Files
A tickets file has one row per message. Rows that share a ticket value form one ticket, and the tickets template has rows like these:
ticket,subject,status,priority,created_at,requester_email,requester_name,author,author_email,author_name,visibility,body,attachments
1001,License key missing,resolved,normal,2026-01-05 09:00:00,jane@example.com,Jane Doe,customer,jane@example.com,Jane Doe,public,Where is my license key?,
1001,,,,2026-01-05 10:30:00,jane@example.com,,agent,support@example.com,Sam Support,public,It is on your account page under Licenses.,
1001,,,,2026-01-05 10:31:00,jane@example.com,,agent,support@example.com,Sam Support,internal,Sent the key by email too.,
The first row of a ticket opens it:
- subject: when empty, the start of the first message is used.
- status: “waiting”, “pending”, “on hold”, “hold”, “snoozed” or “awaiting customer” become Waiting on customer. “resolved”, “solved”, “closed”, “done”, “complete” or “completed” become Resolved. Anything else is Open. A later row with a status moves the ticket on.
- priority: “high” or “urgent” keep their level, and anything else is Normal.
- requester_email and requester_name: the customer. The requester becomes a customer like any other.
Every row adds one message:
- created_at: the message’s date and time. A date without a time zone is read as UTC.
- author: “customer”, or “agent”, “team”, “staff” or “admin” for your team. Left empty, a row whose author_email differs from the requester counts as the team.
- author_email and author_name: who wrote it. A team member with that address and access to tickets here gets the reply under their name. Anyone else shows as their name with “(imported)”.
- visibility: “internal”, “private” or “note” make a private note. Anything else is a public reply.
- body: plain text or HTML.
- attachments:
https://addresses, separated by spaces or commas. Each file is downloaded, up to 20 MB.
A row without a ticket value is skipped as “A row without a ticket number”. A ticket whose first row has no requester address is skipped as “No email address”.
Follow the Import
The import runs in the background and shows in the Imports card, as “Customers from customers.csv” or “Tickets from tickets.csv”. It follows the same rules as a help desk import: no email goes to customers, no alert goes to your team and the screen keeps it moving while it’s open. Left out lists anything skipped, with examples.
Import Tickets from Zendesk, Freshdesk or Intercom explains the progress states and the report.
Your File While It Imports
An uploaded file is kept encrypted in the private uploads folder, wp-content/uploads/core-support-private, until its import finishes. Core Support then deletes it. A file imported from the command line is read where it is and never copied.
If the encrypted copy goes missing before the import finishes, the import stops with “The uploaded file is gone. Upload it again.”
The Same File Twice
Importing the same file again changes nothing, because Core Support recognizes the file by its contents.
A file with any change counts as a new file. For customers that’s fine, since rows match customers by address. For tickets, the edited file’s tickets are imported again as new tickets. If you fix a tickets file after importing it, undo the first import before you upload the corrected one.
Undo a File Import
A finished file import has an Undo button in the Imports card, like any other import. It removes the tickets and customers the file added. Customers who also bought or wrote in here keep their record and lose only what the file said about them.
Large Files from the Command Line
wp core-support import file ./customers.csv --format=customers
wp core-support import file ./tickets.csv --format=tickets
wp core-support import file ./customers.csv --format=customers --no-create--format=<format>: required.customersortickets.--no-create: only update customers who already exist.
The command reads a file of any size from the server and waits until the import finishes. wp core-support import undo <id> undoes it by the job number from wp core-support jobs list.
Before a large tickets import, I’d import 2 tickets in the same layout first, check them and undo that test import. A wrong column name is far easier to spot on 2 tickets than on 2,000.