
Add Custom Fields to Customers
Your store keeps a VAT number in order meta, FluentCRM has a “Plan” field and your old help desk tracked each customer’s company size. Each tool calls the same fact something different, and none of it reaches the agent answering the ticket.
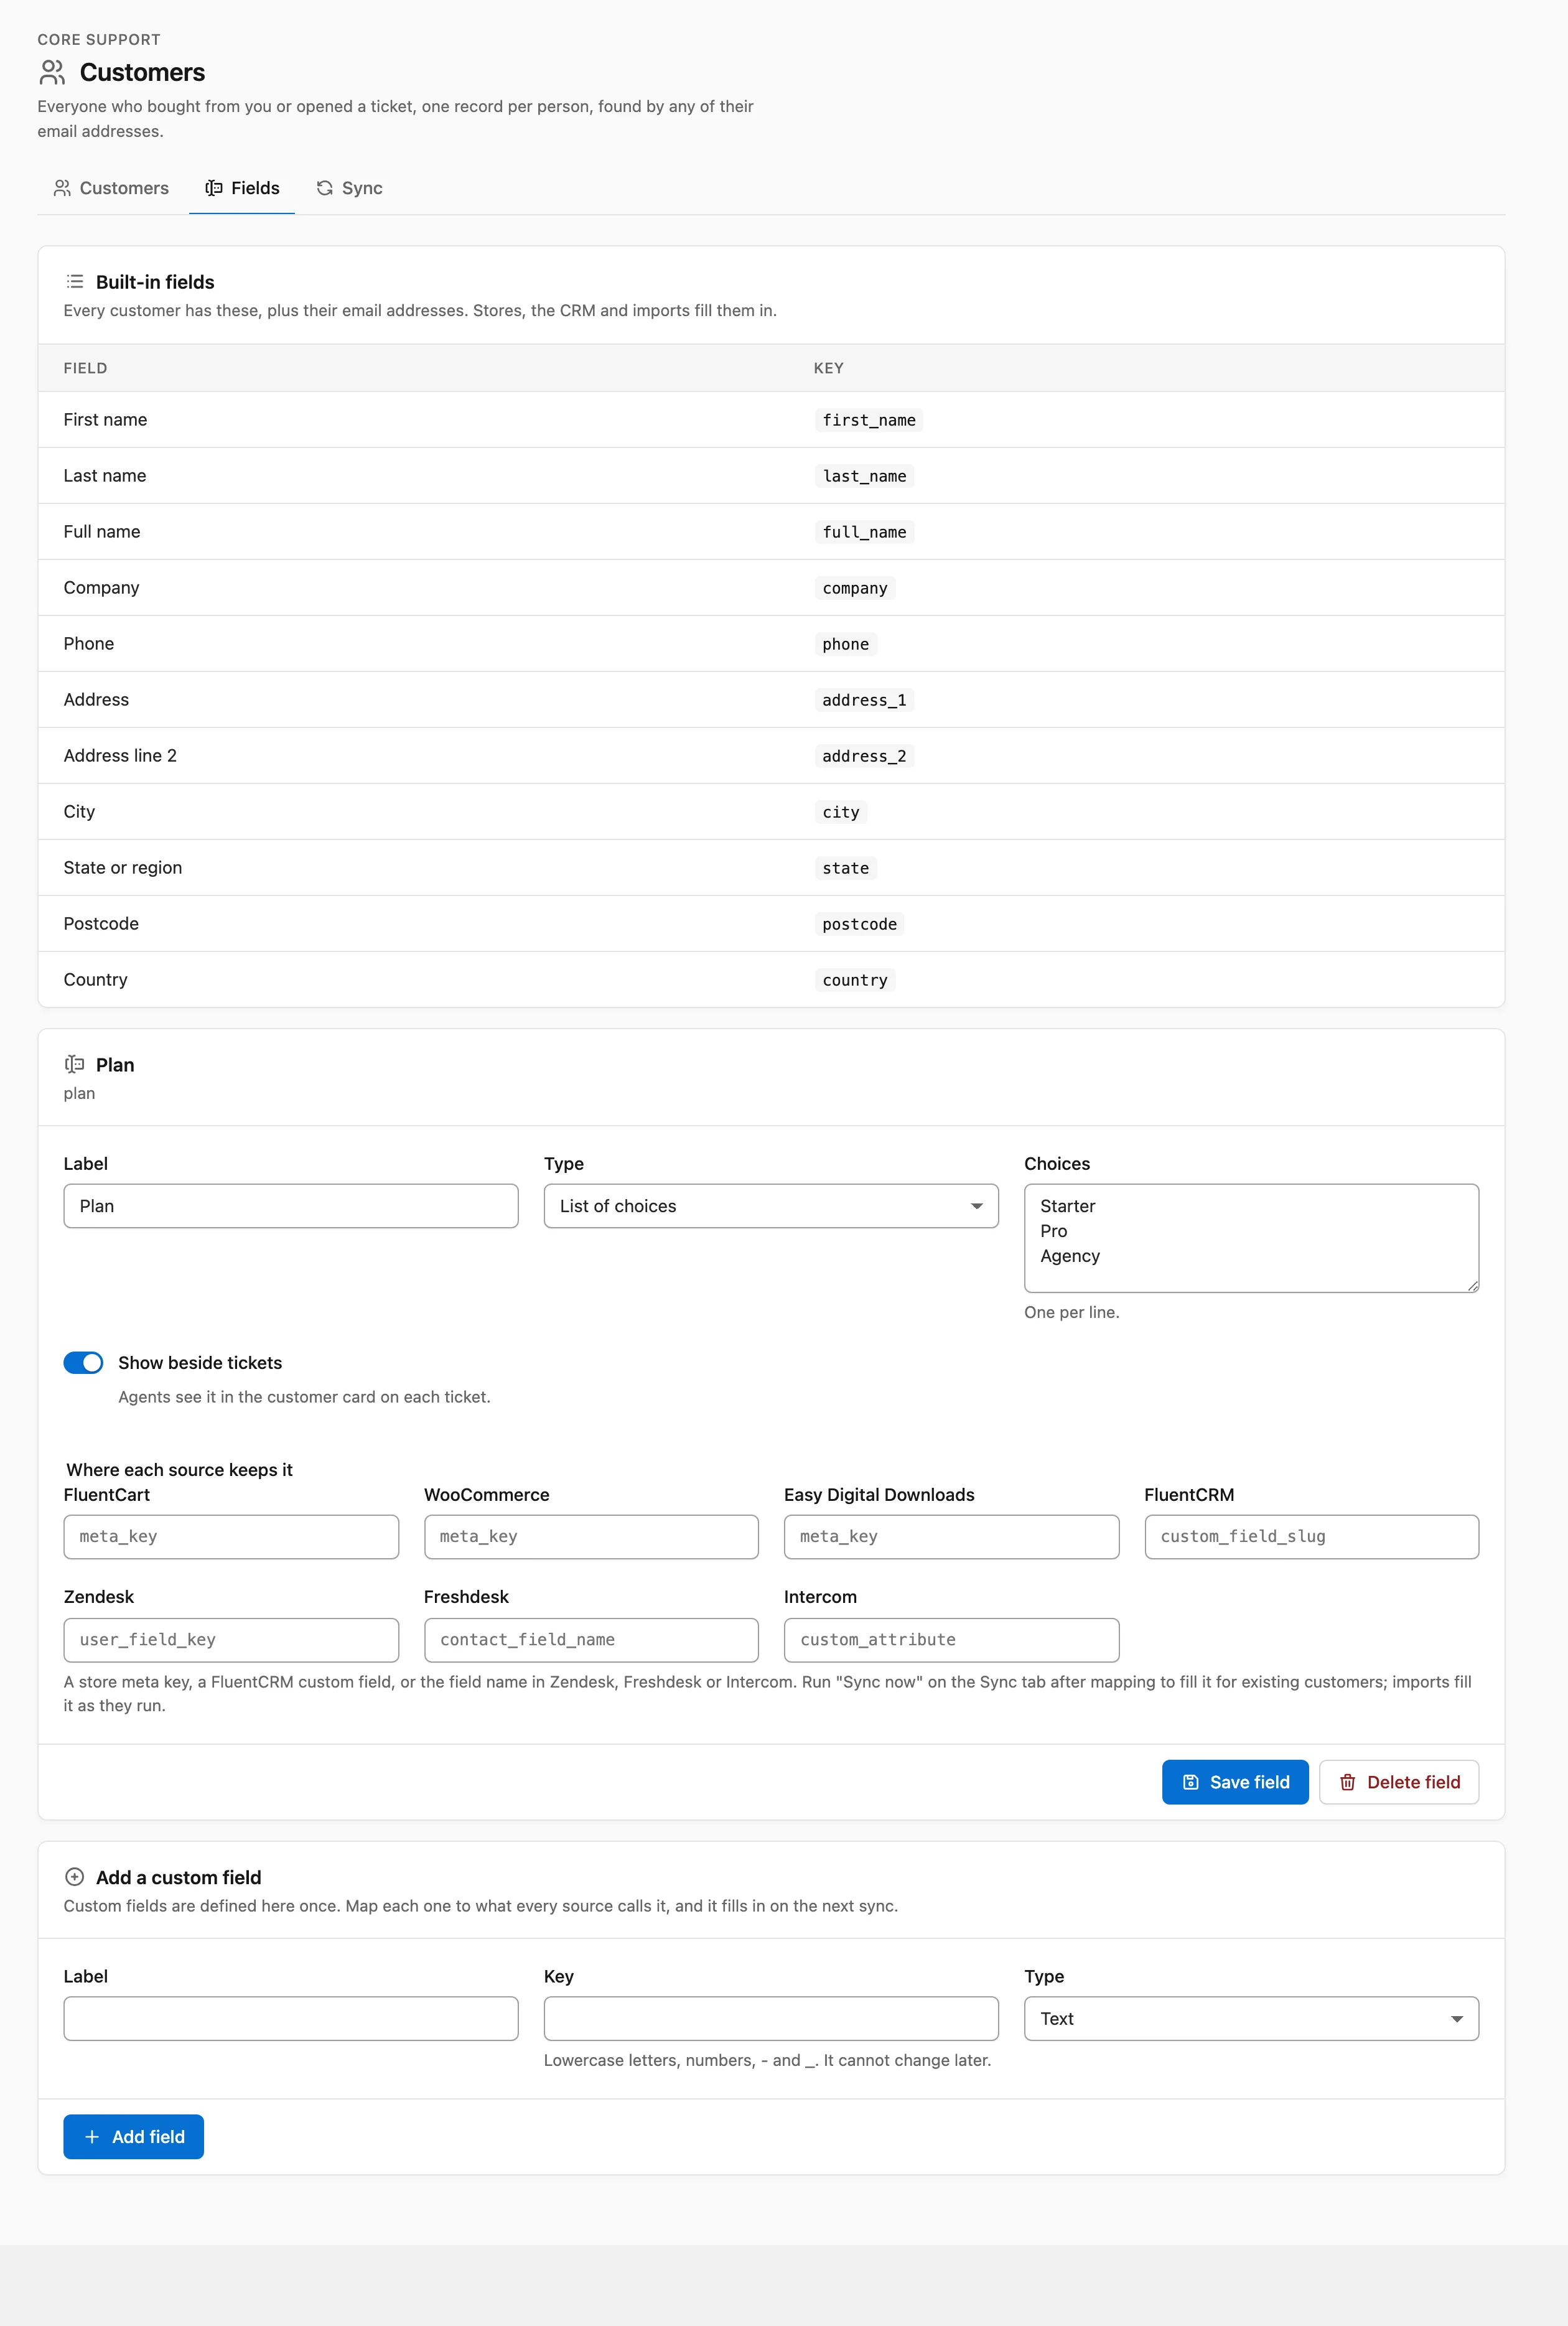
Core Support → Customers → Fields defines each customer field once. You map it to what every source calls it, and syncs and imports fill it in from there. Tick one switch and agents see the field beside every ticket.
Built-in Fields
Every customer has these fields, plus their email addresses. Stores, the CRM and imports fill them in:
- First name (
first_name), Last name (last_name) and Full name (full_name) - Company (
company) and Phone (phone) - Address (
address_1), Address line 2 (address_2), City (city), State or region (state), Postcode (postcode) and Country (country)
Country holds a 2-letter code such as US, and any other value is dropped. A value longer than its field is shortened rather than refused. The Built-in fields card on the Fields tab lists them with their keys.
Add a Custom Field
The Fields tab is for managers: Support Managers and administrators.
- Go to Core Support → Customers and choose the Fields tab.
- In Add a custom field, type a Label, up to 80 characters.
- Check the Key. It fills in from the label as you type, in lowercase letters, numbers,
-and_, up to 64 characters. It can’t change later. - Pick a Type.
- Choose Add field.
The field then gets its own card, with the settings below. A key that matches a built-in field, email or another custom field is refused with “A field with this key already exists. Choose another key.”
Field Types
Each type cleans what a source sends. A value that doesn’t fit its type is left empty:
- Text: one line, up to 1,000 characters.
- Paragraph: several lines, up to 5,000 characters.
- Number: a number, such as
42or3.5. - Date: a date written as
YYYY-MM-DD. Anything after it, such as a time, is dropped. - List of choices: one of the Choices you list, one per line. A value must match a choice exactly.
- Yes or no:
1,true,yesoronread as Yes, and anything else as No. - Email address: a valid address.
- Web address: an
httporhttpsaddress. - Phone number: any phone format.
The Choices box appears only when the type is List of choices.
Map the Field to Each Source
Under Where each source keeps it, each field has a box for every source. Leave a box empty, or on Not mapped, for a source that doesn’t hold this field:
- FluentCart: a FluentCart customer meta key.
- WooCommerce: an order meta key. When the order doesn’t have it, the account’s user meta with the same key is used.
- Easy Digital Downloads: an EDD customer meta key.
- FluentCRM: pick one of your FluentCRM custom fields from the list. Without FluentCRM active, it’s a box for the field’s slug.
- Zendesk: a user field key.
- Freshdesk: a contact field name.
- Intercom: a custom attribute name.
You don’t need to guess the help desk names. The check on Core Support → Import lists every customer field key it found. A CSV file needs no mapping, because a column named like the field’s key or its label fills it.
Choose Save field after mapping.
Fill the Field for Existing Customers
A new mapping fills in on the next read from that source:
- Stores and FluentCRM: run Sync now on the Sync tab once after mapping. New orders and CRM changes fill it from then on.
- Imports: they fill mapped fields as they run, so map before you start an import.
Saving a field also updates every customer in the background. When 2 sources hold a value, the order on the Sync tab decides which one wins, as Sync Customers from FluentCart, WooCommerce, EDD and FluentCRM explains.
Show a Field Beside Tickets
Turn on Show beside tickets on the field’s card, then choose Save field. Agents see the label and value in the customer card on each ticket, once the customer has a value. A Yes or no field shows as Yes or No.
Agents can also correct a custom value on the customer page, the same way as a built-in detail. Their value stays until someone hands it back to the sources.
Change, Reorder or Delete a Field
- Move up and Move down set the order fields appear in on the customer page and the ticket card.
- The label, type, choices and mappings can change at any time. The key can’t.
- Delete field removes the field and every customer’s value for it, after a confirmation.
I’d only mark a few fields Show beside tickets. The card is there to answer “who is this?” at a glance, and every extra line pushes the order list further down.
The fields come from your sources, so the next step is to check the customer records they fill and confirm each mapping picked up a value.