
Headless Forms
Headless mode lets a site that doesn’t run WordPress show a Core Forms form and send its submissions back to WordPress. Use it for a static HTML site, an Astro or Next.js build, or a React, Vue or Svelte app. You build the form in Core Forms as usual, and every submission runs through the same validation, spam checks, storage and actions as a form on a WordPress page.
Watch: headless forms on any website
There are two ways to connect:
- Drop-in embed: paste a
<div>and one<script>tag. The script loads the form’s HTML from WordPress, shows it, and posts submissions back. - Native fetch: request the form’s schema yourself, render your own markup, and post the answers as JSON.
Before you start
Headless access needs a site-wide API key and a per-form switch.
- Go to Core Forms > Settings and open the Headless / REST section.
- Click Generate next to API key to create a random key (it starts with
cf_), then save the settings. - In Allowed origins, enter each site that will embed your forms, one per line, as scheme, host and optional port. For example
https://example.comorhttp://localhost:4321. - Save the settings.
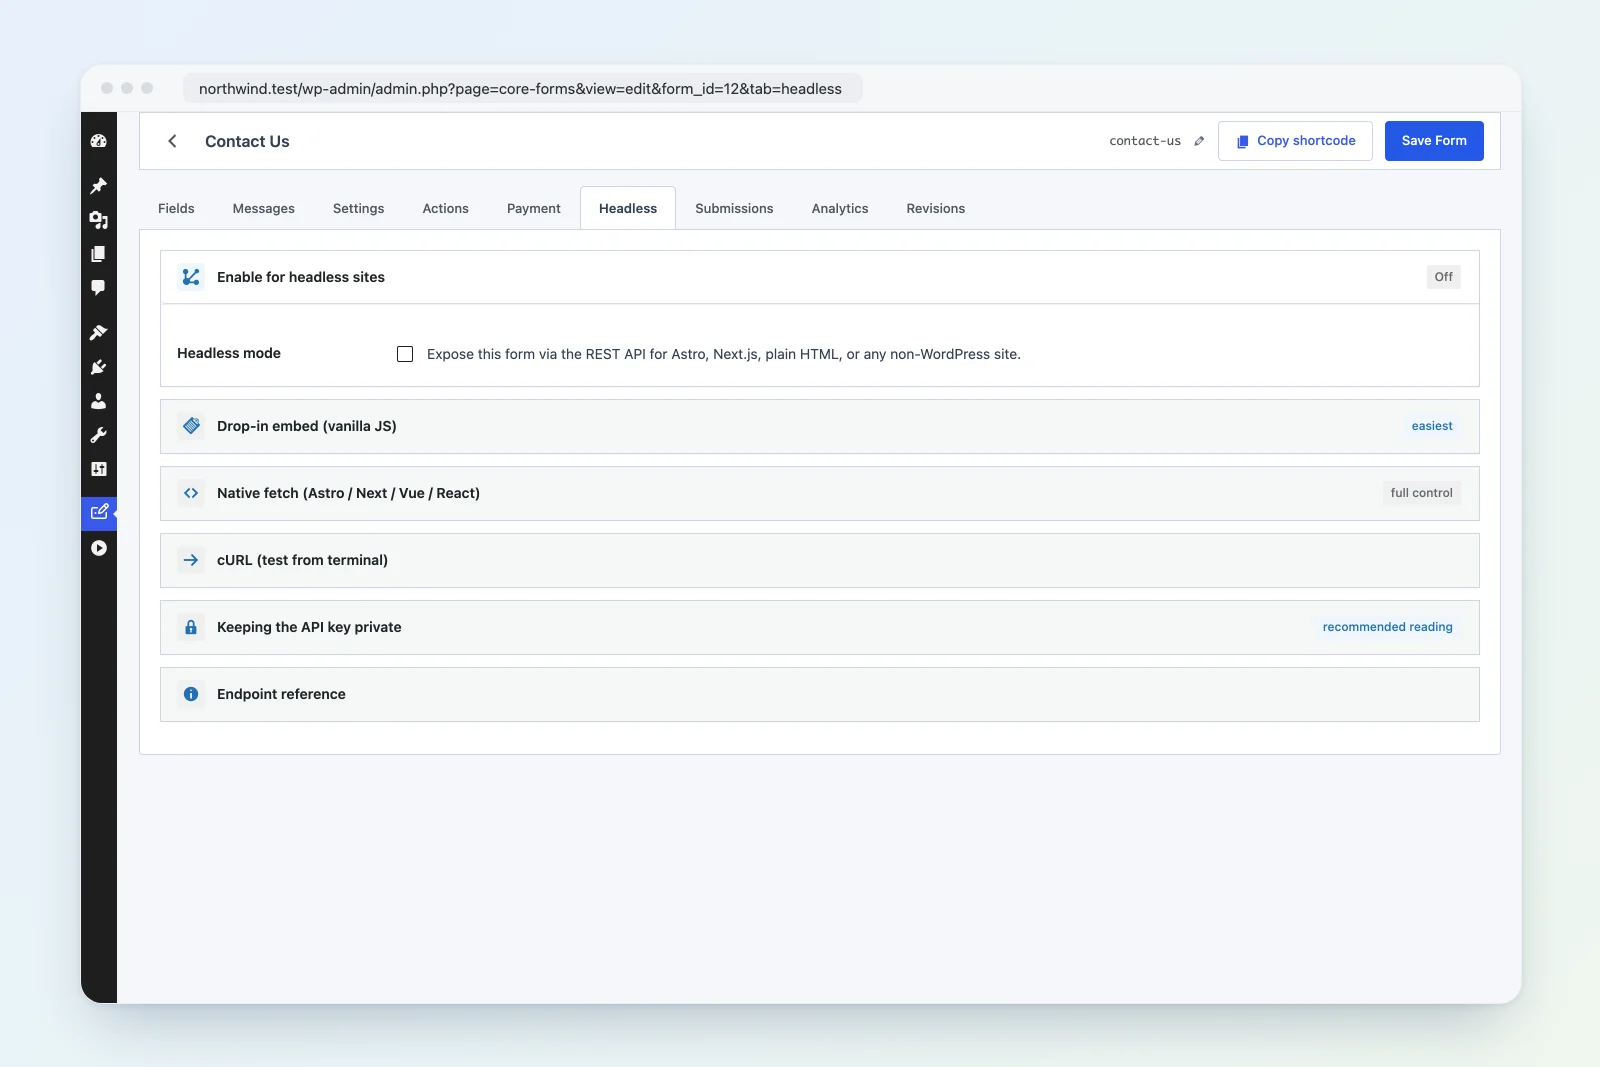
- Edit the form, open its Headless tab, turn on Headless mode, and click Save Form.
The Headless tab shows a status banner. It warns you when the API key isn’t set, or when the form is enabled but neither reCAPTCHA nor Turnstile is configured. Once both are in place it shows Ready to embed, and its snippets contain your real key and URLs.
Drop-in embed
Copy the snippet from the form’s Headless tab. It looks like this:
<div data-cf-form="contact" data-cf-key="YOUR_SITE_API_KEY"></div>
<script src="https://your-wordpress-site.com/wp-json/core-forms/v1/embed.js" defer></script>data-cf-formtakes the form’s slug or numeric ID.data-cf-keyis the site API key.embed.jsmounts every[data-cf-form]element on the page once the document is ready.
When a visitor submits the form, the script posts the answers as JSON with the API key in the X-Core-Forms-Key header. It also sends the page URL, so [CF_REFERRER_URL] and the other referrer variables point at the page the visitor was on, not at the WordPress REST endpoint.
After a successful submission the script replaces the form with the form’s success message, or follows the form’s redirect URL. If the submission fails, it shows the error message above the form.
Events
The script fires these events on the host <div>. They bubble, so you can listen on a parent element too.
| Event | When it fires | event.detail |
|---|---|---|
cf:mounted |
The form HTML is in place | The form schema |
cf:submit |
The visitor submits | { form }, the <form> element |
cf:success |
The submission was accepted | The response body |
cf:error |
Loading or submitting failed | The error or response body |
document.querySelector('[data-cf-form]').addEventListener('cf:success', (event) => {
  console.log('Submitted', event.detail);
});
Plain HTML
Paste the snippet where the form should appear. Nothing else is needed.
Astro
Paste the snippet into a component or page. Add is:inline so Astro leaves the external script alone:
<div data-cf-form="contact" data-cf-key={import.meta.env.PUBLIC_CF_KEY}></div>
<script is:inline src="https://your-wordpress-site.com/wp-json/core-forms/v1/embed.js" defer></script>
React, Vue and Svelte
In a single-page app the form’s element often appears after the page has loaded, so mount it yourself. Load embed.js once (for example in index.html), then call window.CoreFormsEmbed.mount() when the element is in the DOM. The script also exposes window.CoreFormsEmbed.init(), which mounts every element that hasn’t been mounted yet.
React:
import { useEffect, useRef } from 'react';

export function ContactForm() {
  const ref = useRef(null);
  useEffect(() => {
    window.CoreFormsEmbed?.mount(ref.current);
  }, []);
  return <div ref={ref} data-cf-form="contact" data-cf-key={import.meta.env.VITE_CF_KEY} />;
}
Vue:
<script setup>
import { onMounted, ref } from 'vue';
const host = ref(null);
onMounted(() => window.CoreFormsEmbed?.mount(host.value));
</script>

<template>
  <div ref="host" data-cf-form="contact" :data-cf-key="key"></div>
</template>
Svelte:
<script>
  import { onMount } from 'svelte';
  let host;
  onMount(() => window.CoreFormsEmbed?.mount(host));
</script>

<div bind:this={host} data-cf-form="contact" data-cf-key={key}></div>
Don’t render children inside the host element. The script replaces its contents.
Native fetch
Use this route when you want to render the form with your own components.
- Request the schema with
GET /wp-json/core-forms/v1/forms/{id-or-slug}. This endpoint is public. - Render your fields from the response.
- Post the answers as JSON to
POST /wp-json/core-forms/v1/forms/{id}/submitwith theX-Core-Forms-Keyheader.
The schema response contains:
id,slugandtitlehtml: the complete rendered formfields: each field’sname,type,required,labelandoptionsmessages: the form’s messagessubmit_url: the submit endpointrequires_captcha:truewhen a reCAPTCHA or Turnstile site key is saved
const res = await fetch('https://your-wordpress-site.com/wp-json/core-forms/v1/forms/42');
const form = await res.json();

await fetch(form.submit_url, {
  method: 'POST',
  headers: {
    'Content-Type': 'application/json',
    'X-Core-Forms-Key': 'YOUR_SITE_API_KEY',
  },
  body: JSON.stringify({
    name: 'Ada',
    email: 'ada@example.com',
    _cf_h42: '',                      // honeypot: optional, must be empty if sent
    _cf_page_url: window.location.href, // optional: fills [CF_REFERRER_URL]
  }),
});
The honeypot field
Every Core Forms form has a hidden honeypot field named _cf_h followed by the form ID, for example _cf_h42. The drop-in embed sends it for you because it’s part of the form HTML.
With your own markup you can leave it out: since 4.15.1 the endpoint adds an empty one for you, because the API key already identifies your app. If you do send it, keep it empty. A filled honeypot is treated as a bot, so the submission isn’t saved and runs no actions, while the endpoint still answers with a generic success message.
Before 4.15.1, a submission without the honeypot field was silently dropped in the same way. Update the plugin if your app sends only its own fields.
Array fields
For checkboxes and other multi-value fields, send an array. Keys ending in [], such as "topics[]", are accepted too and are treated the same as "topics".
Responses
| Status | Meaning |
|---|---|
200 |
The submission was accepted. The body carries the processor’s message object, and redirect_url when the form redirects. |
422 |
Validation or processing failed. The body carries the error message. |
401 |
The X-Core-Forms-Key header is missing or wrong. |
403 |
The form isn’t enabled for headless use. |
404 |
No form matches the ID or slug. |
503 |
No API key is set on the site. |
The message is an object such as { "type": "success", "text": "Thanks!" }, not a plain string.
How submissions land in WordPress
The submit endpoint feeds the request into the same processor as a form on a WordPress page. That means:
- Required fields, email fields, calculations, conditional logic and submission limits are checked as usual.
- The honeypot, the global blocklist, reCAPTCHA, Turnstile and Akismet all run.
- The entry is saved when the form saves submissions, and appears under the form’s Submissions tab and on All Submissions.
- Every enabled action runs: emails, webhooks, integrations and payments.
- With draft publishing on, headless requests use the published form, not the draft.
WordPress nonces don’t work across origins. The submit endpoint creates its own nonce on the server after checking the API key, so forms keep working when Enable Nonce is on.
Allowed origins and CORS
The REST routes send CORS headers so browsers on other sites can call them. No cookies are sent or accepted.
- With Allowed origins filled in, only requests from a listed origin get an
Access-Control-Allow-Originheader. The browser blocks every other origin. - With Allowed origins empty, Core Forms reflects whatever origin the browser sent. That’s handy while you set things up, but add your origins before you go live.
CORS is a browser rule. It doesn’t stop a server or script from calling the endpoint directly, so it doesn’t replace the API key or a captcha.
Keeping the API key private
The key only lets someone submit to forms you’ve marked as headless. A leaked key can bring spam to those forms, but it gives no account access and can’t read entries.
To keep it out of the browser, post to a route on your own server and add the header there. The Headless tab has ready-to-copy proxy examples for Cloudflare Workers or Pages Functions, Next.js (App Router) and Astro server endpoints. Keep the key in a server-only environment variable, never in a PUBLIC_ or NEXT_PUBLIC_ one.
Rotate the key any time from Settings > Headless / REST > Generate. Every existing client stops working as soon as you save the new key.
Spam protection
Configure reCAPTCHA or Turnstile under Core Forms > Settings before you publish a headless form. Once reCAPTCHA keys are saved, every submission must carry a valid token in g-recaptcha-response. Turnstile is checked on forms where it’s turned on, and expects its token in cf-turnstile-response. A missing or invalid token rejects the submission.
The schema’s requires_captcha flag is true whenever a reCAPTCHA or Turnstile site key is saved, even if Turnstile is off for this particular form.
The drop-in embed inserts the form HTML with innerHTML, which doesn’t run scripts inside that HTML. If you use a captcha with the drop-in embed or your own markup, load the provider’s script on your site and make sure the token is part of the submission. Test a real submission before going live.
Endpoint reference
| Method | Route | Auth |
|---|---|---|
GET |
/wp-json/core-forms/v1/forms/{id-or-slug} |
Public |
POST |
/wp-json/core-forms/v1/forms/{id-or-slug}/submit |
X-Core-Forms-Key header |
GET |
/wp-json/core-forms/v1/embed.js |
Public |
The key is accepted only in the header, never as a query parameter.