
 by
by
You ask an AI app for a few Halloween stickers and every one comes back in a different style. The ghost is a watercolor, the pumpkin is 3D, the “transparent” background turns out to be a gray checkerboard painted into the picture, and the sheet you print shrinks to fit the page.
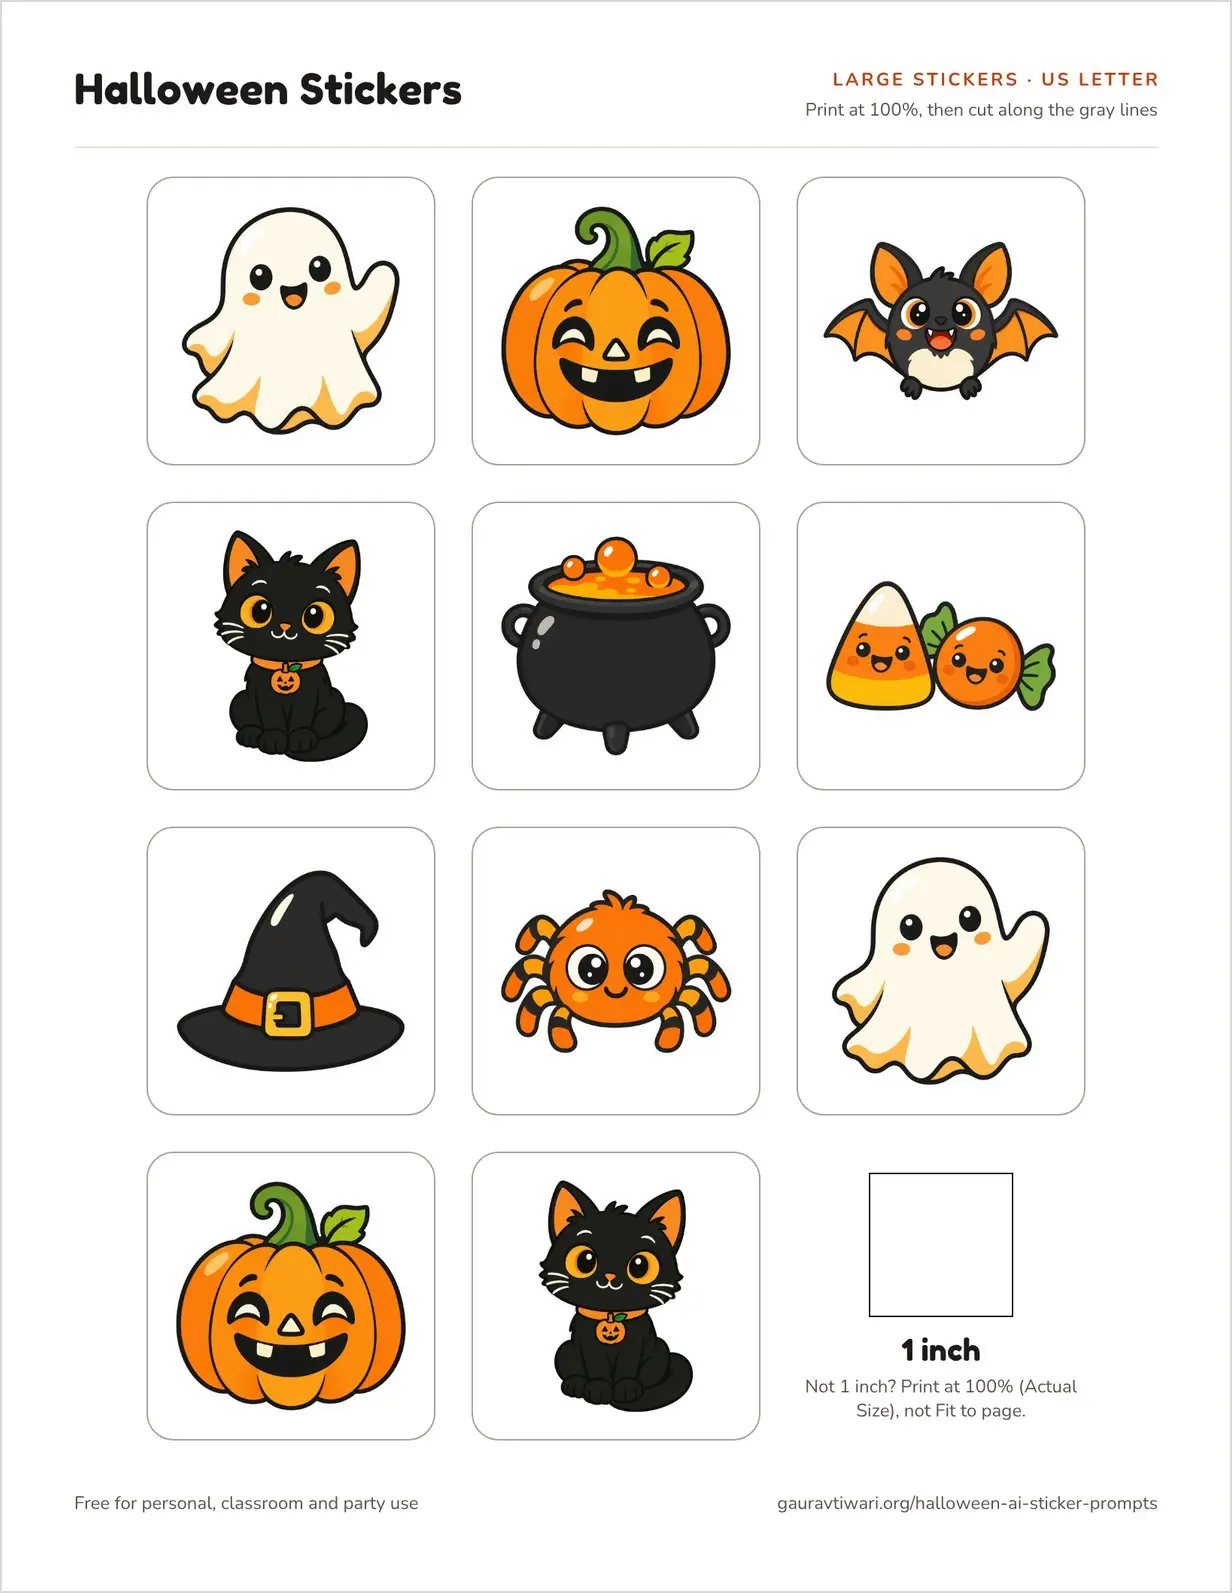
These Halloween AI sticker prompts fix the style problem with one shared style block, so 8 different motifs come out looking like one set. Each prompt below sits next to the exact sticker it made. If you only want stickers to print, the finished sheets come as Canva templates you can change and as print-ready PDFs for US Letter and A4, with a cut line around every sticker and a scale check square. The same 8 stickers come as transparent PNGs too.
Printing on A4? Download the A4 sticker sheets (PDF) instead. It has the same layout in millimeters, with 35 small stickers on page 2. Want to swap a sticker, change the title or drop in your own art first? Open your size as a Canva template. You need a free Canva account for that, while the PDFs need no account at all.
What’s in the Sticker Pack
The pack has 8 original Halloween motifs in one cartoon style: a ghost, a jack-o’-lantern, a bat, a black cat, a cauldron, candy, a witch hat and a spider. None of them copies a movie, game or brand character, so you can use them at a school party without wondering about it.
- Canva templates: one for US Letter and one for A4. Every sticker is a separate image and every label is live text, so your copy lets you move, resize, swap or delete anything on the sheet.
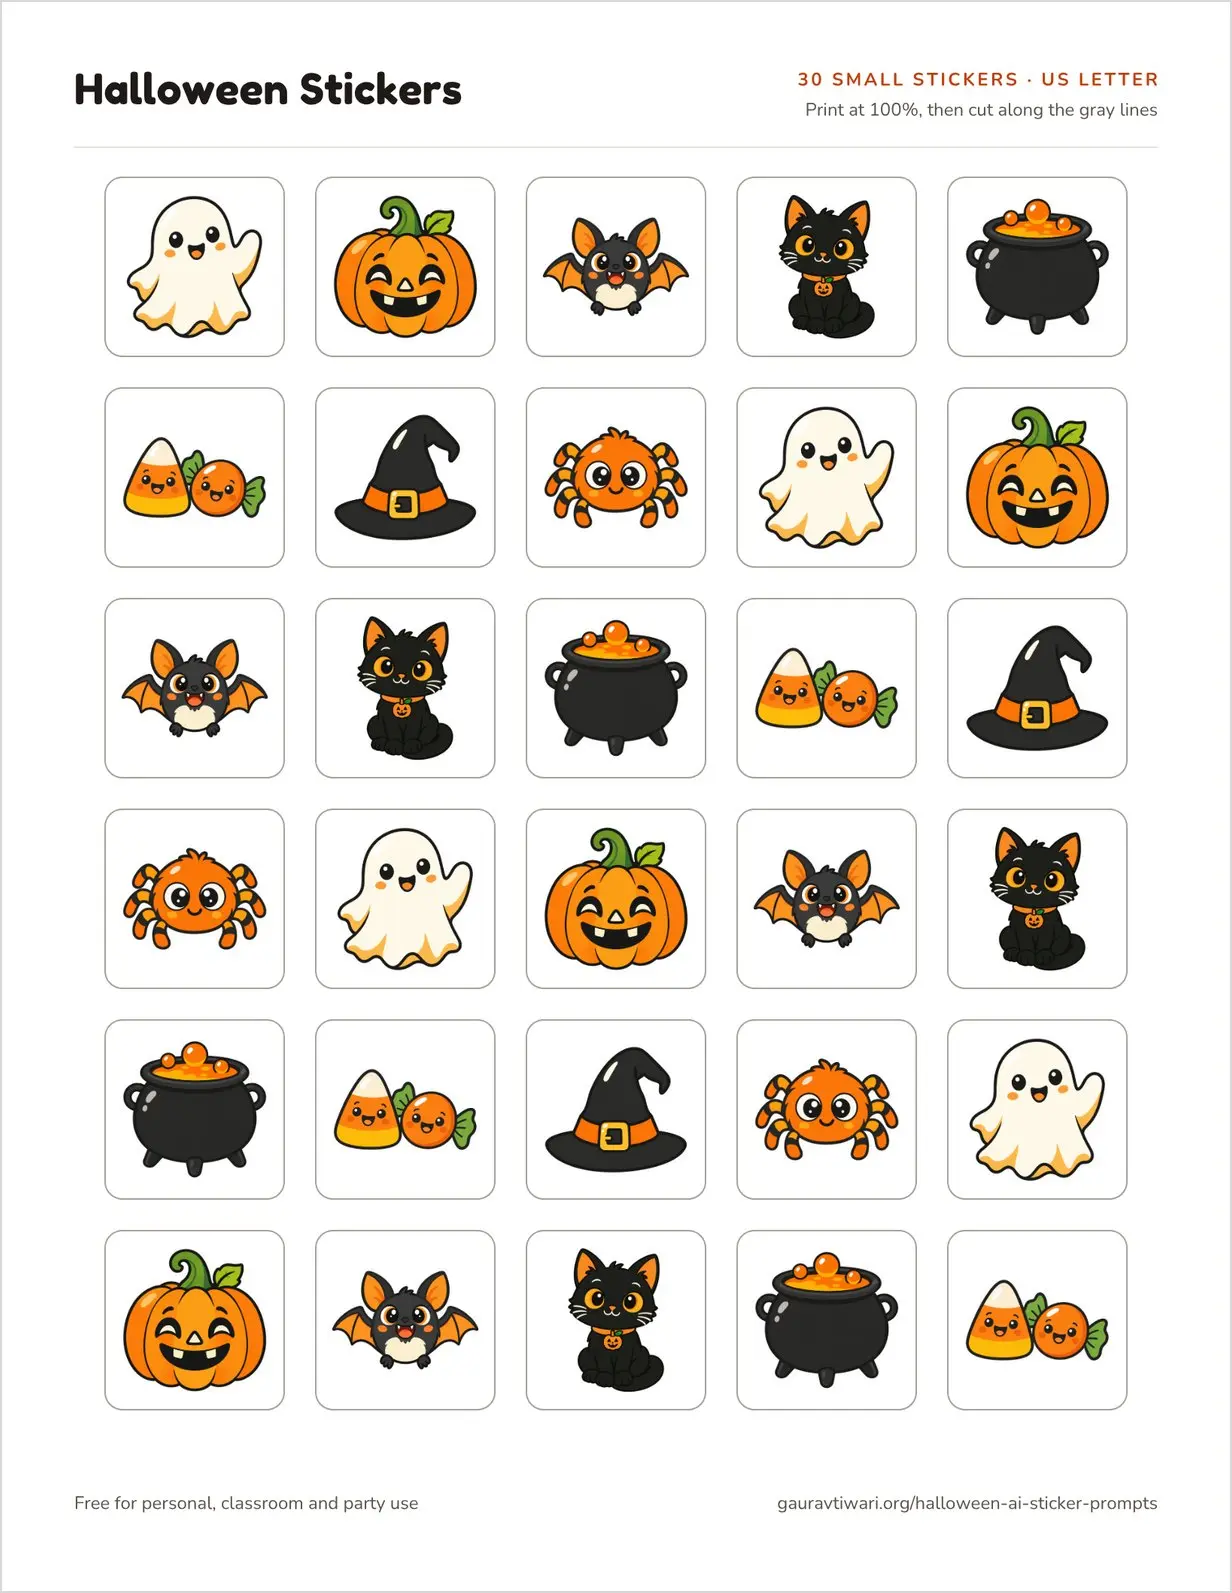
- Letter sheets (PDF): 8.5 x 11 inches, 11 large stickers inside 2 inch cut lines on page 1 and 30 small stickers inside 1.25 inch cut lines on page 2, plus a page of print and cut notes.
- A4 sheets (PDF): 210 x 297 mm, 11 large stickers inside 55 mm cut lines and 35 small stickers inside 30 mm cut lines.
- Transparent PNGs: the 8 stickers with no background, roughly 900 to 1,000 pixels on the longest side, in one ZIP file.
- Prompt file: all 8 prompts plus a blank template for your own motif, as a plain text file.
- Safe margin: every sticker and every line of text sits at least 0.5 inch (12.7 mm) inside the paper edge, which clears the unprintable border on common home inkjets.
The small-sticker page uses the same 8 motifs in rotation. Small stickers work well on a reward chart, a lunch note or a treat bag, where a 2 inch sticker covers too much.
Choose One Sticker Style First
A sticker set looks like a set only when every sticker shares the same outline, colors and finish. The easiest way to get that is to write the style once and change only the subject. Every one of these Halloween AI sticker prompts is the same block of text with a different first sentence.
This is the template. Replace the part in brackets and keep everything else exactly as it is:
Die-cut sticker illustration of [your subject, with one or two details]. Style: cute, friendly Halloween cartoon for kids, bold rounded charcoal outlines of even thickness, flat colors with one small soft highlight, no gradients and no texture. Colors: pumpkin orange, warm amber, cream white, charcoal black and a little leaf green only. Add a thick, even white border around the whole shape, like a vinyl sticker, with smooth rounded edges and no gaps. Show it front-on and centered, filling about 70% of a square frame. Background: solid flat magenta (#FF00FF) everywhere, with no shadow, no glow and no pattern. No text, no letters, no logos and no watermark.
Each line in the template has a job:
- “Die-cut sticker illustration”: tells the model you want one isolated object, not a scene with a floor and a sky.
- The outline line: bold, rounded charcoal outlines of even thickness keep the stickers readable at 1 inch and make them easy to cut around.
- “Flat colors with one small soft highlight”: flat fills keep every sticker in the same finish, and gradients are usually where one sticker starts to look different from the next.
- The color line: 5 named colors and the word “only” stop the model from inventing a new palette for each sticker. This line matters more than any other for consistency.
- The white border: the thick, even border becomes the edge of the sticker, so a slightly wobbly cut still looks neat.
- The framing line: “front-on and centered, filling about 70%” leaves room so the border doesn’t get cropped at the edge of the image.
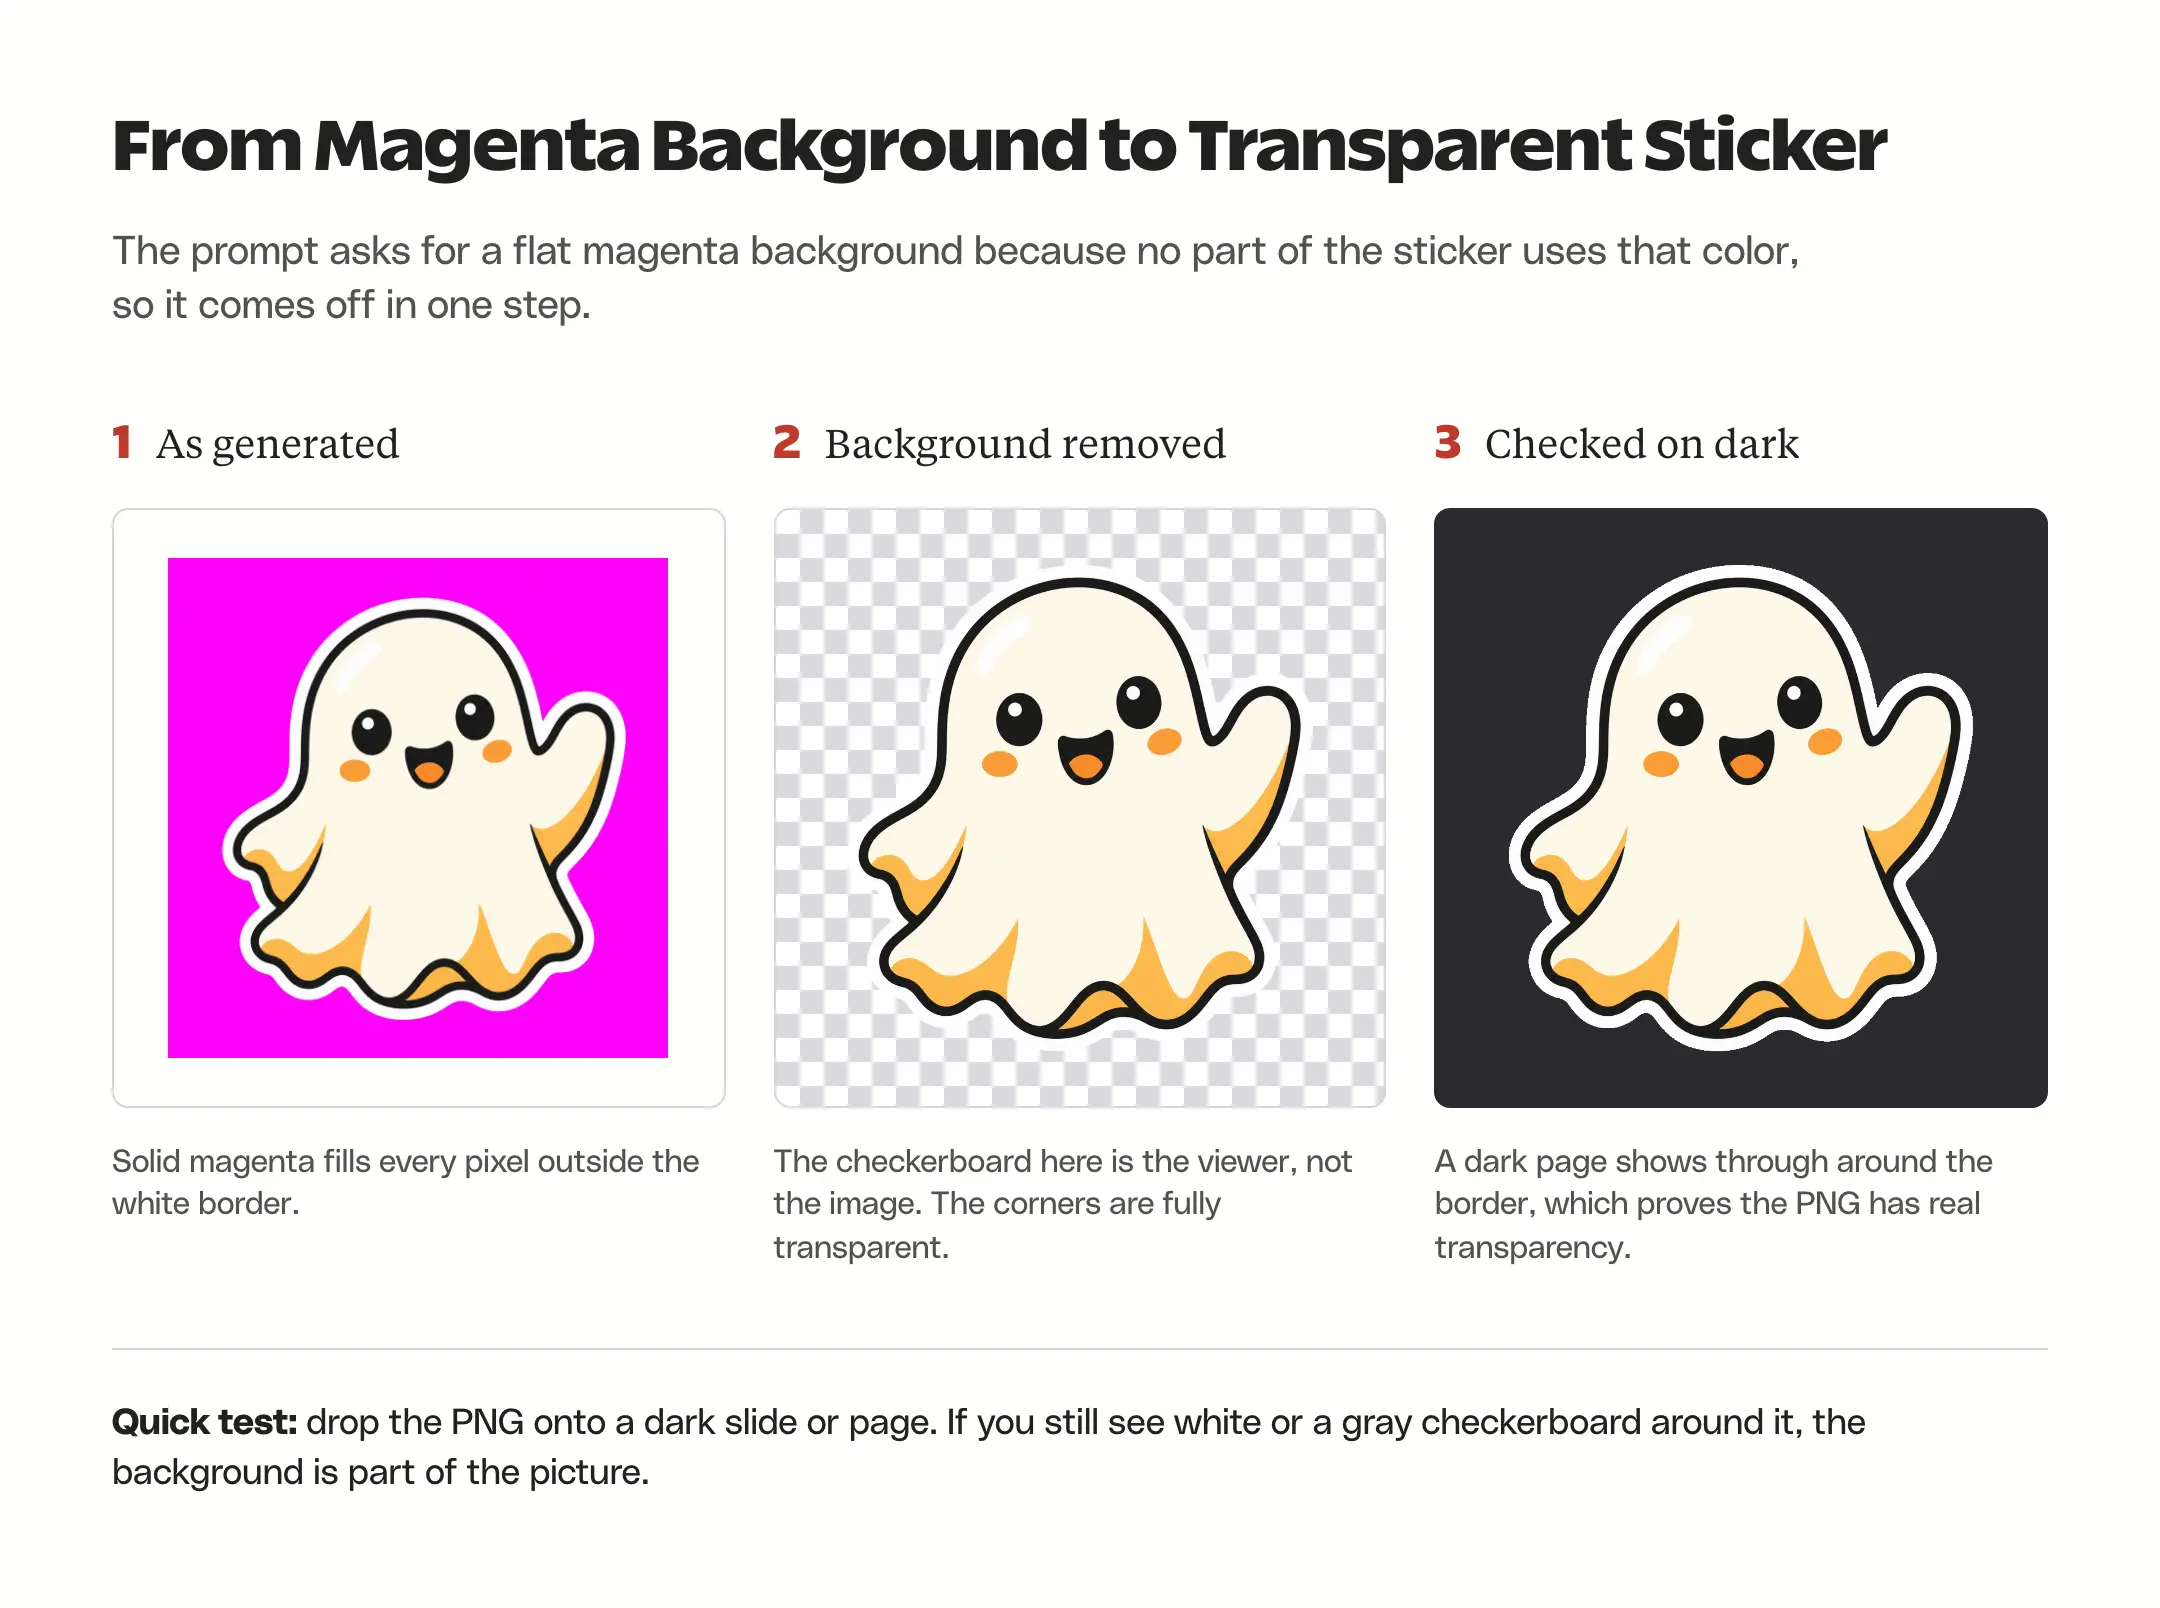
- The magenta background: no part of these stickers uses magenta, so the background comes off cleanly later. The section on transparency explains why this beats asking for “transparent”.
- “No text, no letters”: image models can add stray letters or fake words to things like wrappers and labels unless you rule it out.
Keep the subject short, with one or two details at most. “A smiling jack-o’-lantern pumpkin with a curly green stem” works. A long subject competes with the style block, and the sticker is more likely to drift away from the set.
Halloween AI Sticker Prompts
Every sticker below came from the exact prompt printed under it, run with OpenAI’s image model. The ghost needed a second run, explained in its note. The other 7 are first results. You can paste these prompts into ChatGPT, which uses ChatGPT Images 2.5, or into Gemini, which uses Nano Banana 2. Both make images on their free plans with a daily limit.
Your results will vary a little from these, because the same prompt never gives the same picture twice. If you want Halloween versions of your own photos instead of stickers, my Halloween AI prompts for selfies, couples and pets cover that.
Ghost

This is the second version of the ghost. The first one came back wearing an orange witch hat that the prompt never asked for, so this prompt adds “with no hat and no other accessories”. The orange cheeks were the model’s own idea, and they stayed because they match the rest of the set.
Die-cut sticker illustration of a small friendly ghost with round black eyes and a small open smile, waving one hand, with no hat and no other accessories. Style: cute, friendly Halloween cartoon for kids, bold rounded charcoal outlines of even thickness, flat colors with one small soft highlight, no gradients and no texture. Colors: pumpkin orange, warm amber, cream white, charcoal black and a little leaf green only. Add a thick, even white border around the whole shape, like a vinyl sticker, with smooth rounded edges and no gaps. Show it front-on and centered, filling about 70% of a square frame. Background: solid flat magenta (#FF00FF) everywhere, with no shadow, no glow and no pattern. No text, no letters, no logos and no watermark.
Jack-o’-Lantern
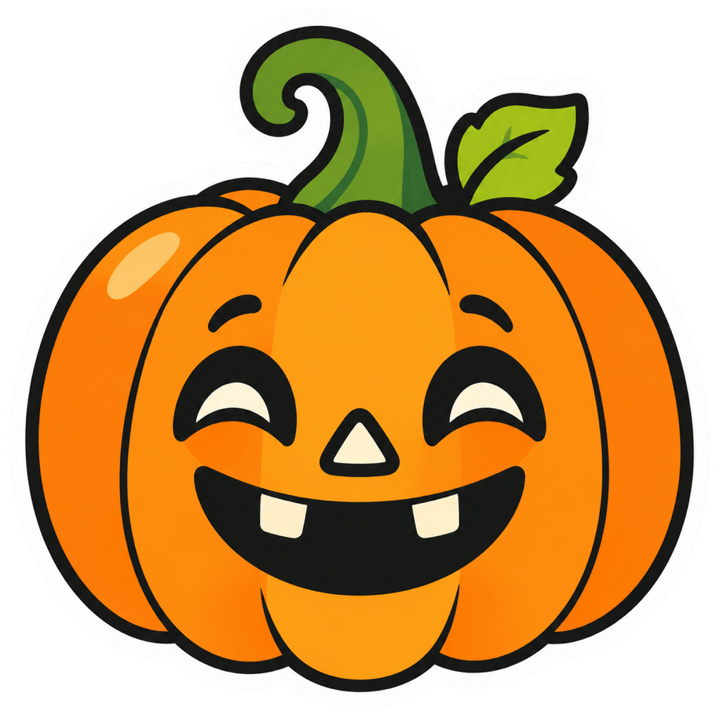
The pumpkin came out closest to the brief. The stem and the leaf are the only green on the sticker, which is why the color line allows “a little leaf green” and nothing more.
Die-cut sticker illustration of a smiling jack-o'-lantern pumpkin with a curly green stem and one small leaf. Style: cute, friendly Halloween cartoon for kids, bold rounded charcoal outlines of even thickness, flat colors with one small soft highlight, no gradients and no texture. Colors: pumpkin orange, warm amber, cream white, charcoal black and a little leaf green only. Add a thick, even white border around the whole shape, like a vinyl sticker, with smooth rounded edges and no gaps. Show it front-on and centered, filling about 70% of a square frame. Background: solid flat magenta (#FF00FF) everywhere, with no shadow, no glow and no pattern. No text, no letters, no logos and no watermark.
Bat
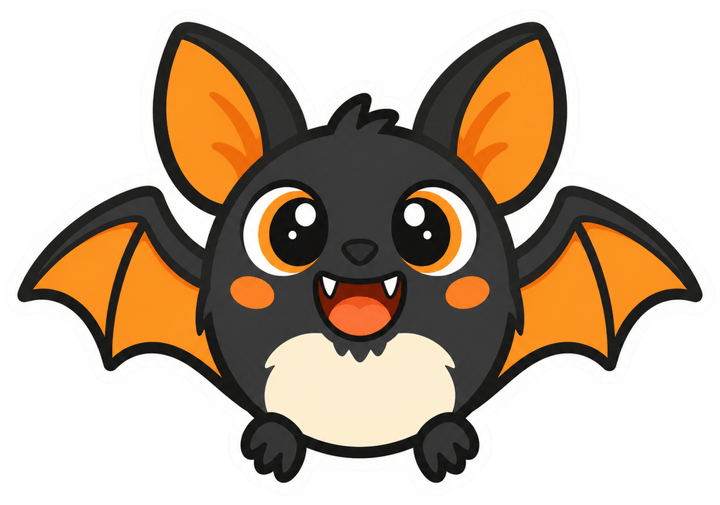
Spread wings make the bat the widest sticker in the pack, and the wing tips landed only a few pixels from the edge of the frame even with the “about 70%” line. For any wide subject, change it to “about 60%” so the white border never gets cut off.
Die-cut sticker illustration of a round little bat with spread wings, big eyes and two tiny fangs, smiling. Style: cute, friendly Halloween cartoon for kids, bold rounded charcoal outlines of even thickness, flat colors with one small soft highlight, no gradients and no texture. Colors: pumpkin orange, warm amber, cream white, charcoal black and a little leaf green only. Add a thick, even white border around the whole shape, like a vinyl sticker, with smooth rounded edges and no gaps. Show it front-on and centered, filling about 70% of a square frame. Background: solid flat magenta (#FF00FF) everywhere, with no shadow, no glow and no pattern. No text, no letters, no logos and no watermark.
Black Cat
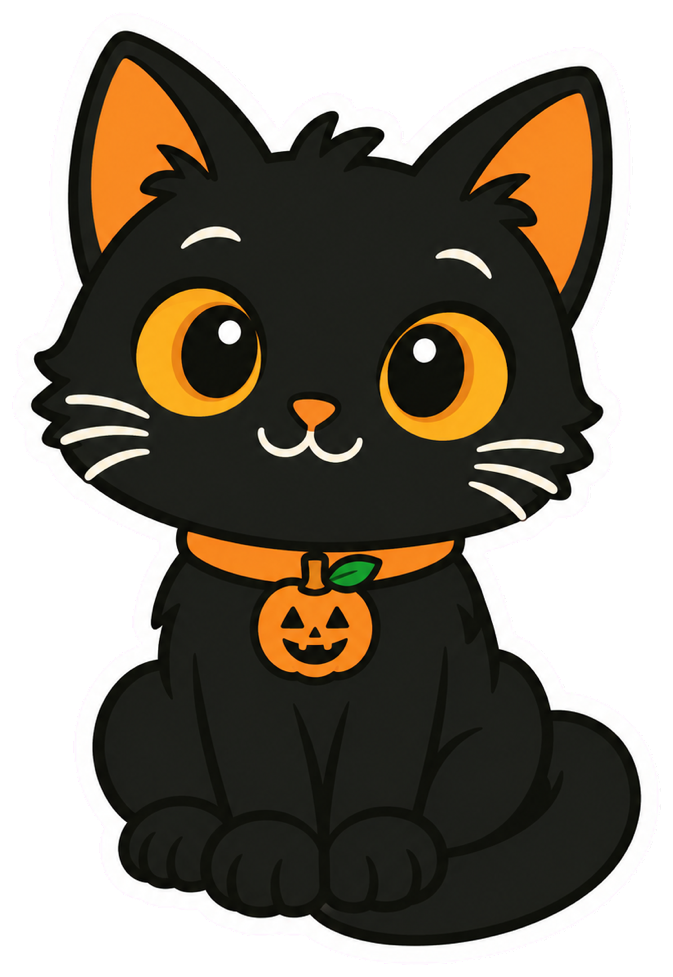
The model added an orange collar with a tiny pumpkin tag. The collar stayed, because it ties the cat to the pumpkin sticker. Add “no collar” to the subject if you want a plain black cat.
Die-cut sticker illustration of a sitting black cat with big amber eyes and a tail curled around its paws. Style: cute, friendly Halloween cartoon for kids, bold rounded charcoal outlines of even thickness, flat colors with one small soft highlight, no gradients and no texture. Colors: pumpkin orange, warm amber, cream white, charcoal black and a little leaf green only. Add a thick, even white border around the whole shape, like a vinyl sticker, with smooth rounded edges and no gaps. Show it front-on and centered, filling about 70% of a square frame. Background: solid flat magenta (#FF00FF) everywhere, with no shadow, no glow and no pattern. No text, no letters, no logos and no watermark.
Cauldron

Most cauldron art uses green potion. Asking for orange keeps the sticker inside the palette, and the model drew the 3 bubbles the prompt asked for.
Die-cut sticker illustration of a round black cauldron on three short legs, bubbling with bright orange potion and three round bubbles. Style: cute, friendly Halloween cartoon for kids, bold rounded charcoal outlines of even thickness, flat colors with one small soft highlight, no gradients and no texture. Colors: pumpkin orange, warm amber, cream white, charcoal black and a little leaf green only. Add a thick, even white border around the whole shape, like a vinyl sticker, with smooth rounded edges and no gaps. Show it front-on and centered, filling about 70% of a square frame. Background: solid flat magenta (#FF00FF) everywhere, with no shadow, no glow and no pattern. No text, no letters, no logos and no watermark.
Candy
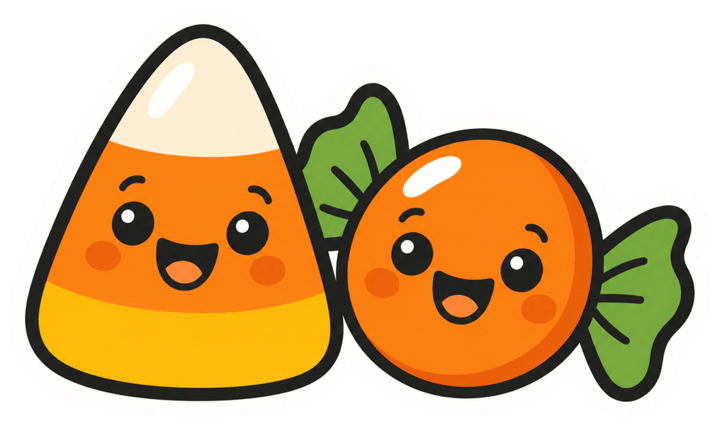
Two objects make two stickers unless the prompt joins them. “Touching side by side so they form one sticker shape” gives you a single outline to cut. The faces were the model’s addition, and they suit the set.
Die-cut sticker illustration of a piece of candy corn and a wrapped round candy with twisted ends, touching side by side so they form one sticker shape. Style: cute, friendly Halloween cartoon for kids, bold rounded charcoal outlines of even thickness, flat colors with one small soft highlight, no gradients and no texture. Colors: pumpkin orange, warm amber, cream white, charcoal black and a little leaf green only. Add a thick, even white border around the whole shape, like a vinyl sticker, with smooth rounded edges and no gaps. Show it front-on and centered, filling about 70% of a square frame. Background: solid flat magenta (#FF00FF) everywhere, with no shadow, no glow and no pattern. No text, no letters, no logos and no watermark.
Witch Hat
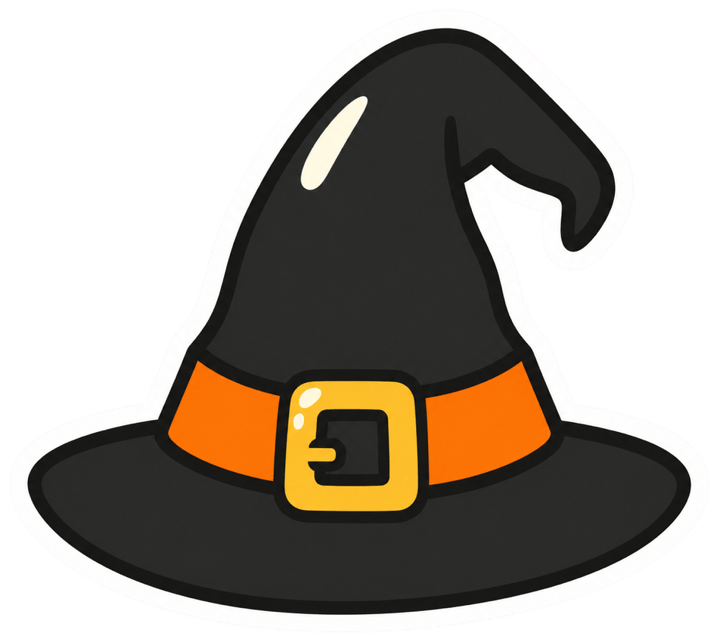
A hat on its own works well as a label sticker for a treat bag or a costume box. The gold buckle is the only yellow in the pack, so it gets noticed.
Die-cut sticker illustration of a pointed witch hat with a bent tip, an orange band and a small gold buckle. Style: cute, friendly Halloween cartoon for kids, bold rounded charcoal outlines of even thickness, flat colors with one small soft highlight, no gradients and no texture. Colors: pumpkin orange, warm amber, cream white, charcoal black and a little leaf green only. Add a thick, even white border around the whole shape, like a vinyl sticker, with smooth rounded edges and no gaps. Show it front-on and centered, filling about 70% of a square frame. Background: solid flat magenta (#FF00FF) everywhere, with no shadow, no glow and no pattern. No text, no letters, no logos and no watermark.
Spider
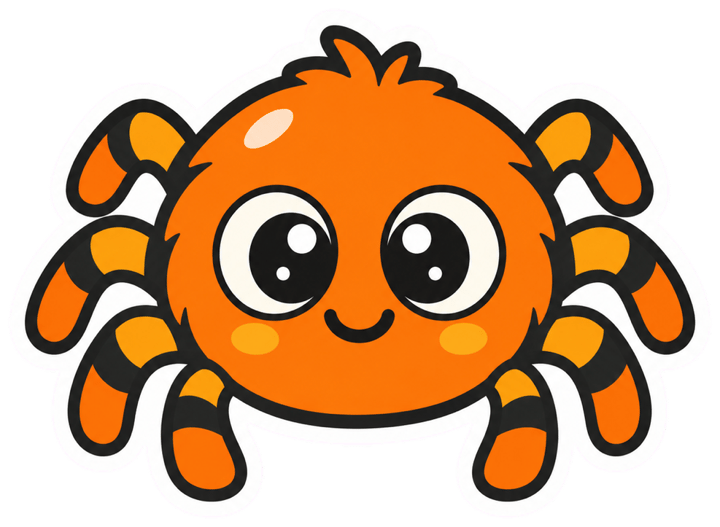
The spider came out orange because the color line has no room for a dark purple or gray body. Change the subject to “a round little black spider” if you want the classic look. Count the legs before you print, because extra or missing limbs are a common image-model mistake.
Die-cut sticker illustration of a round little spider with eight short bent legs, big friendly eyes and a small smile. Style: cute, friendly Halloween cartoon for kids, bold rounded charcoal outlines of even thickness, flat colors with one small soft highlight, no gradients and no texture. Colors: pumpkin orange, warm amber, cream white, charcoal black and a little leaf green only. Add a thick, even white border around the whole shape, like a vinyl sticker, with smooth rounded edges and no gaps. Show it front-on and centered, filling about 70% of a square frame. Background: solid flat magenta (#FF00FF) everywhere, with no shadow, no glow and no pattern. No text, no letters, no logos and no watermark.
Make the Background Transparent
A sticker PNG needs real transparency: an alpha channel that tells every app “nothing here”. Many AI images only look transparent. The gray and white checkerboard you see is painted into the pixels, and it prints as a gray checkerboard.
There are broadly two ways to get a real transparent sticker. You can ask the model for a transparent background directly, or you can generate the sticker on a flat color and remove that color afterward.
Asking directly can work. With the magenta line swapped for “Background: transparent, so it can be saved as a PNG sticker”, the same ghost prompt came back from OpenAI’s model as a PNG with a real alpha channel: the corners were fully transparent and the ghost was solid. OpenAI’s developer documentation lists transparent backgrounds as a supported option for its current image models. Gemini is a different story. Google doesn’t document transparent output for Gemini’s image model, and Google’s own sticker example prompt asks for a white background instead. People on Google’s developer forum have reported Gemini drawing a fake checkerboard when asked for transparency.
That is why every prompt here uses magenta. It works the same in ChatGPT, Gemini or any other image app, and it gives you a background that comes off in one click because nothing in the sticker shares its color.
These free tools remove a flat background and save a PNG:
- Mac: open the image in Preview and use Remove Background in the toolbar. Preview may ask to convert the file to PNG, which you want.
- iPhone and iPad: touch and hold the sticker in Photos, then copy it or share it as a cutout. Apple’s photo cutouts need iOS 16 or later.
- Any computer: Adobe’s free background remover downloads a transparent PNG. It needs a free Adobe account and has a daily limit.
- Canva: Canva’s Background Remover is part of its paid plans, so it suits you only if you already pay for Canva.
- remove.bg: the free download is a preview of up to 0.25 megapixels, about 625 x 400 pixels. That is too small to print a sticker larger than about 2 inches sharply.
Check the file before you print it. Drop the PNG onto a dark slide, a dark document or a dark desktop. If the dark color shows around the white border, the transparency is real. If you still see white or a checkerboard around it, the background is part of the picture, and you need to remove it again.
One small detail from this pack: the prompt asked for #FF00FF, and the backgrounds came back a slightly different magenta, close to #FC02FC. That is normal. You should use a remover that picks the color from the image itself rather than one that needs the exact hex code.
Build a Printable Sticker Sheet
A sticker sheet is a page of transparent PNGs placed at a fixed physical size, with enough space between them to cut. Three numbers decide whether it works on paper: the sticker size, the resolution and the margins.
- Size: 1.25 to 2.25 inches (32 to 57 mm) is a practical range for most uses. The large stickers in this pack sit inside 2 inch cut lines (55 mm on A4) and the small ones inside 1.25 inch lines (30 mm on A4).
- Resolution: a print looks sharp at about 300 pixels per inch. A 1,024 pixel image prints sharp up to about 3.4 inches, and Gemini’s free plan downloads at 1K, so don’t stretch a free Gemini sticker much beyond that.
- Margins: home printers can’t print to the paper edge. Epson and HP printer specs list about 3 mm at the sides and up to 12.7 mm at the bottom, so a 0.5 inch (12.7 mm) safe margin clears most of them.
- Gaps: leave at least 0.2 inch (5 mm) between stickers so one cut never runs into the next sticker. This pack uses 0.25 inch on the large page.
- Cut line: a white border on white paper is invisible, so you can’t see where to cut. Each sticker in this pack sits inside a thin gray line with rounded corners, which leaves a margin of white paper and is much easier to follow with scissors than the sticker’s own outline.
- Scale check: a square of known size (1 inch on Letter, 25 mm on A4) tells you whether the printer shrank the page.
If you build your own sheet in Canva, Google Docs or Word, set the page to Letter or A4 first, then place each PNG and set its width in inches or millimeters rather than dragging it by eye. A sheet built at the wrong page size gets scaled when it prints, and every sticker comes out smaller than you planned.
Edit the Canva Sticker Sheets
The quicker route is to start from the finished sheet. The Letter template and the A4 template have every sticker as its own image, every cut line as its own shape and every word as live text, so nothing is flattened into one picture. Here is how to make it yours:
- Open the template for your paper size, sign in or create a free Canva account, then click “Use template”. Canva makes your own copy, and the original stays the same for the next person.
- To move or resize a sticker, select the sticker and the gray line around it together and group them with Ctrl+G or Cmd+G, so the cut line travels with the art.
- To use your own art, upload a transparent PNG, delete a sticker and drag yours into the empty gray line. Keep it a little inside the line so the scissors never touch the art.
- Delete the stickers you don’t need, duplicate the ones you want more of and change the “Halloween Stickers” title to a class or party name if you like.
- Click Share, then Download, choose PDF Print and print it at 100%.
Leave the 1 inch (or 25 mm) square where it is. It is the only way to tell from a test print whether your printer shrank the page.
Print and Cut
The settings are the same for the sheets in this pack and for any sheet you build yourself:
- Choose Letter or A4 to match the sheet, and set the scale to 100% or “Actual Size”. “Fit to page” shrinks every sticker.
- Set the paper type to the closest match for your sticker paper, such as Label, Photo or Heavyweight, and the quality to Best or High.
- Print page 1 on plain paper first and measure the scale square. It should be exactly 1 inch on Letter or 25 mm on A4.
- Load one sheet of sticker paper the way your printer’s manual shows, so you print on the paper side and not the backing.
- Let inkjet prints dry for a few minutes, then rough-cut each sticker out of the sheet before you trim along its gray line. For a shaped sticker instead of a rounded square, cut loosely around the dark outline and leave a thin white edge.
The paper decides more than the printer does. Sticker paper is made for either inkjet or laser printers, and the wrong one smudges or, in a laser printer, can melt. These are the usual choices:
- Matte white sticker paper: the easiest to print on and to write on afterward. Avery’s matte white sticker paper is listed for both inkjet and laser printers. Good for reward charts and labels.
- Glossy or clear sticker paper: brighter colors, and clear paper lets a surface show through around the border. Check the pack says it suits your printer type.
- Full-sheet labels: cheap and sold in big packs, but many, such as Avery 5165, are laser-only.
- Printable vinyl: tougher and more water resistant, for water bottles and laptops. Many waterproof materials only work in laser printers, while inkjet vinyl such as Koala’s printable vinyl sticker paper asks for dye ink, so check the pack against your printer.
- Ordinary paper: fine for a test print or for stickers you glue down with a glue stick, which is how a lot of classroom crafts use them anyway.
These sheets are made for scissors. They don’t carry the registration marks that cutting machines read, and I haven’t run them through a Cricut or a Silhouette. Cricut’s Print Then Cut adds its own sensor marks when you print from Design Space, and Cricut says that printing a saved PDF outside Design Space gives wrongly sized marks. If you use a cutting machine, upload the transparent PNGs from the ZIP file into its software and let it build the sheet and the marks itself.
Fix Inconsistent or Blurry Stickers
The first three problems below happened while making this pack, and the fix next to each is the one that worked. The rest are the usual ways a sticker set goes wrong.
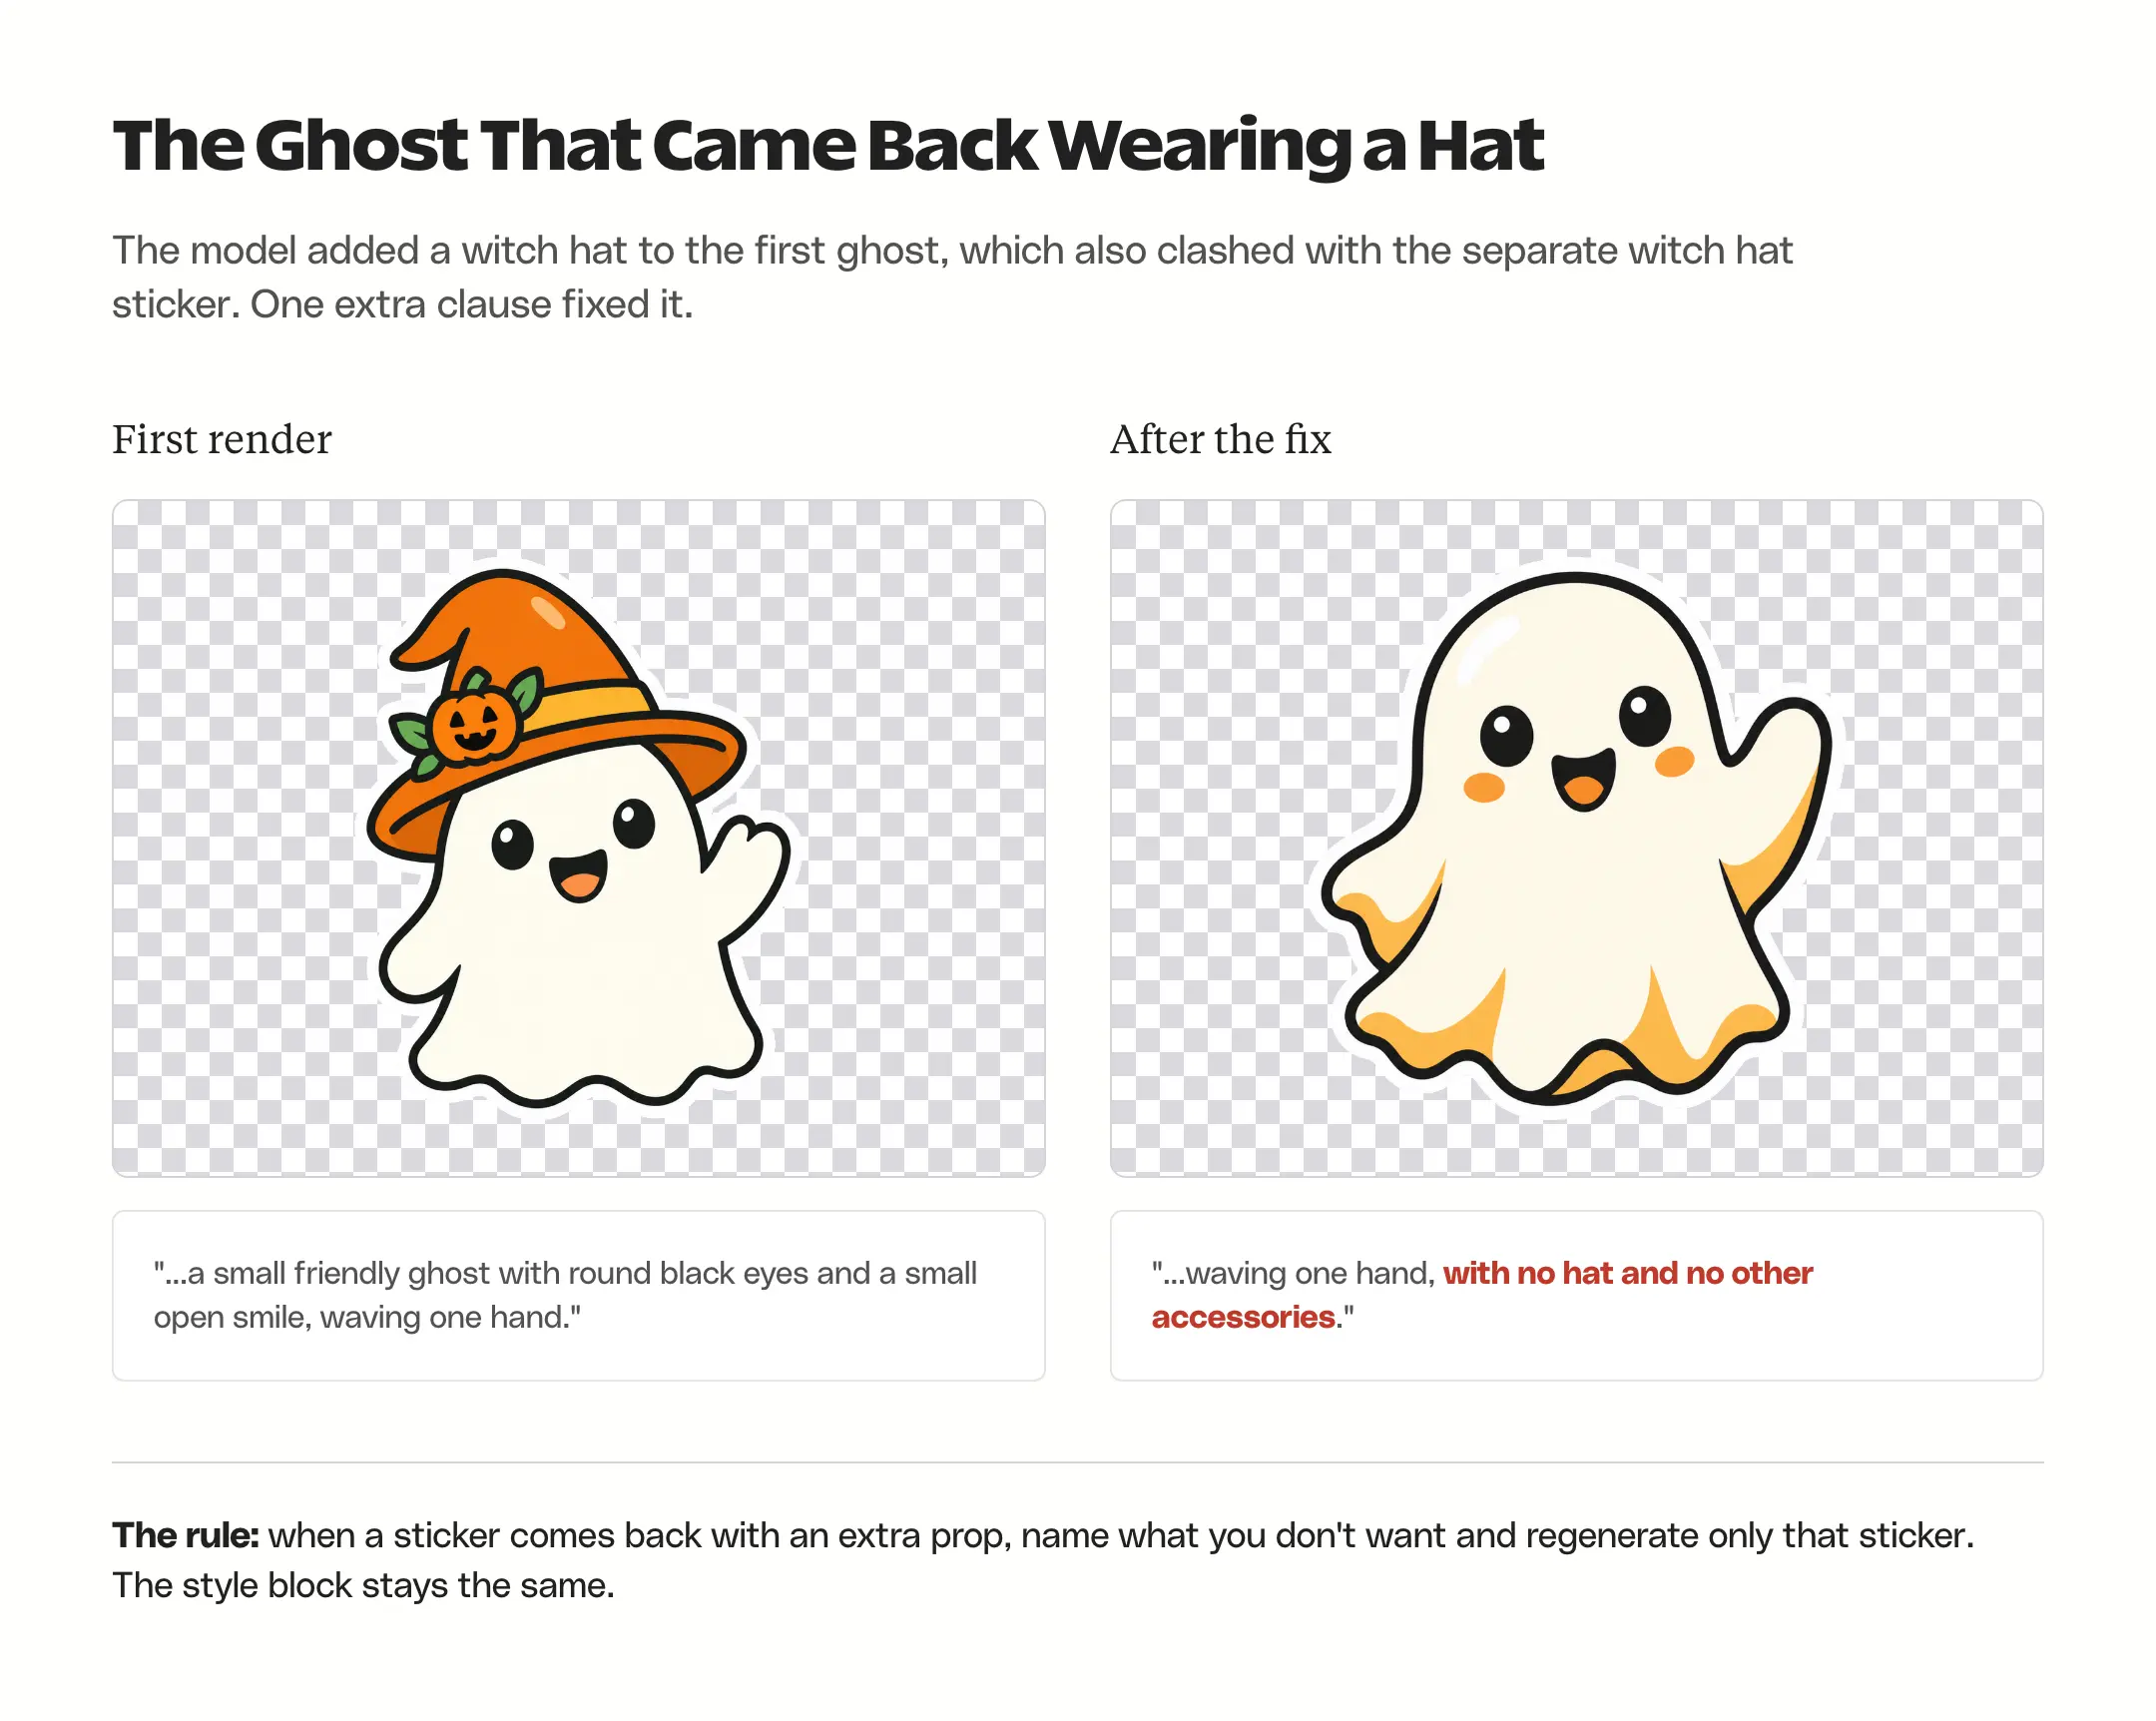
- An extra prop appears: the first ghost came back wearing a witch hat. Naming what you don’t want (“with no hat and no other accessories”) removed it on the next run. Fix the subject line only and leave the style block alone.
- Little extras you didn’t ask for: the cat got a collar and the candy got faces. These aren’t errors. Keep them if they suit the set, or add “no collar” or “no face” to the subject.
- The border touches the edge: wide subjects such as the bat fill more of the frame than the prompt asks for. Lower “about 70%” to “about 60%” for that sticker.
- One sticker looks different from the rest: check that you pasted the full style block. A missing color line is the usual cause, because the model then picks its own palette.
- The sticker prints blurry: the file is too small for the print size. Print it smaller, or upscale the original before removing the background. My list of AI image enhancers has free options.
- Text appears on the sticker: keep “No text, no letters” in the prompt, especially for subjects with labels, wrappers or bands.
- A magenta fringe after removal: remove the background again with a tool that has an edge cleanup or despill option, or erase the fringe by hand. A soft pink edge shows on white paper.
Keep the original file next to every edited version. If a background removal goes wrong, you can go back to the magenta original instead of generating the sticker again and losing the match with the rest of the set.
Recommended Tools for Each Job
Apart from paper, ink and the printer itself, every job in this guide can be done with free tools. These are the defaults I’d start with, plus the alternatives worth knowing and the reason each one fits what the steps above need.
Sticker Art
Default: ChatGPT. Every sticker in this guide came from OpenAI’s image model, so ChatGPT gives you the closest match to the results shown above. OpenAI’s documentation lists transparent backgrounds for its current image models, so the “Background: transparent” swap from the transparency section is worth trying there first. The free plan makes images with a limit that resets over time.
- Gemini: free, and the prompts work as written, but plan to remove the magenta background yourself. The free 1K download also caps a sharp print at about 3.4 inches.
- Microsoft Copilot: Copilot also makes images on its free plan, with a daily allowance. Paste the same prompt and treat the background the same way as Gemini’s.
- Canva’s AI image generator: the free plan includes a small monthly allowance, and it saves a step if you edit the Canva sticker sheets anyway.
Background Removal
Default: Adobe’s free background remover. It runs in any browser, takes PNG files up to 50 MB and downloads a transparent PNG, which is all a sticker needs. It asks for a free Adobe account and has a daily limit.
- Preview on a Mac or Photos on an iPhone: built in and free, with no upload and no account, which suits a handful of stickers.
- Canva’s Background Remover: worth using only if you already pay for Canva, because it’s part of the paid plans.
- remove.bg: fine for a quick check, but the free download is a 0.25 megapixel preview, so a printable file costs credits.
Sheet Layout
Default: the ready-made Canva sheets in this pack. They already handle the safe margin, the gaps, the cut lines and the scale square, and every sticker is a separate image you can swap. Open the Letter sheet in Canva or the A4 sheet, upload your own PNGs and drop them into the gray lines. To start from a blank page instead, Canva works on the free plan: create a design at 8.5 x 11 inches or 210 x 297 mm, upload the PNGs and type each sticker’s width instead of dragging it.
- Avery Design & Print: Avery Design & Print Online is free and has templates matched to Avery sticker paper and labels, so the page size and margins are already set.
- Google Docs: free and familiar. Set the paper size in Page setup and each sticker’s width in Image options.
- Cricut Design Space: the free app you need if you cut with a Cricut, because Print Then Cut adds its own sensor marks from there.
Printing
Default: matte sticker paper in the printer you already have. Matte is the easiest finish to print on and you can write on it afterward. Match the paper to your printer type before you buy anything else.

Avery Printable Sticker Paper, Matte White: Letter-size sheets with a repositionable adhesive, listed for both laser and inkjet printers, so it works in most home printers.

Avery Glossy White Full-Sheet Labels: the glossy option. Each sheet is one 8.5 x 11 inch label, listed for laser and inkjet, with a permanent adhesive for stickers that should stay put.
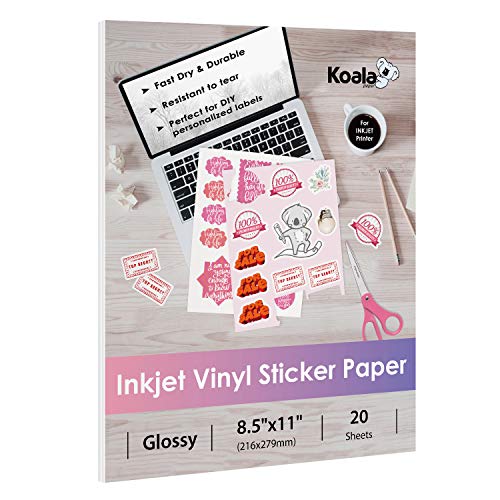
Koala Printable Vinyl Sticker Paper: glossy, water-resistant vinyl for water bottles and laptops. It’s inkjet-only, Koala says to use dye ink, and the listing names printers it doesn’t work with, so check yours first.

Canon PIXMA TS9521Ca: if you need a printer, this inkjet has a rear tray as well as the main cassette, and Canon lists paper sizes from 12 x 12 inch scrapbook pages up to 11 x 17 inches. Check the vinyl’s printer list before you pair the two.

Avery Clear Laminating Sheets: optional. One 9 x 12 inch self-adhesive sheet covers a whole Letter page before you cut, adds a glossy layer over the ink and needs no machine.
Cutting
Default: small, sharp scissors. The sheets are made for hand cutting, and a short blade follows the curves around each sticker more easily than a long one.

Fiskars 5″ Non-Stick Micro-Tip Scissors: micro-tip blades for tight curves, and a non-stick coating that Fiskars makes for sticky materials such as stickers and vinyl, so adhesive doesn’t gum up the blades.
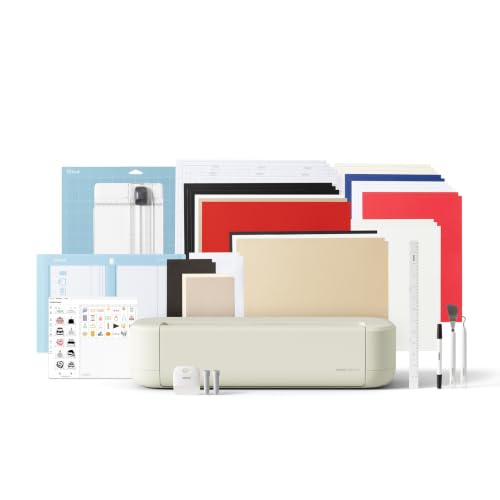
Cricut Explore 5: for cutting by machine. Cricut says it recognizes and cuts around images printed on a home inkjet printer. Import the transparent PNGs from the ZIP into Design Space and let it add its own marks, rather than printing the PDF sheets from this pack.
FAQs on Halloween AI Stickers
Yes. Ordinary paper works for a test print, for crafts where you glue the stickers down and for decorations you tape up. For stickers that peel and stick, use sticker paper or full-sheet labels made for your printer type.
The image probably has the checkerboard painted into it, or it was saved as a JPG, which can’t store transparency. Remove the background with a free remover, save the result as a PNG and check it on a dark background.
Yes. The prompts are plain descriptions, so Gemini, ChatGPT and other image apps can all use them. The examples here came from OpenAI’s model, so expect Gemini’s versions to look a little different, and plan to remove the magenta background yourself.
Yes. Open the Letter or A4 Canva template from this page and click Use template to get your own copy. Every sticker is a separate image and every label is live text, so you can move, resize, swap or delete them. A free Canva account is enough, and the PDFs work without any account.
The PDF is made for cutting by hand and has no registration marks. For a cutting machine, import the transparent PNGs into its own software and let it add the marks it needs.
OpenAI’s terms give you ownership of what you generate, and Google says it won’t claim ownership. Ownership under a tool’s terms isn’t the same as copyright, though, and the US Copyright Office says purely AI-generated images aren’t protected by copyright, so anyone could copy them. Avoid trademarked characters completely if you plan to sell. The sheets and PNGs in this pack are for personal, classroom and party use.
Copy the template, change only the subject in brackets and keep every other line the same. A subject with one or two details stays closest to the set.
Final Remarks
Start with the Letter sheets or the A4 version, or open the Canva template first if you want to swap stickers. Print one page on plain paper and measure the square before you load sticker paper. When you want a ninth sticker, paste the template, change the subject and keep everything else exactly the same.
If the stickers are for a classroom, they pair well with my free Halloween math worksheets as a reward for a finished sheet.
Tell Google you want more of this.
Add Gaurav Tiwari as a preferred sourceOne tap, and this site shows up more often in your own Top Stories, AI Overviews and AI Mode. Remove it any time.
Disclaimer: This site is reader-supported. If you buy through some links, I may earn a small commission at no extra cost to you. I only recommend tools I trust and would use myself. Your support helps keep gauravtiwari.org free and focused on real-world advice. Thanks. - Gaurav Tiwari