How to Easily Disable Laptop Keyboards on Windows 11, 10, 8, 7?
At times, you may need to connect an external keyboard to your laptop. It could be because your built-in keyboard is damaged in some way, or you need to use certain extra features that it does not possess. It could even be because you are simply used to working with an external keyboard, and want to keep it that way. However, using your external keyboard while your inbuilt one is enabled can be a rather jarring experience.
As a result, many users prefer to disable their laptop keyboard when connecting an external one to their device. This, however, is not as easy as you might have thought it to be. And quite understandably so, because turning off your laptop keyboard by accident can be another difficult situation you will not like to be stuck in. There are different ways to disable laptop keyboards, both temporarily and permanently. I will be covering both of them in this article. You can then choose the one which is in accordance to your needs.
Table of Contents
How to temporarily disable laptop keyboard
It is easy enough to disable your laptop’s keyboard until you restart the device. Basically, you need to uninstall keyboard drivers which will result in the keyboard getting disabled until you restart the laptop. Windows operating systems generally possess a feature to install drivers automatically. Thus, after you restart the laptop, Windows will automatically install default drivers.
It will take a maximum of 2 minutes to complete this process. To proceed with this, you need to follow the steps given below:

Open up the device manager by right-clicking the start button and choosing “Device Manager”. Alternatively, you can open up the Run Dialog Box by pressing the Windows key + R and typing in devmgmt.msc.

In the Device Manager, bring up the dropdown menu under the “keyboard” label and locate the keyboard that you wish to disable.

Right-click on the keyboard (name), and click on “Disable”. If there is no "Disable" option there, you can also choose "Uninstall" to disable your laptop keyboard.

That is more or less all you need to do. When prompted to confirm whether you wish to uninstall the driver or not, accept it. However, make sure that you do not restart your laptop. If you do so, you will reset the laptop keyboard back to its original condition once again.
How to permanently disable your laptop keyboard using Group Policy Editor
In order to disable your laptop keyboard permanently, you need to add a few more steps to the procedure given above. You can use the Group Policy Editor for this purpose; it will prevent your inbuilt keyboard from getting automatically enabled whenever you restart the laptop. Simply follow the procedure given below to carry out this method:
- Press the Windows key + R to open up the Run Dialog Box, and type in “gpedit.msc” in there to open up a local group policy editor.
- On the left side of the screen, navigate to Computer Configuration > Administrative Templates > System > Device Installation. Over there, you should find an option labelled “Device Installation Restriction”.
- In the right hand side of the screen, you will notice a number of policies which are essential for Windows to function properly. Open up the policy titled “Prevent Installation of Devices not described by other policy settings”.
- You can now modify the policy by clicking on policy setting or simply right-clicking and choosing “Edit”. Proceed to enable the policy to disable your laptop keyboard permanently.
- From this point onwards, you can repeat the previously discussed procedure to temporarily disable the keyboard. By virtue of this policy editor, the driver will not get reinstalled every time you restart the laptop.
How to disable your laptop keyboard using third-party applications
Apart from the methods discussed above, there are a number of third party applications available online to help you disable your laptop’s keyboard on Windows. In fact, they can help you do it in a surprisingly short span of time. I have included a list of such applications below, including some which will allow you to disable particular keys along with the trackpad.
1. Key Freeze
Key Freeze is a pretty popular application for disabling laptop keyboards. It is easy to install, and can disable both your keyboard and trackpad within minutes. However, you cannot use Key Freeze to disable only one of them at a time. You can, however, activate both of them again by pressing Ctrl + Alt + Del while both of them have been disabled.
2. Device Manager
You will find a number of device manager software on sites like CNET, DownloadCrew etc. These resemble the inbuilt Windows Device Manager, but are comparatively more accessible. They can help you disable your laptop keyboard even faster, using only some of the steps listed above.
How to permanently disable your laptop keyboard using the Device Manager
This method is a relatively riskier one, because it can possibly disable your trackpad as well. Therefore, you should connect an external mouse to your laptop as a precaution. Basically, it involves you updating your keyboard driver with an incompatible one. The steps for this method have been listed below:
Visit your Windows’ Device Manager, as told earlier, open up the keyboard section and choose the keyboard you wish to update. Right-click it and select “Update”.
You can also navigate to Properties → Driver and do updates/rollbacks from there.

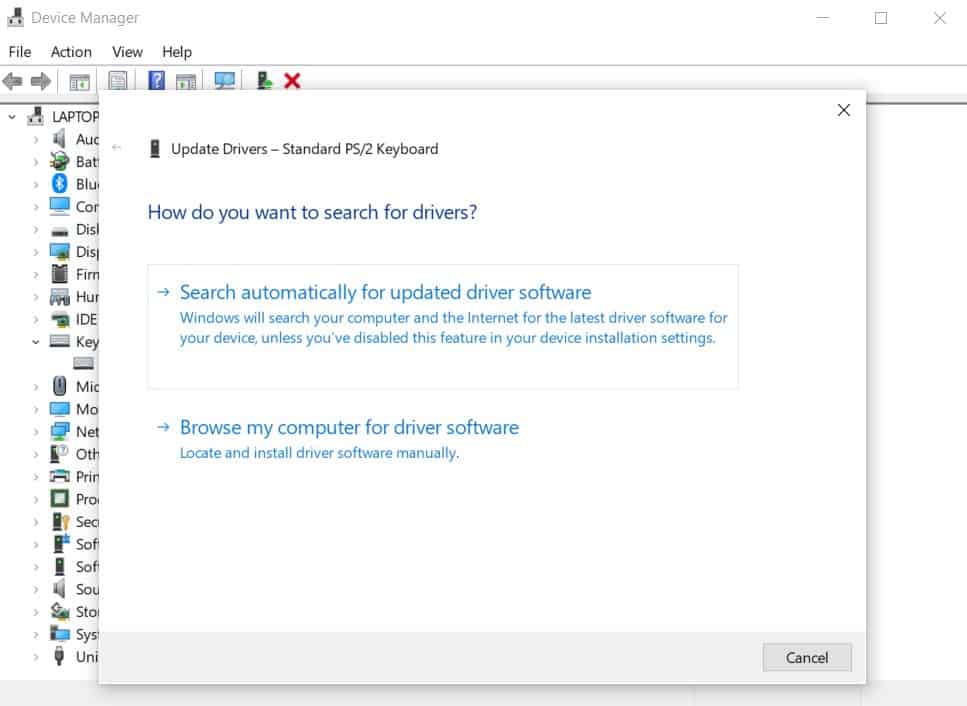
When you are asked how you wish to upgrade your driver, choose “Browse my computer for driver software”.
Choose “Let me pick from a list of available drivers on my computer”.

Uncheck the show compatible hardware option. You will then be able to see all the drivers from various manufacturers.

You can now choose any incompatible driver from the list. When you are warned by Windows that the selected driver may not be able to work properly with your hardware, choose “Yes”.
Once the driver has been installed, proceed to restart your laptop. You will notice that the inbuilt keyboard has been disabled permanently.
Of all these options listed above, the Device Manager method is the safest and easiest. It will enable you to disable your laptop keyboard without any additional risk to your device.
Also see:
If you want your keyboard to work back, you can use the same procedure to reinstall a compatible driver. You can use an external keyboard or the built-in mouse in case you need some input/interaction with options.
![]()