
 by
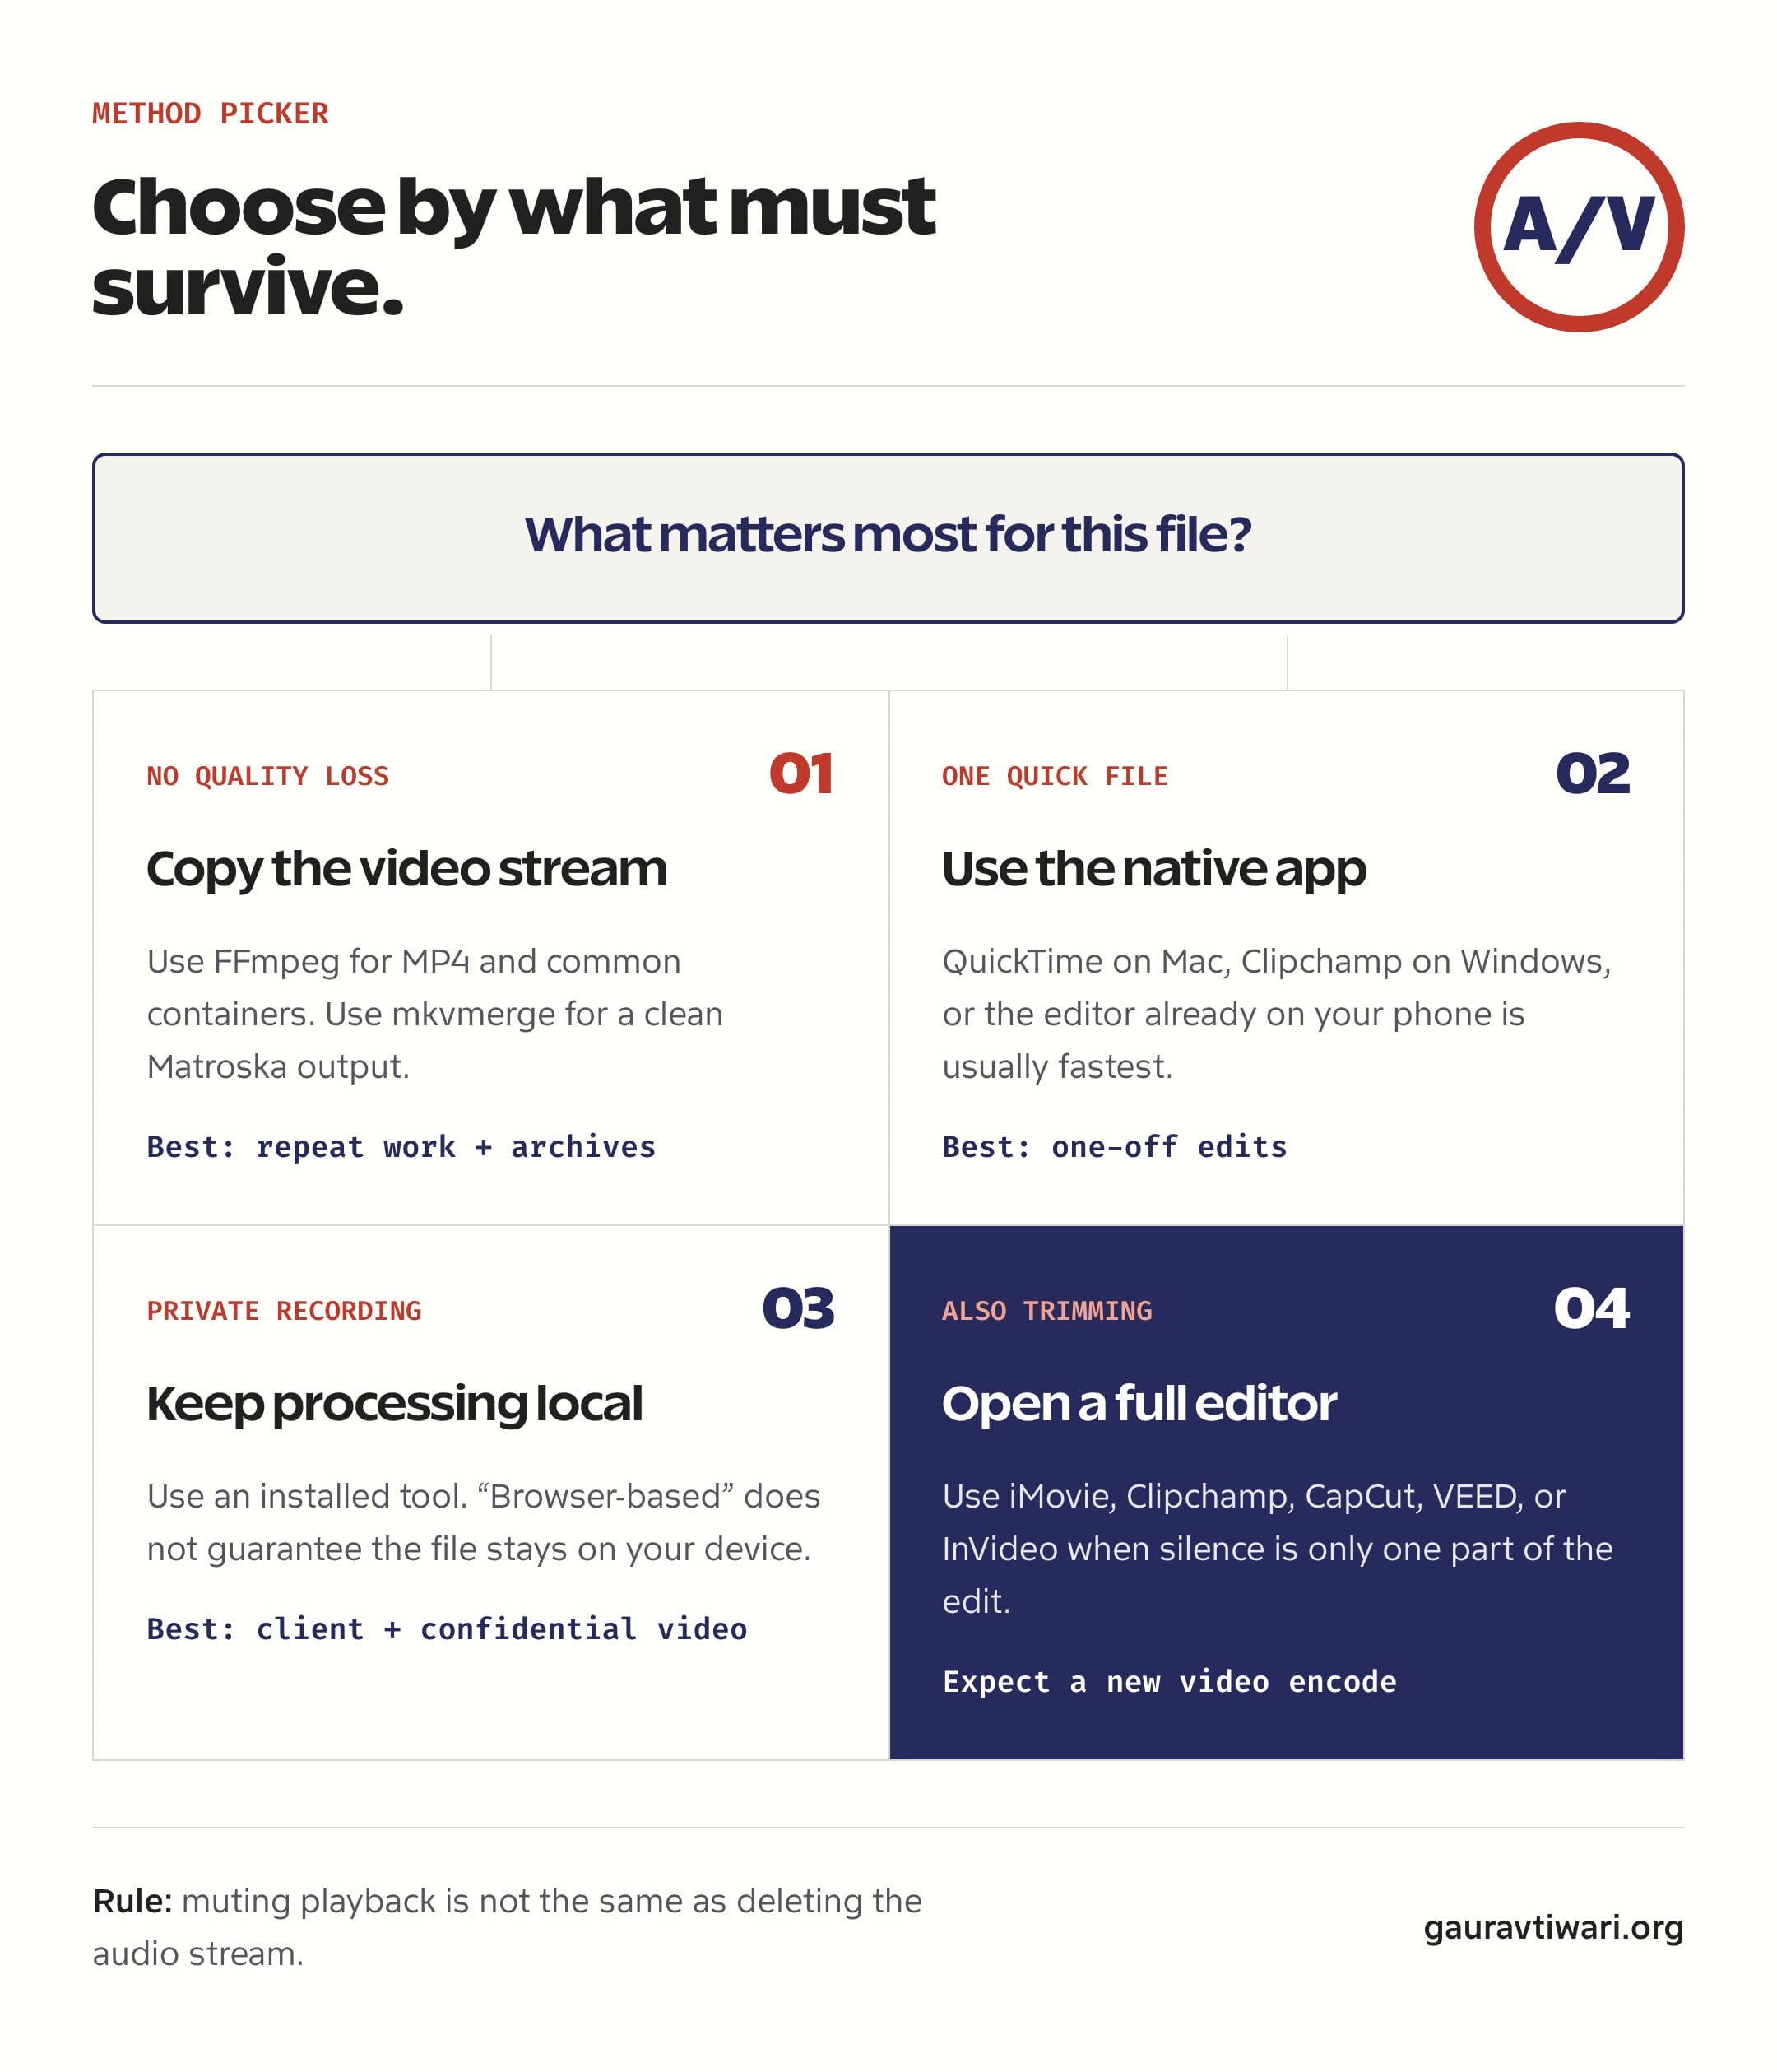
byTo remove audio from video without reducing picture quality, copy the existing video stream and exclude every audio stream. FFmpeg does this in one command. If you only have one file, QuickTime Player, Clipchamp, iMovie, or your phone’s native editor may be easier.
The important distinction is whether you need silent playback or a true video-only file. A mute control can leave an audio track inside the exported file. That matters when the recording contains a private conversation, background noise, or licensed music you must remove.
My practical recommendation
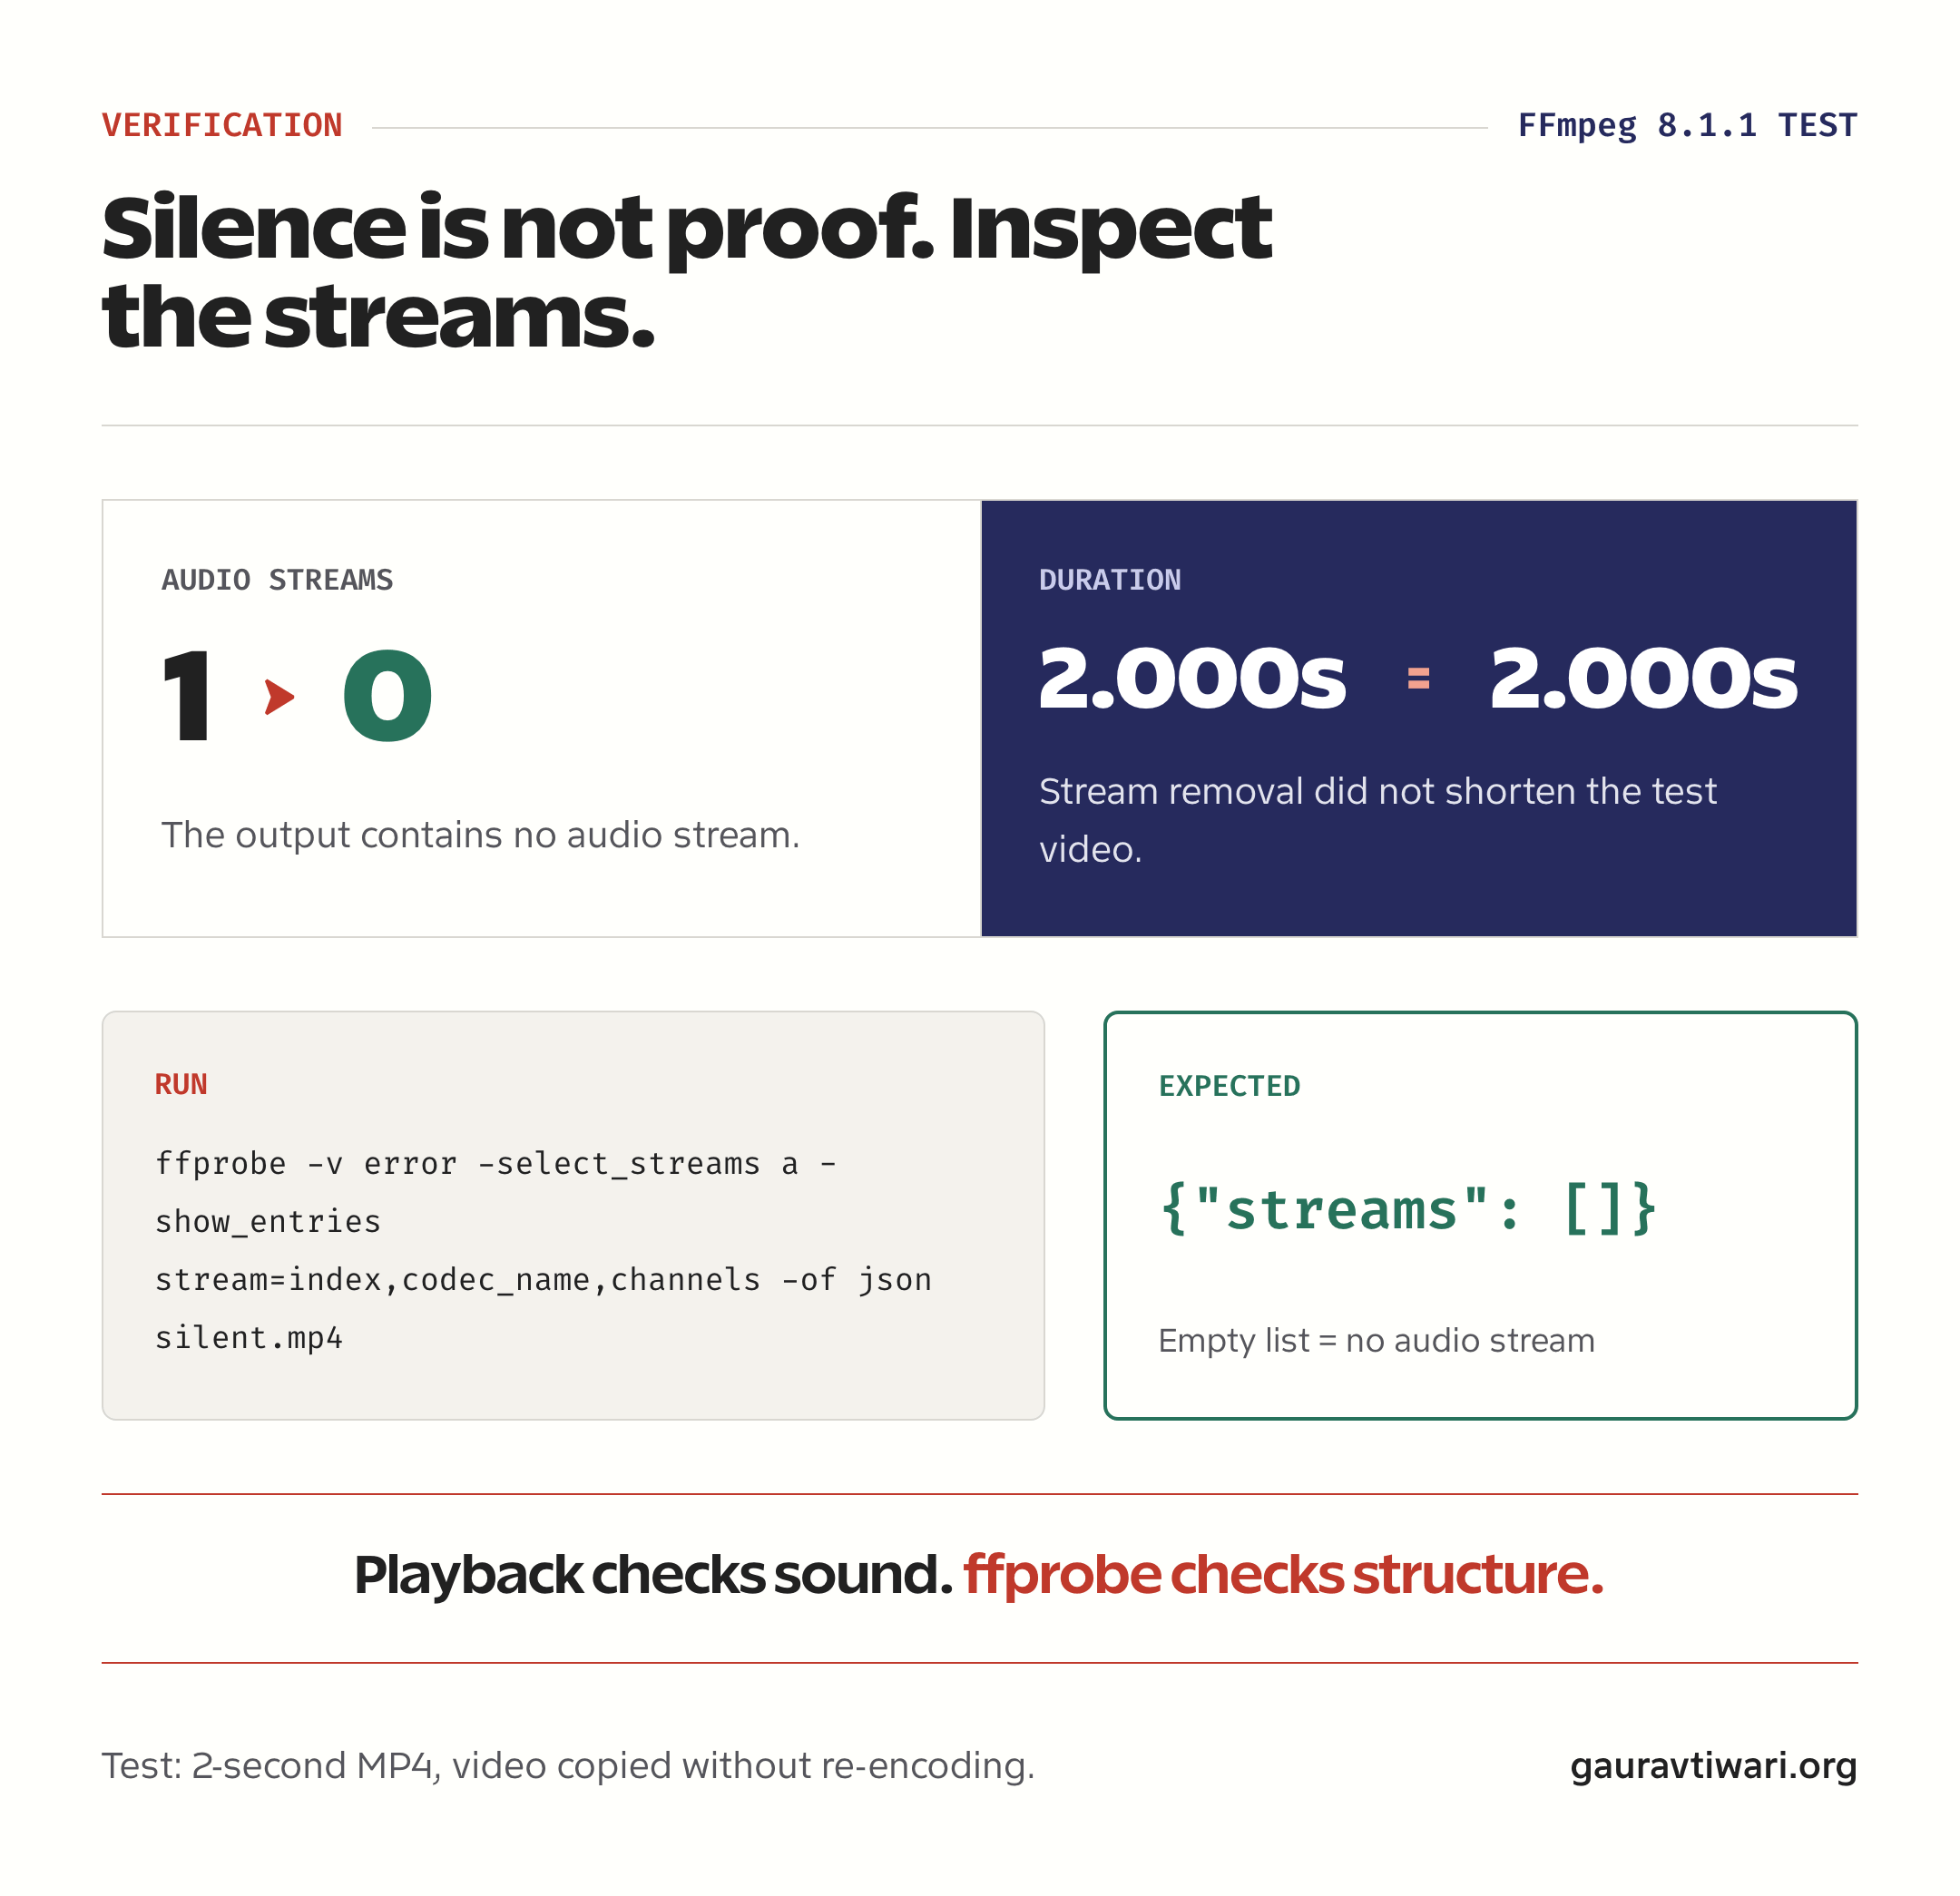
- Best quality-preserving method: FFmpeg stream copy. In my local FFmpeg 8.1.1 test, the audio-stream count fell from 1 to 0 while the 2.000-second duration stayed unchanged.
- Best one-off method: use the native editor already on your Mac, Windows PC, iPhone, iPad, or Android phone.
- Best privacy rule: keep client recordings and confidential video on your device instead of uploading them to an unknown web tool.
Jump to: method comparison · CLI tools · device instructions · verification
Which method should you use to remove audio from video?
Use FFmpeg when you need speed, repeatability, and no video re-encoding. Use a native graphical editor for a one-off file. Choose a full video editor only when you also need to trim, crop, add text, or replace the soundtrack.
| Method | Platform | Audio track removed? | Video re-encoded? | Best for |
|---|---|---|---|---|
| FFmpeg | Mac, Windows, Linux | Yes | No with stream copy | Fast, repeat, or batch work |
| mkvmerge | Mac, Windows, Linux | Yes | No | Matroska files |
| MP4Box | Mac, Windows, Linux | Yes | No by default | Removing a specific MP4 track |
| QuickTime Player | Mac | Yes | Depends on the file | One simple Mac file |
| iMovie | Mac, iPhone, iPad | Yes in export | Usually | Editing and replacing audio |
| Clipchamp | Windows, web | Yes if detached and deleted | Yes | Windows users |
| Google Photos | Android | Not guaranteed | Usually | Quick phone mute |
| iPhone Photos | iPhone, iPad | Not guaranteed | Varies | Reversible mute |
| VLC | Mac, Windows, Linux | Yes | Usually | Users who already have VLC |
| Mobile editor | iOS, Android | Usually in export | Yes | Social clips and extra edits |
| Online remover | Browser | Varies | Often | Non-sensitive, small files |
Make a copy before editing. An accidental overwrite is a much bigger problem than a few extra megabytes on disk.
Is muting the same as removing the audio track?
No. Muting changes how the file plays; removing audio changes what streams the file contains.
- Muted video: volume is set to zero, but an audio stream may remain in the project or output.
- Removed audio: the output container has no audio stream, or the selected audio track has been deleted.
- Replaced audio: the original track is removed or muted and a new music, narration, or effects track is added.
If you are removing a private conversation, do not trust your ears alone. Inspect the output with ffprobe or MediaInfo after export.
How do you remove audio with command-line tools?
Command-line tools are the strongest option when you want a local, scriptable workflow. FFmpeg is the best general choice, mkvmerge is excellent for Matroska, and MP4Box is useful when you need to remove a specific track from an MP4 container.
FFmpeg: remove every audio stream without re-encoding
ffmpeg -i input.mp4 -map 0 -map -0:a -c copy silent.mp4
This command maps every stream from the input, removes all mapped audio streams, and copies everything else without decoding and encoding the video again.
-i input.mp4selects the source file.-map 0includes every stream from the first input.-map -0:auses negative mapping to exclude all audio streams.-c copystream-copies the remaining video, subtitle, attachment, and data streams.
This is safer than mapping only 0:v when the source also contains subtitles or other streams you want to preserve. FFmpeg’s official documentation explains stream copy, manual stream mapping, negative maps, and the -an audio-disable option.
If the output container does not support one of the copied streams, FFmpeg will stop with an error. Change the container or map only the streams you need rather than forcing a lossy video conversion.
mkvmerge: remove audio from an MKV file
mkvmerge -o silent.mkv --no-audio input.mkv
The --no-audio option tells mkvmerge not to copy any audio track from the input. It writes a new Matroska file and keeps supported video, subtitle, chapter, and attachment data.
MP4Box: remove a specific audio track from MP4
First inspect the file so you know the audio track ID:
MP4Box -info input.mp4
Then duplicate the file and remove the selected track from the copy:
cp input.mp4 silent.mp4
MP4Box -rem <audio-track-id> silent.mp4
GPAC’s MP4Box documentation defines -rem as removing the track with the given ID. Work on a copy because this command changes the MP4 file you name.

How do you remove sound on Mac, Windows, iPhone, and Android?
Use the simplest local app that can produce the result you need. QuickTime removes audio directly on Mac, Clipchamp can detach and delete it on Windows, and phone editors are convenient when silent playback is enough.
QuickTime Player on Mac
- Open the video in QuickTime Player.
- Choose Edit, then Remove Audio.
- Save or export the new file under a different name.
Apple documents Remove Audio as deleting the audio track and leaving a video-only file. This is my first choice for a Mac user with one compatible file.
iMovie on Mac, iPhone, or iPad
Use iMovie when you also need to trim, crop, add titles, or replace the soundtrack.
- Add the video to a project timeline.
- Detach the audio from the clip.
- Select the detached track and delete it.
- Export the finished video.
Apple provides separate instructions for detaching audio on Mac and editing audio on iPhone and iPad. iMovie normally creates a newly encoded export, so match the source resolution and frame rate.
Clipchamp on Windows
Clipchamp offers both a volume control and an audio-detach workflow. Use detach and delete when you want the soundtrack removed from the edit rather than merely turned down.
- Add the video to the timeline and select it.
- Open the audio controls and choose Detach audio.
- Select the new audio track and delete it.
- Export the video at the source resolution when possible.
Microsoft’s Clipchamp instructions cover muting, separating, and deleting audio. Clipchamp re-encodes the exported video, so it is easier than FFmpeg but not as exact.
iPhone Photos and Google Photos on Android
For a quick mute, open the video’s edit controls and tap the speaker or audio icon. Save a copy when the app offers that option.
- iPhone or iPad Photos: the speaker control is fast and reversible in Photos, but use iMovie when you need a new export with the audio removed.
- Google Photos on Android: use the Mute control, then save a copy. Google’s video editing help notes that available controls can vary by device.
Can VLC remove audio from video?
Yes. VLC can create a new file with the audio codec disabled, although its Convert/Save workflow is less direct and normally transcodes the video.
- Open Media → Convert/Save and add the source file.
- Select Convert, then edit the chosen profile.
- Open the Audio codec tab and clear the Audio option.
- Choose a new destination filename and start the conversion.
Use VLC when it is already installed and convenience matters more than preserving the exact encoded video stream.
When should you use a mobile or online video audio remover?
Use a mobile or online editor when removing sound is only one part of a social-media edit. These tools are convenient, but they usually upload the file, re-encode it, or both.
- Good fit: short, non-sensitive clips that also need captions, trimming, resizing, or a replacement soundtrack.
- Poor fit: private meetings, client footage, legal recordings, medical video, unreleased work, or large archives.
- Before uploading: check file-size limits, output resolution, watermark rules, account requirements, retention policy, and whether processing is local or server-side.
CapCut, InVideo, VEED, and Canva can all produce silent video exports. If you are choosing between browser editors, my InVideo vs. VEED comparison explains the broader workflow differences.
For more capable desktop options, see my guide to the best video editing software.
Which export settings protect video quality?
Stream copy is the only method here that preserves the existing encoded video exactly. If an editor must re-encode, keep its output settings close to the source.
- Resolution: keep 1920×1080 as 1920×1080 unless you intentionally need a smaller copy.
- Frame rate: keep 24, 25, 30, 50, or 60 fps aligned with the source.
- Aspect ratio: do not convert horizontal footage to vertical unless that is part of the edit.
- Codec: H.264 is the safest compatibility choice; H.265 can reduce file size but is less universal.
- Bit rate: use the editor’s high-quality setting or a bit rate near the source. A much lower value can create blocking and smeared motion.
Avoid exporting the same clip repeatedly. Each lossy encode can remove more image detail. If you need to join the silent clips afterward, use this guide to combine multiple videos into one.
How do you verify that the audio track is gone?
Use ffprobe to inspect the output’s audio streams. Silent playback is a useful check, but an empty stream list is stronger proof.
ffprobe -v error -select_streams a \
  -show_entries stream=index,codec_name,channels \
  -of json silent.mp4
A file with no audio stream returns:
{"streams": []}
If you prefer a graphical inspection, open the output in MediaInfo and look for an Audio section. Its absence indicates that the container has no reported audio stream.
- Play the beginning, middle, and end of the output.
- Confirm that the duration and frame size match the source.
- Check that subtitles, chapters, and metadata you need still exist.
- Keep the original until the silent file has passed every check.
If YouTube still reports a playback or sound problem, the file may not be the cause. Try these fixes for the YouTube audio renderer error.
FAQs
These answers separate a quick mute from complete audio-track removal.
Can I remove audio from video without reducing quality?
Yes. FFmpeg can copy the existing video and exclude all audio streams with -map 0 -map -0:a -c copy. This avoids decoding and re-encoding the video.
Does muting a video remove its audio track?
Not always. A mute control can set playback volume to zero while leaving an audio stream in the project or exported file. Inspect the output when complete removal matters.
What is the easiest way to remove audio on Mac?
Open the video in QuickTime Player and choose Edit, then Remove Audio. Use iMovie if you also need to trim, crop, add titles, or replace the soundtrack.
What is the easiest way to remove audio on Windows?
Clipchamp can detach and delete the audio track before export. FFmpeg is faster and avoids video re-encoding when you have repeat or batch work.
Can I remove sound from a video on my phone?
Yes. iPhone Photos and Google Photos provide quick mute controls, while iMovie and mobile video editors can create a new silent export. Save a copy so the original remains available.
Will removing audio reduce the video file size?
Usually. The saving equals the removed audio data, although a graphical editor may also change the video size because it re-encodes the file.
How do I prove that the audio track is gone?
Run ffprobe with -select_streams a and JSON output. A result containing an empty streams array means no audio stream was found in the output file.
Tell Google you want more of this.
Add Gaurav Tiwari as a preferred sourceOne tap, and this site shows up more often in your own Top Stories, AI Overviews and AI Mode. Remove it any time.