How to Compress Images for Web: Complete Guide to Faster Page Loads
Images are the heaviest part of most websites. They account for 50-70% of average page weight, and unoptimized images are the single biggest reason sites fail Core Web Vitals. Fix your images, and everything else gets faster.
A 1-second delay in page load time reduces conversions by 7%. 53% of mobile users abandon sites that take longer than 3 seconds. And Google uses page speed as a ranking factor. Image optimization isn’t optional anymore.
After this guide, you’ll have a system with tools that compress images and shrink file sizes by 60-80% without visible quality loss, whether you’re on Mac, Windows, Linux, or using any major CMS.
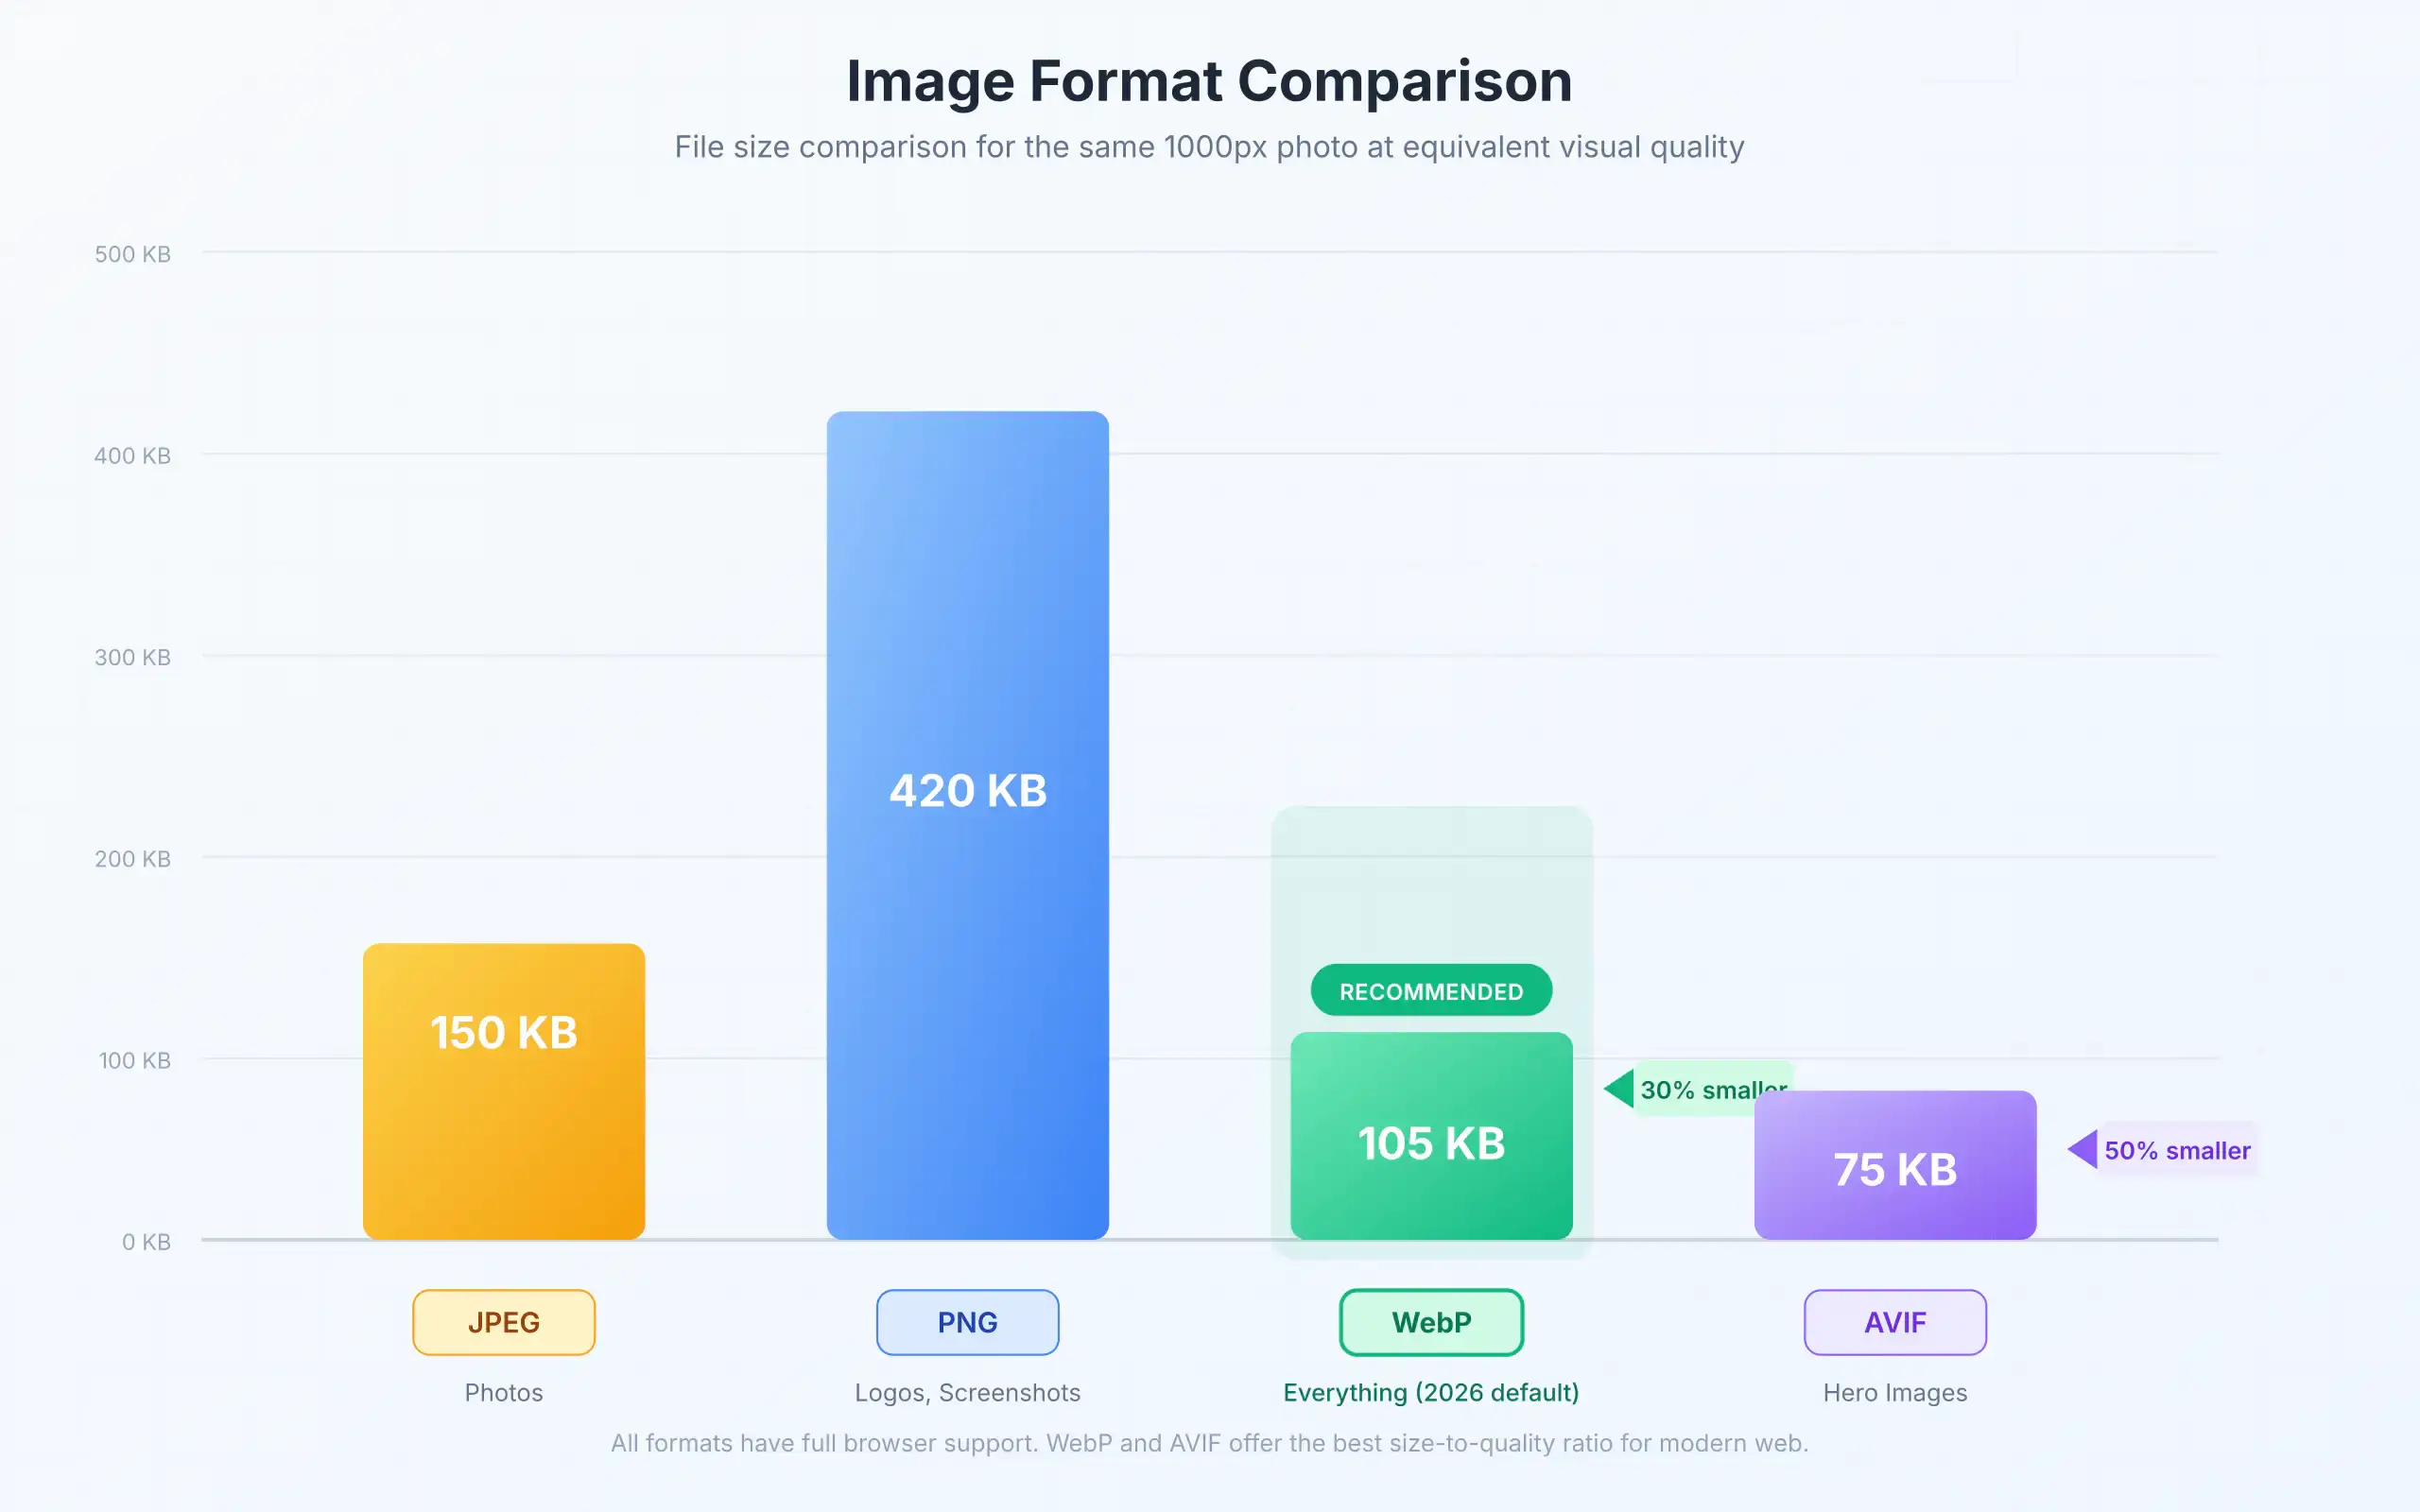
Sites using WebP format load 25-35% faster than those stuck on JPEG and PNG. AVIF pushes that even further with 50% smaller files than JPEG.
Why Image Optimization Is Critical for Performance
Your Largest Contentful Paint (LCP) score depends heavily on image size. LCP measures how fast your main content loads, and Google’s threshold is 2.5 seconds or less. Uncompressed images make that nearly impossible on mobile connections.
Here’s the current state of image optimization:
Modern formats deliver real gains. WebP is universally supported across all major browsers and delivers 25-35% smaller files than JPEG. AVIF pushes compression even further at 50% smaller than JPEG, with support in Chrome, Edge, Firefox, and Safari. JPEG XL had promise, but Google dropped Chromium support, so it’s mostly used offline now.
Mobile users are impatient. Over 60% of web traffic comes from mobile devices on slower connections. These visitors bounce fastest when pages load slowly. Every 100ms of improvement matters.
Search rankings depend on speed. Core Web Vitals are a confirmed ranking factor. Sites with optimized images consistently score better on PageSpeed Insights, which translates directly to search visibility.
The tools have caught up too. I compress 200+ images monthly across my sites, and the workflow is almost invisible now. Most optimization happens automatically.
What You Need Before Starting
For desktop tools:
- A computer (Mac, Windows, or Linux)
- The images you want to compress
- 10-15 minutes for initial setup
For CMS plugins:
- Admin access to your WordPress, Shopify, or other CMS
- A rough idea of your monthly image volume (this affects which tools make sense)
For online tools:
- Just a browser and images to compress. That’s it.
⚠️ Privacy note: Some online tools upload your files to external servers. For client work, product shots before launch, or anything confidential, use desktop tools like ImageOptim (Mac) or RIOT (Windows) that process everything locally. Your files never leave your machine.
Choosing the Right Image Format
Before you compress anything, pick the right format. This single decision can cut file size in half before compression even starts. I’ve seen people spend hours optimizing PNGs that should have been JPEGs from the start.
JPEG (.jpg)
Best for photographs and images with many colors. Lossy compression means some quality loss, but it’s usually invisible at 75-85% quality settings.
Use when: You’re working with photos, product images, or anything with complex color gradations.
PNG (.png)
Best for graphics, logos, screenshots, and images needing transparency. Lossless compression preserves quality but results in larger files.
Use when: You need transparency, sharp text, or graphics with flat colors.
WebP (.webp)
The modern default. Offers both lossy and lossless compression, typically 25-35% smaller than equivalent JPEG/PNG. Supported by all major browsers since 2023.
Use when: You want the best balance of quality and size for web use. This should be your default format in 2026.
AVIF (.avif)
The compression king. Around 50% smaller than JPEG with excellent quality retention. Slower to encode but worth it for hero images and critical above-the-fold content.
Use when: Maximum compression matters and you can provide WebP fallback for older browsers.

How to check what format your site serves: Open DevTools (F12), go to the Network tab, reload, and look at the Content-Type header for image requests. You should see image/webp or image/avif instead of image/jpeg.
Quick Reference: Target Sizes
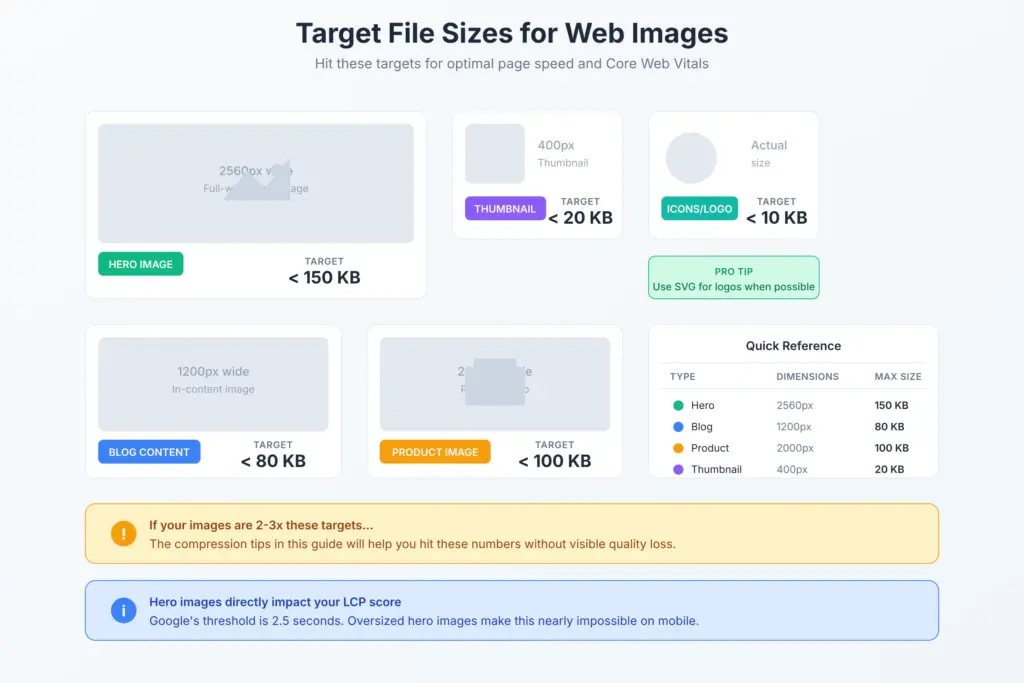
Before you start compressing, know your targets. These are the file sizes I aim for:
| Image Type | Max Dimensions | Target File Size |
|---|---|---|
| Hero/banner | 2560px wide | Under 150KB |
| Blog content | 1200px wide | Under 80KB |
| Product images | 2000px wide | Under 100KB |
| Thumbnails | 400px wide | Under 20KB |
| Icons/logos | Actual size | Under 10KB (use SVG when possible) |
If your images are hitting these targets, you’re doing well. If they’re 2-3x larger, the compression tips below will fix that.
Compressing Images on Mac
Mac users have excellent options here. I’ve tested dozens over the years, and these are the ones that actually stay in my dock.
ImageOptim (Free)
ImageOptim used to process every image I published before switching to Clop. Free, open-source, and everything stays on your machine. It is still the best free option out there.
What makes it different: ImageOptim doesn’t just run one compression algorithm. It chains together PNGCrush, OptiPNG, Zopfli, JpegOptim, MozJPEG, and others, trying each combination to find the smallest possible file. Most tools run one pass. ImageOptim runs multiple.
How to use it:
- Download ImageOptim from the official website
- Drag and drop your images into the app window
- Wait for compression to complete (green checkmarks appear next to each file)
By default, it uses lossless compression. For aggressive file size reduction, enable lossy mode in Preferences:
Lossy mode settings I recommend:
- JPEG quality: 75-80%
- PNG quality: 70-90%
These settings typically reduce file size by 60-80% with no visible quality loss. The app replaces your original files, so keep backups if you’re paranoid. You’ll see green checkmarks and percentage savings next to each file when processing completes.
Clop (System-Wide Clipboard Optimization)
Clop runs in my menu bar constantly. Every time I copy an image or take a screenshot, Clop compresses it automatically before I paste. No extra steps. No remembering to optimize.
Why I keep it running: Screenshots from CleanShot X, images copied from the web, graphics exported from Figma, they’re all oversized by default. Clop catches everything in the clipboard and shrinks it before it reaches my blog posts, emails, or Slack messages.
The compression happens fast enough that I don’t notice the delay. And it shows a quick notification with before/after file sizes so you know it’s working.
Pricing: One-time purchase around $12. Worth it for the set-and-forget convenience.
CleanShot X (Screenshots Already Optimized)
CleanShot X is my screenshot tool of choice, and it has built-in image optimization. When you capture screenshots or screen recordings, CleanShot can automatically optimize file size before saving.
The compression setting: Go to Preferences → General → Optimize screenshots. This reduces screenshot file sizes without affecting visual quality. Combined with Clop, my screenshots are typically 50-70% smaller than macOS’s native Screenshot app produces.
Affinity (Batch Processing)
For batch processing hundreds of images, Affinity has powerful export options. Its batch processing feature lets you apply compression settings across entire folders.
When I use it: Product image shoots, event photography, any time I need to process 50+ images with consistent settings. The File → Export menu gives you granular control over format, quality, color profile, and metadata, all at once.
Pricing: 100% free. Better with Canva subscription.
Apple Pixelmator Pro (Photo Editing + Export)
If you’re already using Apple Pixelmator Pro for photo editing, its export options include excellent compression controls. File → Export gives you quality sliders for JPEG, WebP, and HEIC with live preview of file size.
Best feature: The “Super Resolution” ML upscaling lets you enlarge images without losing quality, then export at optimized settings. Useful when you have small source images that need to be hero-sized.
Preview (Built-in, Quick Option)
For one-off compressions, Mac’s built-in Preview app works:
- Open the image in Preview
- Go to File → Export
- Adjust the Quality slider (lower = smaller file)
- Save
Preview is fine for occasional use, but it only runs a single compression pass. ImageOptim will get you 10-20% smaller files on the same image.
Eagle (Asset Organization)
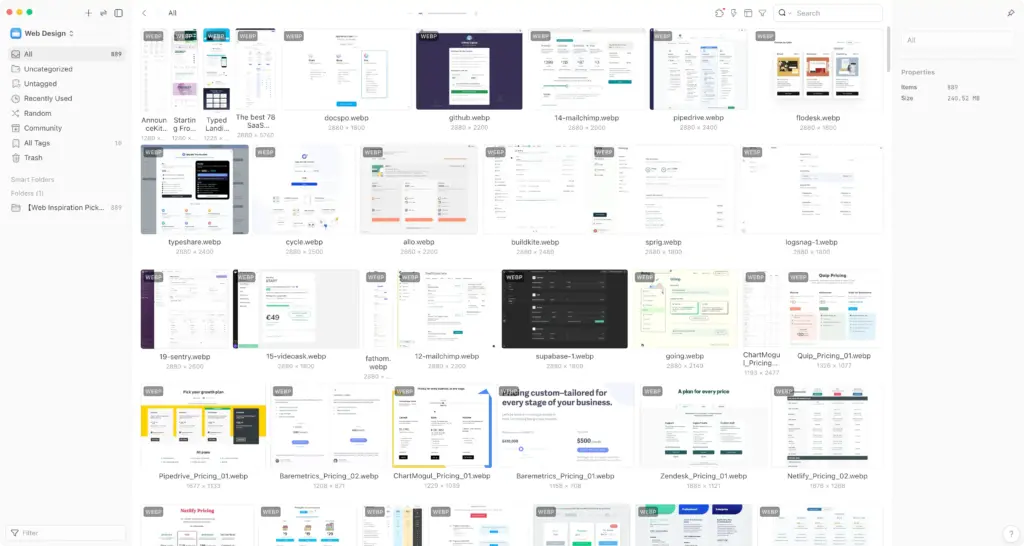
Eagle isn’t a compression tool, but it belongs in this workflow. After compressing hundreds of images, you need to organize them. Eagle lets you tag, categorize, and search your entire image library.
Why I use it: Every compressed blog image, product photo, and screenshot lives in Eagle with tags like “blog-hero,” “tutorial-screenshot,” or “product-lifestyle.” When I need an image, I search instead of digging through folders.
Pricing: $29.95 one-time purchase. Syncs across devices via cloud storage.
My Mac Compression Workflow
Here’s the actual stack I run:
- Clop runs constantly in the menu bar (automatic clipboard optimization)
- CleanShot X captures screenshots with built-in optimization
- ImageOptim processes any images that bypass Clop (downloads, exports from design apps)
- Affinity Photo handles batch processing for large shoots
- Eagle organizes everything with searchable tags
This combination means most images get compressed automatically without any manual intervention. I only open ImageOptim for final passes before publishing.
My blog images average 45KB after this workflow. Before I set this up, they averaged 280KB. That’s an 84% reduction with zero visible quality loss.
Compressing Images on Windows
Windows users have equally powerful options. Some of these tools are Windows-exclusive, and a few actually outperform their Mac counterparts in compression ratios.
Caesium Image Compressor (Free)
Caesium is a free, open-source batch image compressor. It’s lightweight and handles JPEG, PNG, and WebP.
How to use it:
- Download and install Caesium
- Drag images into the main window
- Set your quality level (I use 80 for most images)
- Choose output folder and format
- Click Compress
Caesium shows you the before/after file size for each image, so you can immediately see the savings. Unlike ImageOptim, it creates new files rather than overwriting originals, so you can compare side-by-side before deleting the larger versions. It is also available to use online.
FileOptimizer (Free, Powerful)
FileOptimizer goes beyond images. It compresses PDFs, documents, and various file types using multiple optimization techniques. For images specifically, it’s overkill, but if you need an all-in-one solution, it’s excellent.
RIOT (Free, Advanced Control)
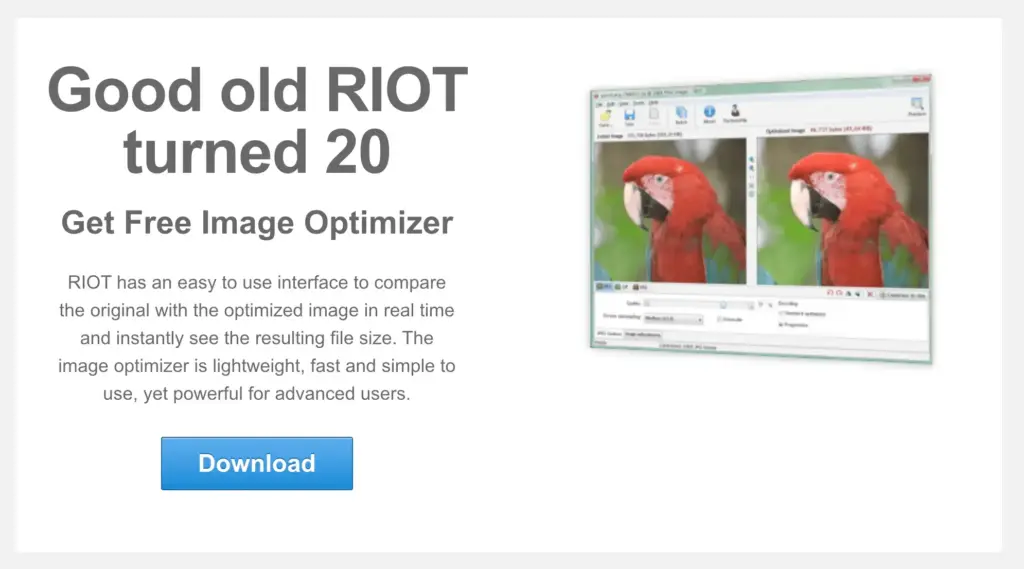
RIOT (Radical Image Optimization Tool) gives you granular control over compression. You can compare original and compressed images side-by-side in real-time, adjusting quality until you find the sweet spot.
What makes RIOT special: The real-time preview. Slide the quality control and watch the image update instantly. This makes it easy to find the lowest acceptable quality for each specific image.
Squoosh Desktop (Via PWA)
Google Chrome Lab’s Squoosh works in any browser but can be installed as a Progressive Web App on Windows for offline use. More on Squoosh in the online tools section.
Compressing Images on Linux
Linux users get the best tools, honestly. The command line utilities here are what power many of the GUI apps on Mac and Windows. If you’re comfortable with terminal, you’ll get the fastest processing and most control.
jpegoptim and optipng (Command Line)
For batch processing via terminal:
# Install the tools
sudo apt install jpegoptim optipng

# Compress all JPEGs in current directory (80% quality)
jpegoptim --max=80 *.jpg

# Compress all PNGs (lossless)
optipng -o5 *.png
The -o5 flag for optipng sets the optimization level (0-7, higher = more compression but slower).
📝 Note: -o7 gives marginally better compression but takes significantly longer. For batch processing hundreds of images, -o5 is the sweet spot.
cwebp (WebP Conversion)
Convert images to WebP from the command line:
# Install
sudo apt install webp

# Convert JPEG to WebP at 80% quality
cwebp -q 80 input.jpg -o output.webp
For batch conversion, wrap it in a loop:
for file in *.jpg; do
    cwebp -q 80 "$file" -o "${file%.jpg}.webp"
done
GIMP (GUI Option)
GIMP is the free Photoshop alternative. When exporting images, it provides quality sliders and compression options for all major formats.
Online Compression Tools (Any Platform)
Online tools work everywhere and require no installation. The tradeoff: your images upload to external servers. For blog posts and marketing images, that’s fine. For client NDA work or unreleased product shots, use desktop tools instead.
Squoosh (Best Overall)
Squoosh, developed by Google Chrome Labs, is my top recommendation for online compression. Here’s why:
- Works entirely in your browser (no server upload for processing)
- Real-time side-by-side comparison
- Supports JPEG, PNG, WebP, AVIF, and even JPEG XL
- Granular control over every compression parameter
- Free with no limits
How to use Squoosh:
- Go to squoosh.app
- Drop an image or click to upload
- Choose your output format (WebP or AVIF recommended)
- Adjust the quality slider while watching the preview
- Download the compressed image
The side-by-side comparison is invaluable. You can zoom in and examine exactly what quality you’re sacrificing at each compression level.
TinyPNG (Quick and Easy)
TinyPNG (which also handles JPEG, WebP, and AVIF despite the name) is the simplest option. Drop images in, get compressed files out. No configuration needed.
Free tier: 20 images at once, 5MB per file
Pro tier: Higher limits, more formats, Photoshop/WordPress plugins
TinyPNG uses smart lossy compression for PNGs, reducing colors intelligently where your eye won’t notice. For PNGs specifically, it often beats other tools.
ShortPixel (Best Compression Ratios)
ShortPixel consistently delivers the smallest file sizes in independent tests. In one comparison, ShortPixel reduced a 2.1MB image to 1.13MB while TinyPNG got it to 1.7MB. That’s a significant difference across hundreds of images.
Compression modes:
- Lossy: Maximum compression, minimal quality loss
- Glossy: Balanced approach, nearly lossless appearance
- Lossless: No quality loss, modest compression
Free tier: 100 images/month
Paid plans: Start at $4.99/month for 5,000 images
ShortPixel also has a robust WordPress plugin, which I’ll cover in the CMS section.
Compressor.io (AVIF Support)
Compressor.io handles AVIF conversion well, which some tools still struggle with. The interface is clean, and it shows real-time compression stats.
WordPress Image Optimization
WordPress powers over 40% of the web, and most WordPress sites have bloated images. I’ve audited hundreds of WordPress sites over the years. The median homepage has 2-4MB of unoptimized images. After proper optimization, that drops to 300-600KB. Same visual quality, 70-80% less bandwidth.
ShortPixel Image Optimizer (My recommendation)
ShortPixel Image Optimizer – Optimize Images, Convert WebP u0026 AVIF
Optimize images u0026 PDFs smartly. Create and compress next-gen WebP and AVIF formats. Smart crop and resize.
ShortPixel consistently performs best in WordPress image optimization tests. It handles WebP and AVIF conversion, bulk optimization of existing images, and automatic compression on upload.
How to set it up:
- Install the ShortPixel plugin from Plugins → Add New
- Get a free API key at shortpixel.com
- Choose your compression type (I recommend Glossy for most sites)
- Enable WebP conversion
- Run bulk optimization on existing images
What I like: ShortPixel replaces original images with optimized versions, meaning your media library stays clean. It also generates WebP versions automatically and serves them to supporting browsers.
Free tier: 100 images/month (including thumbnails, so this is roughly 25-30 actual images)
After bulk optimization, go to Media → Bulk ShortPixel to see your total savings. On a typical blog with 500 images, expect 40-60% total reduction.
FlyingPress (All-in-One Performance + Images, also my recommendation)
FlyingPress 5.3: Built-in Image Optimization – FlyingPress
FlyingPress is built for real-world speed. It already handles caching, optimizes pages in a real browser via cloud optimization, and includes real-user Core Web
FlyingPress added built-in image optimization in version 5.3, and it’s now my preferred solution for sites where I’m already using FlyingPress for caching. One plugin handles page caching, CSS/JS optimization, and image compression. No juggling multiple tools.
What it does:
- Converts images to WebP or AVIF automatically
- Offers both lossy and lossless compression
- Processes images on FlyingPress cloud servers (no server strain)
- Auto-optimizes new uploads
- Lets you restore originals anytime
The smart above-the-fold detection is particularly useful. FlyingPress automatically identifies which images appear in the viewport and preloads them for better LCP scores, while lazy loading everything else.
Pricing: Included with FlyingPress license (starts at $49/year for single site)
Imagify (Great for WP Rocket Users)

WP Rocket and Imagify
Looking for extra tools to boost your website speed together with WP Rocket? Discover Imagify, our free image optimization plugin!
If you’re already using WP Rocket for caching, Imagify integrates seamlessly. Same parent company, consistent interface.
Compression levels:
- Normal: Lossless
- Aggressive: Lossy, significant size reduction
- Ultra: Maximum compression
In tests, Imagify’s Aggressive setting reduced a 555KB file to 25KB (95.34% reduction). That’s extreme, and visual quality does suffer at Ultra, but Aggressive is the sweet spot for most images.
Free tier: 200 images/month
Paid plans: Start at $4.99/month for 5,000 images
EWWW Image Optimizer (Unlimited Local Compression)
EWWW Image Optimizer – Smashing Performance
Looking for extra tools to boost your website speed together with WP Rocket? Discover Imagify, our free image optimization plugin!
EWWW stands out for offering unlimited local optimization. Compression happens on your server, not external APIs. This means no monthly limits, but it does consume server resources.
Best for:
- Sites with large existing image libraries
- Developers who want maximum control
- Anyone concerned about sending images to external servers
Free tier: Unlimited local optimization
Paid tier: Cloud processing and CDN delivery
Smush (Simplest Option)
WP Smush Pro – #1 WordPress Image Optimization Plugin
The powerful image optimization plugin for WordPress, blazing fast load times, WP offloads media plugin integration, and WP Retina 2x plugin support.
Smush prioritizes ease of use. Install, activate, and it automatically compresses images on upload. The interface is friendly, and the one-click bulk optimization makes it accessible for non-technical users.
Caveat: In compression tests, Smush often underperforms compared to ShortPixel and Imagify. If maximum file size reduction matters, choose one of the others.
Free tier: Unlimited images up to 5MB each
Pro tier: Larger files, WebP conversion, CDN
Optimole (Real-Time Cloud Optimization)
Optimole – Optimize Images | Convert WebP u0026 AVIF | CDN u0026 Lazy Load | Image Optimization
Optimole takes a different approach. Instead of compressing images once and storing them, Optimole processes images in real-time based on each visitor’s device, screen size, and connection speed. The original files stay untouched on your server.
How it works: Optimole replaces your image URLs with cloud-based ones. When someone visits, it detects their device and delivers the ideal version, whether that’s WebP, AVIF, or a resized JPEG. Smart, but it means your images depend on their CDN.
Standout features:
- Machine learning compression that adapts to image content
- 450+ CDN locations via AWS CloudFront
- Image offloading to free up server space
- Lazy loading without jQuery
Free tier: Unlimited optimizations for up to 2,000 monthly visits
Paid plans: Higher traffic limits starting at $19.08/month
Robin Image Optimizer (No API, No Limits)
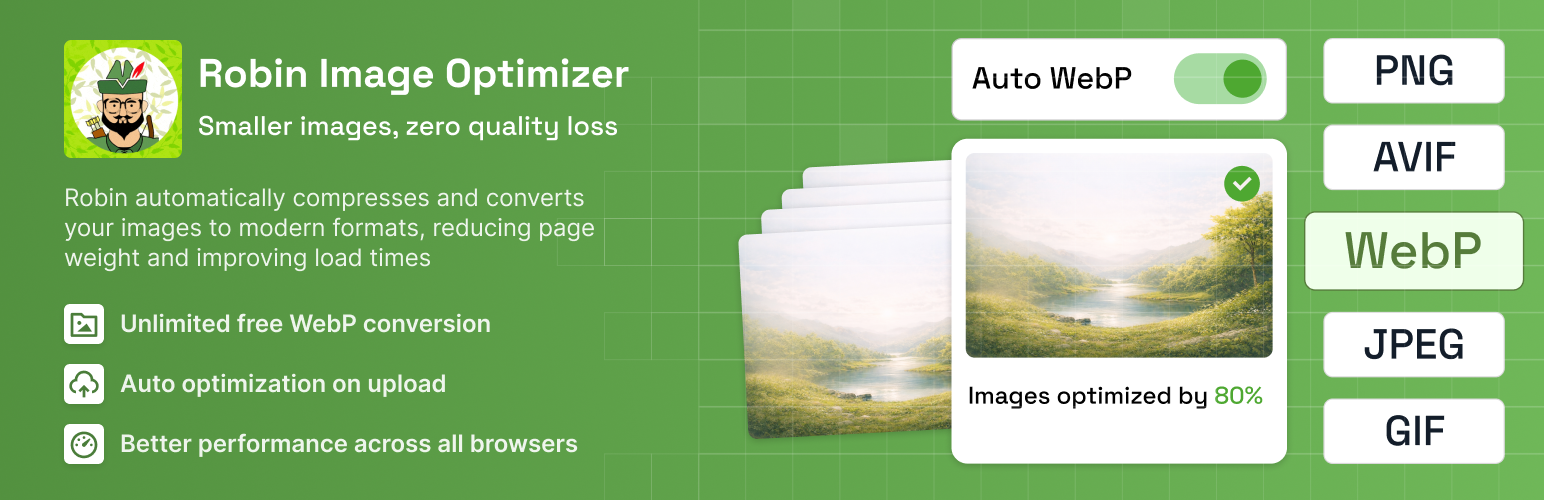
Robin Image Optimizer – Unlimited Image Optimization u0026 WebP Converter
Robin Image Optimizer runs entirely on your WordPress server. No external API calls, no monthly quotas, no sending images to third-party servers. Everything processes locally.
Why consider it: If you’re privacy-conscious or don’t want to depend on external services, Robin is the answer. It handles JPG, PNG, and GIF (including animated), with WebP conversion in the Pro version.
Compression options:
- Lossless for logos and illustrations
- Lossy for photos where smaller size matters more
Free tier: Unlimited optimization, runs locally
Pro tier: WebP conversion, NextGEN Gallery integration, theme/plugin image optimization
Cimo (Browser-Based, Zero Server Load)
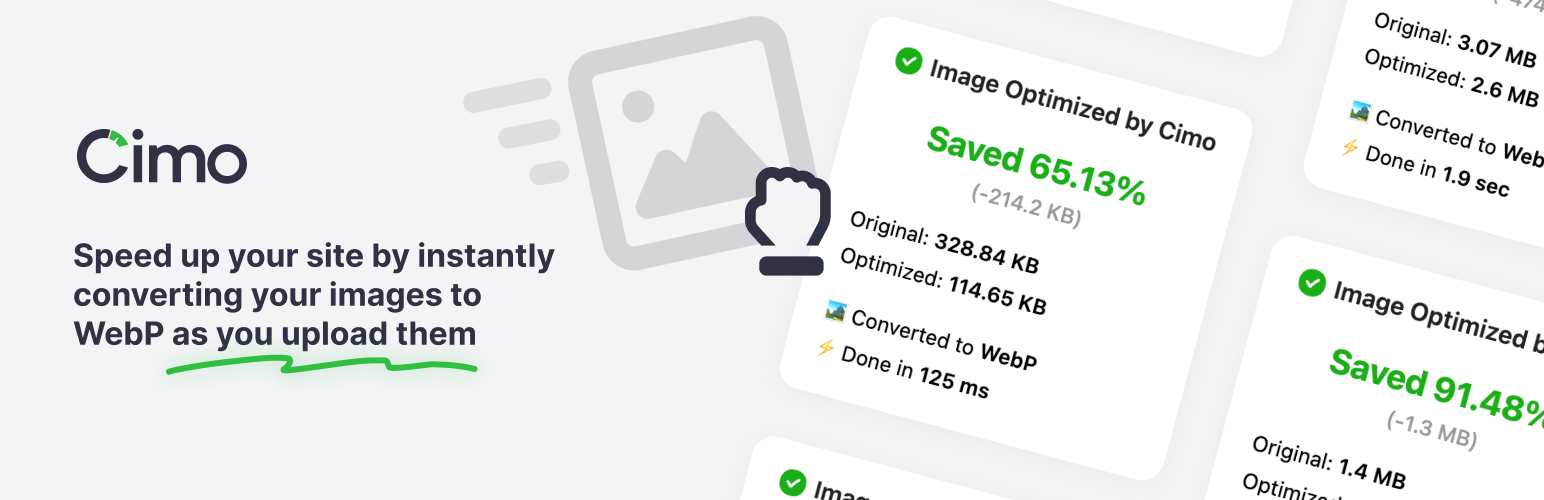
Cimo – Free Instant Image Optimizer u0026 WebP Converter
Cimo is genuinely different. It compresses images in your browser before upload, not on the server or through an API. The optimized WebP file is what actually gets uploaded to WordPress.
Why this matters: Zero server load, faster uploads, and your images never touch third-party servers. The downside: it doesn’t work in Safari, and it only optimizes images uploaded through the browser (not FTP or programmatic uploads).
Features:
- Unlimited optimization with no quotas
- WebP conversion at upload time
- Statistics dashboard showing savings
- No API keys or background processes
Pricing: Free for images, Premium adds video optimization
WP Compress (Adaptive Optimization)
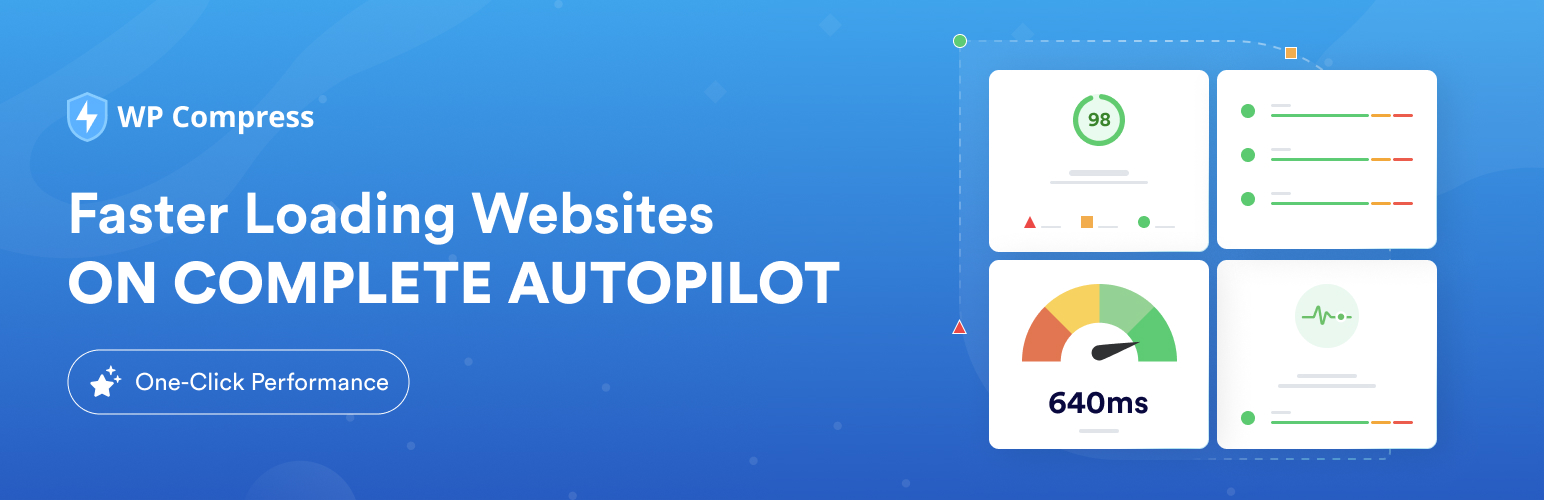
WP Compress – Instant Performance u0026 Speed Optimization
WP Compress combines image optimization with broader performance features. Its “adaptive” approach optimizes differently for mobile visitors versus desktop, creating device-specific versions.
Includes:
- Real-time image optimization
- WebP generation
- CSS/JS optimization
- Advanced caching
- Mobile-specific optimization
Best for: Agencies managing multiple sites (has a centralized portal for monitoring quotas and settings across sites).
Pricing: Essential features free, optimization engine and agency features as add-ons
Compare Image Optimization Plugins
| Feature | EWWW | Imagify | Smush | ShortPixel | TinyPNG |
|---|---|---|---|---|---|
| Free Tier | Yes (limited API-free) | 20 MB/mo | 50 images/bulk | 100 credits/mo | 500 images/mo |
| Pro Price | $7/mo | $5.99/mo | WPMU DEV ($7.50/mo) | $3.99/mo | $12.50/yr (500/mo) |
| WebP Conversion Essential | Yes | Yes | Yes (pro) | Yes | Yes |
| AVIF Support | Yes | Yes | No | Yes | No |
| Lazy Loading | Yes | No (use with WP Rocket) | Yes | No | No |
| Bulk Optimization | Yes | Yes | Yes (50 limit free) | Yes | Yes |
| CDN | Optional (ExactDN) | No | Smush CDN (pro) | No | No |
| Lossy + Lossless | Both | Both | Lossless (free), both (pro) | Both | Lossy only |
| Local Processing | Yes (free mode) | No (cloud) | No (cloud) | No (cloud) | No (cloud) |
| Best For | Privacy-conscious, no limits | WP Rocket users | WPMU DEV users | Pay-per-image value | Simple compression |
| Visit EWWW | Visit Imagify | Visit Smush | Visit ShortPixel | Visit TinyPNG |
Which WordPress Plugin Should You Choose?

| If you need… | Use this |
|---|---|
| Best compression ratios | ShortPixel |
| All-in-one caching + images | FlyingPress |
| WP Rocket integration | Imagify |
| Unlimited local processing | EWWW or Robin |
| Real-time adaptive delivery | Optimole |
| Zero server load | Cimo |
| Agency multi-site management | WP Compress |
| Simplest setup | Smush |
For most WordPress sites, I recommend ShortPixel if you just need image optimization. If you’re also looking for a caching solution, FlyingPress handles both in one plugin with excellent results. For privacy-focused sites that don’t want external API dependencies, Robin or Cimo are solid choices.
Shopify Image Optimization
Shopify doesn’t have the plugin ecosystem WordPress does, but you still have options.
Built-in Compression
Shopify automatically compresses uploaded images to some degree. However, it’s conservative. For better results, compress images before uploading using Squoosh or ShortPixel’s web tool.
Crush.pics App
The Crush.pics Shopify app handles automatic optimization:
- Compresses images on upload
- Bulk optimizes existing product images
- Converts to WebP
- Adds lazy loading
Pricing: Free tier available, paid plans for larger catalogs
Manual Pre-Upload Workflow
For Shopify stores, I recommend this workflow:
- Export product images from your camera or source
- Resize to maximum needed dimensions (usually 2000-2500px wide for products)
- Run through Squoosh, exporting as WebP at 80% quality
- Upload to Shopify
This ensures consistently optimized images without relying on Shopify’s compression.
⚠️ Shopify gotcha: Shopify re-encodes images even if you upload WebP. The platform converts everything to their own optimized format. Pre-optimization still helps because you’re giving Shopify a cleaner source file to work with.
Squarespace Image Optimization
Squarespace handles image optimization automatically, but with limitations.
What Squarespace Does Automatically
- Generates multiple image sizes for responsive delivery
- Applies basic compression
- Serves WebP to supporting browsers (on newer templates)
What You Should Still Do
Pre-optimize images before upload. Squarespace’s compression is decent but not aggressive. Using Squoosh to convert to WebP before uploading gives better results.
Recommended dimensions:
- Full-width banners: 2500px wide
- Gallery images: 1500-2000px wide
- Blog images: 1000-1500px wide
Keep images under 500KB after compression for best performance.
Webflow Image Optimization
Webflow gives you more control than Squarespace but less automation than WordPress.
Built-in Optimization
Webflow automatically:
- Generates responsive image variants
- Compresses uploads (moderately)
- Serves images via their CDN
Manual Optimization Still Helps
For best results:
- Compress images with Squoosh before uploading
- Use the responsive image settings in Webflow’s designer
- Enable lazy loading for below-fold images (in element settings)
Webflow’s asset panel shows file sizes, so you can identify oversized images that need attention.
Wix Image Optimization
Wix applies automatic compression and serves images through their CDN. The optimization is handled server-side, so there’s less manual work required.
What Wix Handles
- Automatic format conversion (WebP where supported)
- Responsive image sizing
- CDN delivery
When to Pre-Optimize
If you’re uploading high-resolution photography or large graphics, pre-compressing still helps. Wix’s upload limits (25MB per file) mean you might hit issues with unoptimized camera exports.
Framer Image Optimization
Framer is popular for portfolio and marketing sites. Like Webflow, it offers automatic optimization with room for improvement.
Automatic Features
- Image compression on upload
- Responsive sizing
- WebP conversion
Best Practices
- Upload images at 2x your display size for retina displays
- Keep source files under 1MB when possible
- Use SVG for logos and icons instead of PNGs
📝 Framer tip: The platform’s AI features can generate placeholder images, but these are often unoptimized. Replace AI-generated images with properly compressed versions before launch.
Common Issues and Fixes
Images look blurry after compression
Solution: You’ve compressed too aggressively. Re-export at higher quality (85-90% for JPEG/WebP). Some images, especially those with text or sharp edges, need gentler compression.
WebP images not loading in some browsers
Solution: Modern browsers all support WebP, but if you’re seeing issues, implement the <picture> element for fallbacks:
<picture>
  <source srcset="image.webp" type="image/webp">
  <source srcset="image.jpg" type="image/jpeg">
  <img src="image.jpg" alt="Description">
</picture>
Most CMS plugins handle this automatically.
Compression not reducing file size much
Solution: The image may already be optimized, or you’re using lossless compression on a lossy-suitable image. Try:
- Switching from PNG to WebP
- Using lossy compression instead of lossless
- Reducing image dimensions (a 4000px image scaled to 800px in CSS wastes bandwidth)
WordPress plugin not compressing new uploads
Solution: Check that the plugin is activated and configured. Some plugins require manual triggering of bulk optimization. Verify your API key (if applicable) hasn’t expired.
Images taking too long to compress
Solution: Large batches can be slow, especially with AVIF. Process in smaller batches or use progressive compression that processes the most important images first.
What’s Next
Image compression is one piece of the performance puzzle. If you want the full stack optimized, check out my performance optimization services. I also run a Cloudflare R2 image optimization service that handles asset delivery for about $2/month. For the DIY route, my Cloudflare R2 WordPress guide walks through the full setup.
Image compression is one piece of the performance puzzle. I run my sites with a three-layer approach: optimized images, page caching, and CDN delivery. Each layer compounds. A site with all three loads in under 1 second. A site with just one might still struggle at 3-4 seconds.
Here’s where to go next:
- Passing Core Web Vitals: The complete guide to achieving green scores on all three metrics
- Using a CDN for WordPress: Serve optimized images from edge servers worldwide (this alone can cut load times by 40%)
- WordPress caching plugins: Page caching handles the HTML side while image optimization handles the media
- WP Rocket settings: My exact configuration for sub-second load times
Start with image compression because it’s the biggest win for the least effort. A single pass through ShortPixel or ImageOptim can shave 2+ seconds off your load time. Everything else builds on that foundation.
Frequently Asked Questions
What is the best image format for websites in 2026?
WebP is the best default format for web images in 2026. It offers 25-35% smaller file sizes than JPEG with equivalent quality, supports both lossy and lossless compression, and works in all major browsers. For maximum compression on critical images, AVIF offers even better results (50% smaller than JPEG) but requires WebP fallbacks for older browser versions.
How much should I compress images without losing quality?
For JPEG and WebP, 75-85% quality produces excellent results with minimal visible quality loss. Most viewers can’t distinguish between 100% and 80% quality, but file sizes differ dramatically. PNG compression is lossless by default, but tools like pngquant can reduce colors intelligently for further savings. Always preview compressed images before deploying to catch any artifacts.
Does image compression affect SEO?
Yes, significantly. Google’s Core Web Vitals include Largest Contentful Paint (LCP), which measures how fast your main content loads. Images are often the LCP element. Unoptimized images hurt your LCP score, which affects rankings. Compressed images load faster, improve user experience, reduce bounce rates, and help you pass Core Web Vitals, all positive SEO signals.
What is the difference between lossy and lossless compression?
Lossy compression permanently removes some image data to achieve smaller file sizes. The quality loss is usually invisible at reasonable settings. Lossless compression reduces file size without removing any data, so the decompressed image is identical to the original. Photos typically use lossy compression (JPEG, WebP lossy). Graphics with sharp edges or text often use lossless (PNG, WebP lossless).
Which WordPress image optimization plugin is best?
ShortPixel delivers the best compression ratios in independent tests and handles WebP/AVIF conversion reliably. For WP Rocket users, Imagify integrates seamlessly from the same company. EWWW offers unlimited local processing if you want to avoid external APIs. Smush is the simplest to use but typically achieves less compression than the alternatives.
Should I compress images before or after uploading to my CMS?
Both approaches work. Pre-compression using tools like Squoosh gives you more control and ensures consistent quality. CMS plugins like ShortPixel handle compression automatically on upload, which is more convenient for workflows with multiple content creators. For best results, resize images to appropriate dimensions before uploading, then let plugins handle format conversion and compression.
How do I serve WebP images to browsers that support it?
Most modern CMS plugins handle this automatically. They generate WebP versions and serve them to supporting browsers while falling back to JPEG/PNG for others. For manual implementation, use the HTML picture element with multiple source elements specifying different formats. The browser automatically selects the best supported format.
Is ImageOptim really free?
Yes. ImageOptim for Mac is completely free and open-source under the GPL v2 license. It processes images locally on your computer without any external services or subscriptions. There are no usage limits, no watermarks, and no premium tier. The developer accepts donations but the full-featured app is free for everyone.
Disclaimer: This site is reader-supported. If you buy through some links, I may earn a small commission at no extra cost to you. I only recommend tools I trust and would use myself. Your support helps keep gauravtiwari.org free and focused on real-world advice. Thanks. - Gaurav Tiwari