
Use Your Custom Fonts in Bricks Builder
Fonts you add in Functionalities show up in Bricks’ font picker, under Custom fonts, and load inside the builder canvas. You upload a font once, then use it in Bricks the same way you use any other font, with no Google Fonts request and no extra plugin.
This guide covers the Bricks side. For uploading fonts, weights and preloading, read Add Custom Fonts.
Before You Start
- Turn on the Fonts module in Functionalities.
- Add at least one font with a family name and a WOFF2 file. Fonts without a WOFF2 file are skipped in Bricks.
- Bricks must be your active theme, or the parent of your active child theme.
Pick the Font in Bricks
- Select a heading, text or any element with typography settings.
- Open Style → Typography.
- Open Font family and choose your font under Custom fonts.
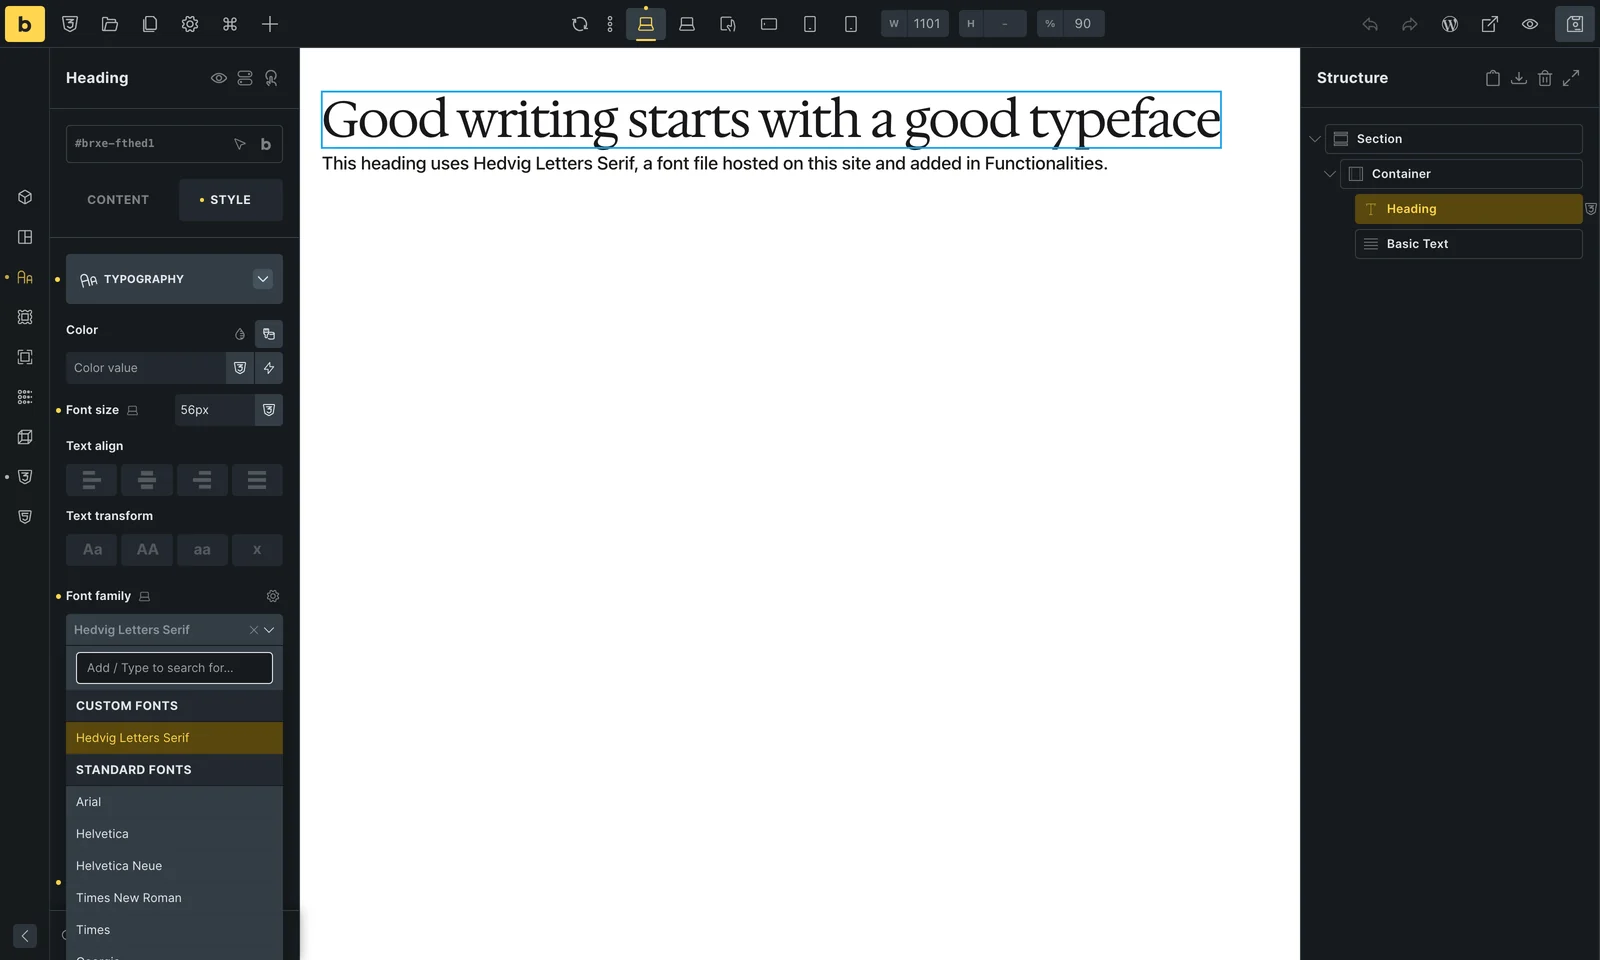
The canvas switches to the font right away, because Functionalities loads the same @font-face rules inside the builder. Set it in Bricks theme styles to use it across the site, or on one element or class.
What Visitors See
On the live page, Functionalities prints the @font-face rules in the page head, with a preload for the files you marked to preload. Bricks then uses the font name in its element styles.

Good to Know
- The name you choose in Bricks is the family name you typed in Functionalities. Rename a family there and elements that used the old name fall back to the next font in their stack, so update them in Bricks too.
- Bricks’ own Custom Fonts screen is not used. Fonts from Functionalities sit beside any fonts you uploaded there, in the same Custom fonts list.
- A variable font file covers every weight in its range, so all of Bricks’ weight choices work with one file.
- Turning the Fonts module off removes the fonts from Bricks and from the live site. Elements keep the font name and fall back to their stack.