
 by
by
Microsoft retired Visual Studio for Mac in August 2024, so a course or project that needs the full Visual Studio IDE, a WinForms designer or a Windows-only extension leaves a Mac user without a native option. To use Visual Studio on Mac today, install Windows through Parallels Desktop, then install the full Visual Studio IDE inside Windows. The virtual machine runs alongside macOS, so your Mac apps stay open while you work in the Windows IDE.
On Apple Silicon the VM runs Windows 11 ARM, so I’d confirm that your required extensions and project dependencies support ARM before buying any license. If your project is modern .NET with no Windows-only pieces, native Mac tools will do the job, and a remote Windows machine covers the cases ARM can’t.
Before You Install Parallels Desktop
Parallels Desktop supplies the Windows virtual machine; you’ll install Visual Studio inside it. Visual Studio for Mac was a different application, and Microsoft retired it on August 31, 2024. You don’t need that old Mac installer for this tutorial.
Check Your Mac and Project
Open Apple menu > About This Mac and check the chip or processor name. This determines which Windows installation you need.
| Mac | Windows VM |
|---|---|
| Apple Silicon, including M-series chips | Windows 11 Arm64 |
| Intel | Windows 11 x64 on Parallels Desktop 26, the last version that supports Intel Macs; Parallels Desktop 27 runs only on Apple Silicon |
The Visual Studio ARM installer detects Windows ARM64 and installs the matching IDE. That doesn’t guarantee compatibility with every extension or native dependency.
Before continuing, ensure you have:
- Installation access and internet: permission to install software on the Mac and in Windows, plus a connection for Windows, Visual Studio and package downloads.
- A compatible project: the Visual Studio version and workloads your course or repository requires. Check the project requirements if these aren’t clear.
- Compatible extensions: Microsoft lists workloads that don’t run on ARM64, including Python, Azure and data science development, Office/SharePoint development, C++ mobile development and Microsoft Blend. For database work, check the SSDT and BI limitations before installing.
- Enough resources for both systems: Microsoft’s Visual Studio requirements recommend 16 GB RAM for typical professional solutions. Windows needs that allocation while macOS still needs memory of its own.
- No nested virtualization: WSL2, Hyper-V and virtualization-based security don’t work in the Windows 11 VM on Apple Silicon, so Docker Desktop’s WSL2 backend and the Android emulator are out. A project that depends on either needs native Mac tools or a remote Windows machine.
Check the Licenses and VM Limits
Parallels, Windows and Visual Studio have separate licensing requirements. A free Visual Studio installation doesn’t make the complete VM setup free.
| Component | What to Check |
|---|---|
| Parallels Desktop | Edition, regional price and renewal terms. Standard is limited to 8 GB virtual RAM and 4 vCPUs per VM |
| Windows 11 Pro | A qualifying license for this VM; each instance needs its own license |
| Visual Studio | Community eligibility or a paid license. The US Professional monthly subscription is listed at $45 per user per month |
| Other dependencies | Any separately licensed extensions or database tools |
The Parallels edition comparison, Windows licensing guidance and Visual Studio pricing cover these separately. Community also has conditions for organizational use.
An 8 GB VM can handle a small learning project. For a larger solution, choose an edition with the resource limits you need and ensure your Mac has enough physical memory. Upgrading to Pro raises the allocation limit; it doesn’t add RAM to the Mac.
Install Visual Studio With Parallels Desktop
Start by getting Windows running in Parallels Desktop. Once Windows is ready, the rest of the installation happens inside the VM, just as it would on a Windows computer.
1. Install Parallels Desktop and Windows 11
For an Apple Silicon Mac, Parallels’ installation assistant downloads Windows 11 Arm64. You’ll need internet access for the downloads and permission to install software on the Mac.
- Download Parallels Desktop, install it on your Mac and open it.
- Accept its Windows installation option. If you already have a VM, open Control Center, select +, then Get Windows 11 from Microsoft.
- Continue through the Windows installation and license prompts. Use a qualifying Windows license for this VM.
- Complete Windows Update and restart when requested. Finish installing Parallels Tools if prompted.
- Open Settings > System > About in Windows and confirm the system type reports an ARM-based processor.
On an Intel Mac, stay on Parallels Desktop 26, the last version for Intel Macs, and use its x64 Windows installation route. Don’t download the ARM image for that machine.
Keep the VM’s allocation within what the Mac can support. Leave storage for Windows updates and build outputs as well as the IDE; the Visual Studio Installer shows the space needed for your selected components.
2. Install Visual Studio and Its Workloads
For a new installation in 2026, choose the current supported Visual Studio release unless your course or employer specifies another version. Download the installer inside Windows from the official Visual Studio download page.
The Visual Studio Installer groups related tools into workloads. Choose the ones your project needs:
- .NET desktop development: the console-app example below, plus supported WinForms and WPF development.
- ASP.NET and web development: ASP.NET Core applications and web tooling.
- Desktop development with C++: Windows C++ projects and their compiler tools.
- SQL Server Data Tools: check the ARM limitations. For Visual Studio 2026 on ARM64, Microsoft’s instructions use Individual components to select SSDT.
Review any required targeting packs or SDKs under Individual components, then install. You can return to the installer and choose Modify if a project needs another component later.
The ARM installation guide explains the automatic architecture selection. Downloading an x64 application doesn’t make the whole VM an x64 Windows environment.
3. Open or Create a Project
For an existing repository, clone it into a folder on the VM’s local disk, such as C:\source\repos. Then choose Open a project or solution in Visual Studio and select the solution file. Follow the repository’s package-feed and configuration instructions before building.
For a first installation check, create a separate console project:
- Select Create a new project.
- Filter by C# and choose Console App. For this example, don’t select the separate .NET Framework template.
- Name it
WindowsSetupCheckand select a local Windows folder. - Choose .NET 10, the current long-term support release, and create the project. .NET 8 and .NET 9 both reach end of support on November 10, 2026.
- Replace the contents of
Program.cswith this example:
int first = 7;
int second = 5;
int total = first + second;
Console.WriteLine($"Total: {total}");
This gives you a value to inspect in the debugger, so the check goes beyond opening a file. Microsoft’s console-app tutorial covers the project-creation screens in more detail.
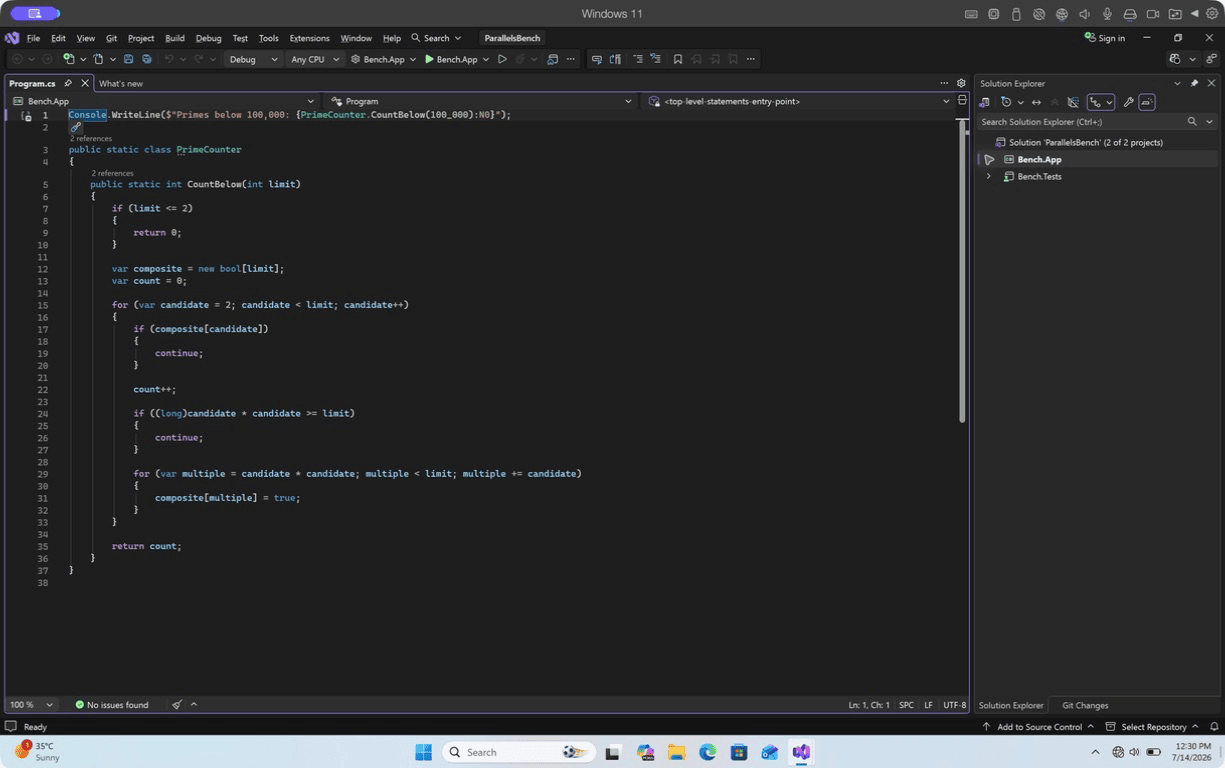
Visual Studio is open inside Windows through Parallels Desktop, with both projects listed in Solution Explorer. The next step is to build the solution and stop at a breakpoint.
4. Build and Hit a Breakpoint
Save Program.cs, then:
- Choose Build > Build Solution and check the Build output for a successful result.
- Ensure
WindowsSetupCheckis the startup project. In a multi-project solution, right-click the executable project and choose Set as Startup Project if needed. - Select the Debug configuration.
- Click the margin beside
Console.WriteLineto add a breakpoint, then choose Debug > Start Debugging. - When execution pauses on that line, hover over
totalor inspect it in Locals. Its value should be12. - Continue execution. The program should print
Total: 12.
For a WinForms or WPF assignment, follow this with a build of the actual project and open its required designer. A console app proves the basic C# toolchain works; it doesn’t prove that a third-party control or Windows extension works.
Fix Problems in the Parallels Setup
Keep the full error message and first check whether it comes from Windows, Visual Studio or an editor you are using alongside it. Parallels runs a separate operating system: installing an SDK in macOS doesn’t install it in the Windows VM.
The SDK Isn’t Found
Inside the Windows VM, open PowerShell and run:
Get-Command dotnet
dotnet --info
dotnet --list-sdks
Get-Command shows which executable Windows resolves. The other commands show the detected .NET installation and SDKs. Run the checks from the repository folder as well, because global.json can change which SDK is selected.
- Windows can’t find
dotnet: check the selected Visual Studio workload and whether the required SDK was installed inside Windows. Installing only a runtime isn’t enough to build a project. - The SDK is installed but the project rejects it: compare
global.jsonwith the installed SDK list. Don’t remove the file just to force another version. - The command works but VS Code reports an error: if you also use VS Code in this workflow, check View > Output for the affected C# extension. Its process may resolve a different installation from the terminal.
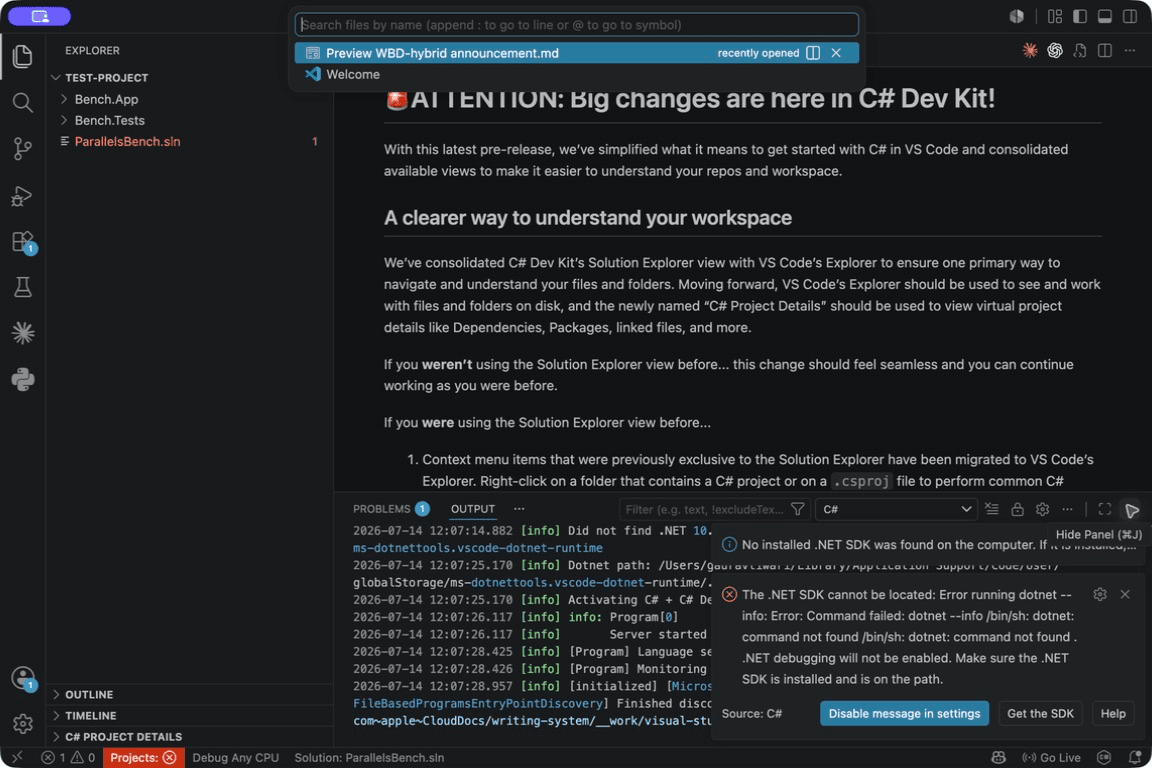
C# Dev Kit reports that it can’t locate the SDK. Check the editor’s environment before changing paths; the message alone doesn’t identify the cause.
If you are checking an editor running in macOS, use command -v dotnet in its terminal instead of PowerShell’s Get-Command. Compare installations within the same operating system, then restart the editor after installing the SDK. Microsoft’s manual .NET configuration guidance covers custom locations.
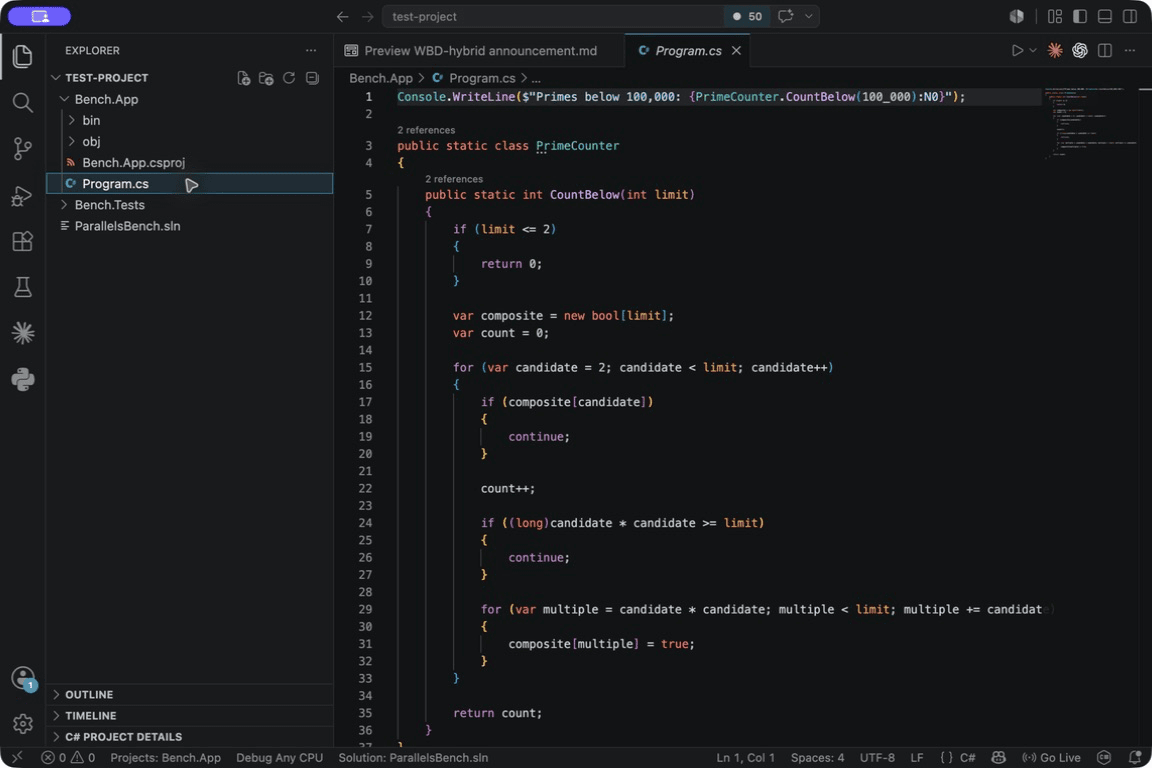
VS Code shows Bench.App and Bench.Tests in the project folder. Seeing both projects helps confirm the folder is open; their build output is still the check that tells you whether the toolchain works.
The Project Opens but Won’t Build
Read the first meaningful error in the build or restore output, then check the matching requirement:
- Missing SDK or targeting pack: install the version the project needs. Don’t change its target framework merely to make the error disappear.
- Package restore failure: check package-feed access, authentication and the requested package version.
- Unsupported project: identify its SDK and target framework. C# Dev Kit doesn’t support .NET Framework projects.
- Missing native library or architecture mismatch: check the dependency’s supported operating systems and CPU architectures.
If a single project inside a solution fails, investigate that project’s requirements. Reinstalling the editor won’t repair a missing database service or make an incompatible native library load.
A Designer or Extension Is Missing
Check the component name in Visual Studio Installer, then the extension’s supported version and architecture. A missing workload may be fixable through Modify. A component unavailable on ARM needs a compatible Windows environment.
For database work, check the SSDT limitations. More VM memory won’t add the missing T-SQL debugger or LocalDB support.
Builds Are Slow or Memory Is Tight
Start by separating package download time from compilation. A first restore may need the network, while later builds can reuse downloaded packages and existing outputs.
- Keep the active Windows checkout on the VM’s local disk while diagnosing shared-folder or file-watching delays. Use version control to move changes between environments.
- Compare Activity Monitor > Memory Pressure on the Mac with Windows Task Manager. If the host is already swapping, assigning more RAM to Windows can make the overall problem worse.
- Stop unused applications or services before changing allocations, then repeat the same project task.
- If the project exceeds Standard’s VM limits, compare Pro on a Mac with enough physical resources against a suitable remote machine.
Offline work also depends on the project. Cached packages and installed tools help, but private feeds, remote databases and licensing checks may still require a connection.
Check Your Project’s Requirements
Parallels gives you a Windows environment, but the repository still decides which tools must be installed in it. Use the build instructions or assignment to check the framework, required workloads and extensions before importing a large project.
| Your Project Needs | Setup | Check Before Committing |
|---|---|---|
| The full Windows Visual Studio IDE | Visual Studio with Parallels Desktop | Required version, workloads and extension architecture |
| WinForms or WPF designer | Visual Studio in the Windows VM | Framework, third-party controls and designer support on ARM |
| .NET Framework or an older Windows project system | Windows with the team’s required tools | Targeting packs and build tools; some dependencies need x64 Windows |
| SQL database or BI project | Check the exact SQL tooling | SDK-style versus original SQL project, SQLCLR and the BI extension |
| Modern .NET console, library, test or ASP.NET Core project | Parallels if you need Visual Studio; native Mac tools are an alternative | Packages, local services and native libraries |
| A dependency that requires x64 Windows | A compatible remote x64 machine when your local VM uses ARM | Confirm the remote machine meets the requirement |
A solution file is only a container for projects. Being able to open a .sln doesn’t mean the editor supports everything inside it.
Read the Project Files
You don’t need to understand every line of XML before choosing a setup. These are the details worth checking:
global.json: selects a .NET SDK, subject to its roll-forward policy. It can request an SDK you haven’t installed even when another SDK works in Terminal.TargetFrameworkorTargetFrameworks: names the framework each project targets.net10.0,net10.0-windowsandnet48describe different requirements.UseWPFandUseWindowsForms: indicate Windows desktop UI dependencies. A cross-platform editor doesn’t make these applications run on macOS.- Project SDKs and build imports: can require additional tooling beyond the base .NET SDK.
- Native dependencies: a package may call an operating-system library or require a particular CPU architecture. Its C# wrapper doesn’t remove that dependency.
Microsoft’s SDK selection documentation explains why the SDK selected inside a repository can differ from the one selected elsewhere. Keep the team’s global.json intact while you establish the required installation.
For .NET MAUI, iOS and Mac Catalyst builds need Xcode on the Mac itself, and the Android emulator doesn’t run in a Windows ARM VM, so MAUI work usually happens natively in macOS with VS Code and the .NET MAUI extension. Unity has its own platform setup beyond the basic console app.
Check SQL and BI Projects Separately
The SQL project format determines which tools you need. Microsoft supports SDK-style SQL database projects built with Microsoft.Build.Sql, including a VS Code development route. SQLCLR introduces a .NET Framework build dependency, so it needs a separate compatibility check.
For a Windows setup, the SSDT installation documentation makes several distinctions that matter:
- Visual Studio 2026 on ARM64 includes SSDT, but its SQL projects lack T-SQL IntelliSense and code completion.
- The T-SQL debugger isn’t available in that ARM64 setup.
- Visual Studio on ARM64 can’t connect to LocalDB. An assignment that assumes a local LocalDB instance needs another arrangement.
- SSIS, SSAS and SSRS use separate extensions. Check the exact extension’s supported Visual Studio version and architecture. Installing SSDT doesn’t establish compatibility for these tools.
If a database course depends on one of those missing features, arrange a compatible Windows machine before paying for a VM license.
When Native Mac Tools Are Enough
If you don’t need the full Visual Studio IDE, a compatible modern .NET project can run directly in macOS. This is an alternative to the Parallels tutorial, particularly for a console app or ASP.NET Core service with no Windows-only dependencies.
- Install Microsoft’s .NET SDK for macOS: Arm64 for Apple Silicon or x64 for Intel, on a supported macOS release. The runtime alone doesn’t include build tools.
- Install Visual Studio Code and Microsoft’s C# Dev Kit. Its current listing requires the .NET 10 SDK; keep another SDK alongside it if the repository pins that version.
- Open the repository folder containing the solution or
.csproj, then use its restore, build and test instructions. If you need a first project, Microsoft’s C# setup guide walks through creating a console app. - Add a breakpoint on an executable line and choose Run > Start Debugging. Select the C# project if prompted, following the debugging instructions.
C# Dev Kit licensing is separate from VS Code being free. It’s free for personal, academic and open-source use and for commercial teams of up to 5 people; larger commercial teams need a Visual Studio Professional or higher subscription.
Rider is another native .NET IDE, with free noncommercial use and separate commercial licensing. Neither editor removes a project’s Windows dependencies. If your assignment requires Visual Studio and a Windows designer, continue with the Parallels setup.
Use a Remote Windows Machine
A remote Windows computer is useful when the project requires an environment your local VM can’t provide. This might be an employer’s development PC or a dedicated cloud desktop. Confirm its architecture as well; “remote” doesn’t automatically mean x64.
This route is worth considering when:
- A required extension or dependency supports x64 Windows but not your Windows ARM VM.
- Your organization supplies an approved development image or requires source code to stay on managed infrastructure.
- The project needs more memory or storage than your Mac can give Windows comfortably.
Install the required Visual Studio version on that machine, keep the repository there and connect through the approved remote-access client. The build executes on Windows. Your Mac displays the session and sends your input.
The tradeoff is the connection: latency affects interaction, and a lost connection interrupts access. A suitable remote desktop also needs permission to reach the repository and any private package feeds.
Microsoft Dev Box is being retired: its closing-down period started on September 14, 2026 and the service ends on September 18, 2028. Existing deployments stay supported during the transition, but Microsoft recommends Windows 365 for new virtualized developer environments, so I wouldn’t build a new setup on Dev Box.
The broader Windows apps on Mac guide covers other applications and Windows-running methods. For development, confirm that the remote machine supports the exact workload before provisioning it.
Frequently Asked Questions
Can I install Visual Studio directly on macOS?
The full Windows Visual Studio IDE doesn’t install as a native macOS app. Run it in a compatible Windows VM or connect to a Windows computer. Visual Studio for Mac was a separate product and is retired.
Can I still download Visual Studio for Mac?
Microsoft says Visual Studio subscribers can access it through the subscription portal. Download access doesn’t restore support or security updates. It isn’t a suitable starting point for a new supported setup.
What if my course specifically requires Visual Studio 2022?
Follow the course’s required version and workloads, or get approval to use an alternative. Visual Studio 2022 gained native Windows ARM64 support in version 17.4, but you still need to check its components and required extensions. A compatible remote x64 Windows machine is an option when the local ARM setup can’t meet those requirements.
Do I need Parallels to learn C# on a Mac?
No. A modern console application can build and run natively with the .NET SDK and a suitable editor. You need Windows when the course or project requires Windows-specific tooling.
Can VS Code open a Visual Studio solution?
Yes, with suitable C# project tooling. Support depends on the projects inside the solution, including their target frameworks and dependencies. Opening the solution is only the first check; build and debug the project you need to use.
Does C# Dev Kit support .NET Framework projects?
No. Microsoft explicitly excludes .NET Framework projects. Delegating project loading to the underlying C# extension is a separate configuration with fewer Dev Kit features, not Dev Kit support for .NET Framework.
Is Visual Studio on Mac free?
The .NET SDK and VS Code are free, and Visual Studio Community is free for qualifying use. A Windows VM can still require paid virtualization software and a Windows license. Check the IDE, extensions and operating-system licenses separately.
Final Remarks
With Windows running in Parallels Desktop, Visual Studio can build and debug your project while your Mac apps stay open. Before treating the setup as ready for daily work, repeat the build and breakpoint checks with the repository you’ll actually use, including its required designer or extension.
Keep the VM’s resource allocation within what your Mac can support. If a particular dependency fails on Windows ARM, check that requirement directly; reinstalling Parallels won’t change the architecture it needs.
Appendix: July 2026 .NET Build Results
The original July 14, 2026 comparison recorded command-line build and test times for a small prime-counting solution. These are historical environment observations, not a measurement of which IDE is faster.
- Mac: Apple M5 Pro, 24 GB unified memory, macOS 27.0 beta build 26A5378j.
- Native tools: VS Code 1.127.0 ARM64, C# Dev Kit 3.20.199 and C# extension 2.140.9.
- Windows VM: Parallels Desktop 26.4.0 build 57513, Windows 11 Pro ARM64 build 26200.8653, 4 vCPUs and 8 GB RAM.
- Windows IDE: Visual Studio Community 2026 18.7.3, build 18.7.11925.98.
- Both toolchains: .NET SDK 10.0.301 and runtime 10.0.9, ARM64.
- Project:
ParallelsBench.sln, a console application and an xUnit project with 4 tests. The Windows copy lived on the VM’s local disk.
| Recorded Measurement | macOS | Windows ARM VM |
|---|---|---|
| Clean build with packages already cached | 2.15 seconds | 2.44 seconds |
| Test command elapsed time | 1.35 seconds | 4.87 seconds |
| Tests passed | 4 | 4 |
The clean build finished within 0.3 seconds on both sides. The test command took about 3.6 times as long in the VM, which is where virtualization and process startup overhead would show, though a single run can’t separate the two.
The first Windows restore/build took 14.85 seconds while downloading dependencies. It isn’t comparable to the Mac’s already-cached build.
These were single runs of a small solution on a beta macOS build, so read them as a rough sense of VM overhead. Before planning around a number, time your own solution the same way.
Tell Google you want more of this.
Add Gaurav Tiwari as a preferred sourceOne tap, and this site shows up more often in your own Top Stories, AI Overviews and AI Mode. Remove it any time.
Disclaimer: This site is reader-supported. If you buy through some links, I may earn a small commission at no extra cost to you. I only recommend tools I trust and would use myself. Your support helps keep gauravtiwari.org free and focused on real-world advice. Thanks. - Gaurav Tiwari