Best Strategies for WordPress Image Optimization: Tools and Settings
WordPress image optimization is often the fastest way to fix a slow LCP. If the largest visible element is a 1 MB featured image, your server can be perfect and the page will still feel heavy.
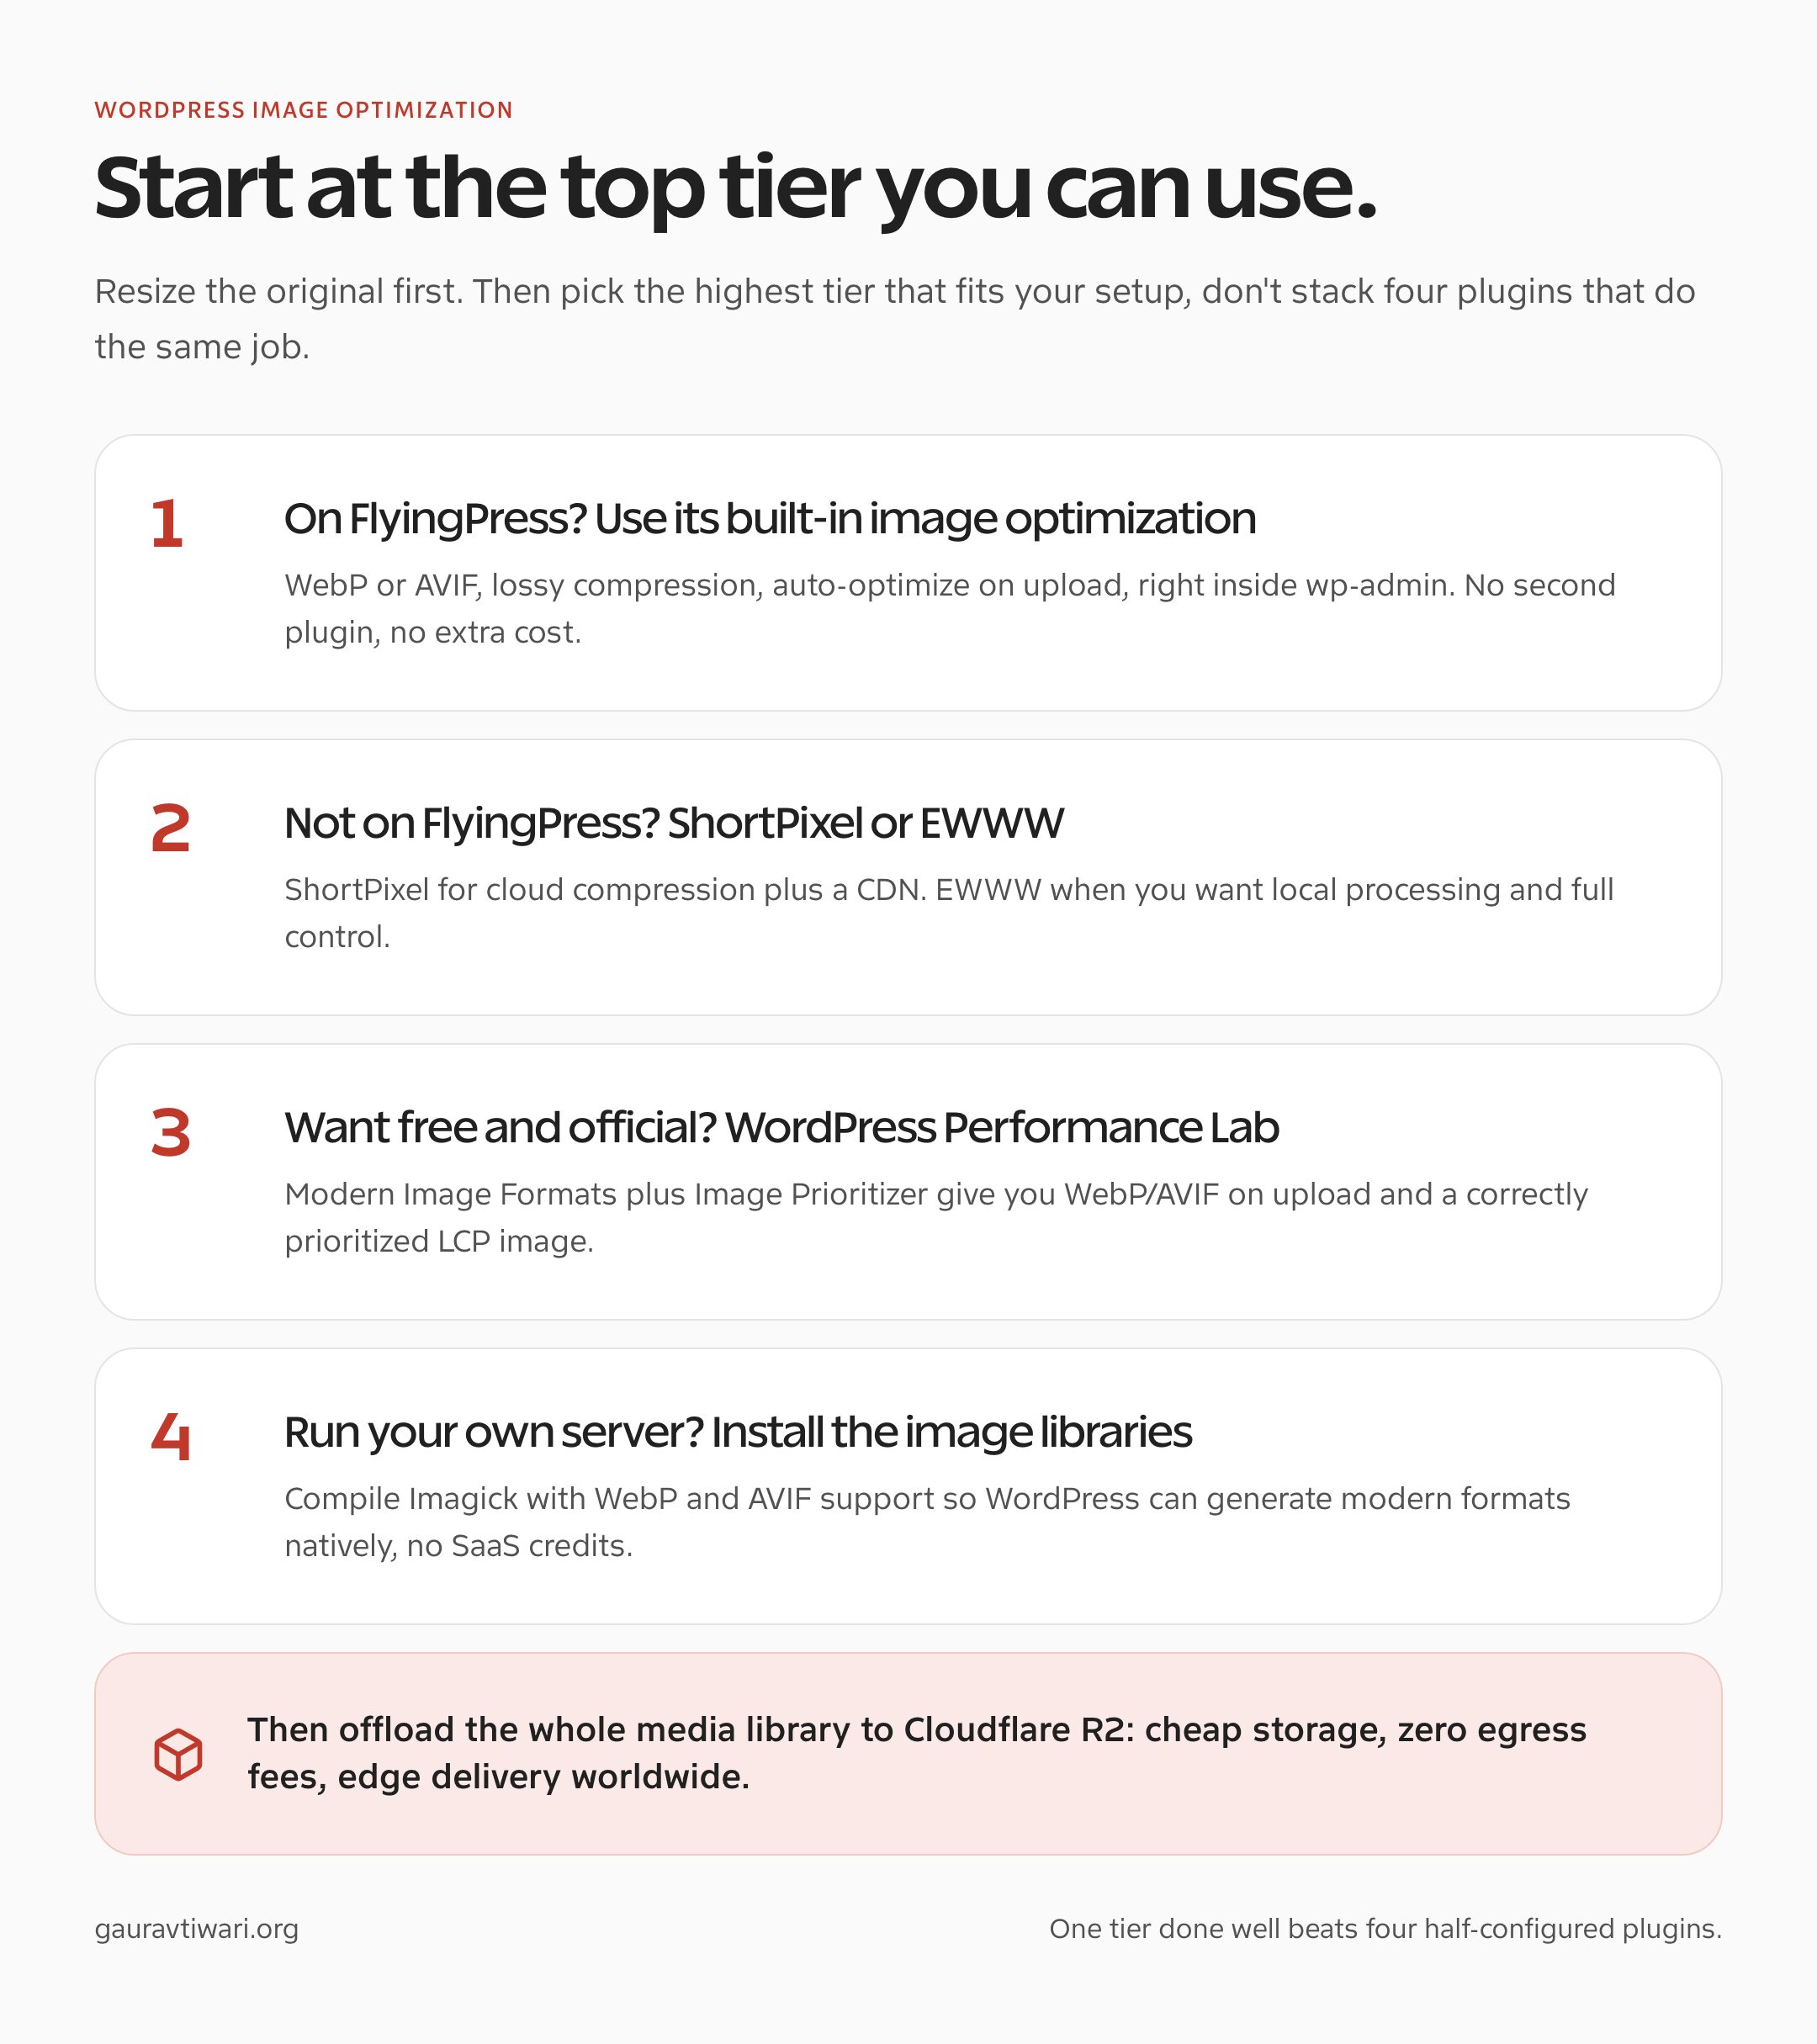
The workflow is simple: resize uploads, compress them, serve WebP or AVIF, use responsive image sizes, avoid lazy-loading the hero image, and move heavy media through a CDN or object storage once the library grows. The only real decision is which tool does that work, and that depends on your stack.
Quick verdict: if you run FlyingPress, use its built-in image optimization and skip the extra plugins. If you don’t, ShortPixel or EWWW cover most sites, WordPress core’s free Performance Lab plugins handle the rest, and Cloudflare R2 is the cheap long-term home for the files.
Quick answer: good WordPress image optimization uses properly sized images, WebP or AVIF, compression, responsive sizes, correct lazy loading, and edge delivery. FlyingPress does all of it natively. If you’re not on FlyingPress, reach for ShortPixel or EWWW, the free WordPress Performance Lab plugins, native server libraries, and Cloudflare R2 for storage.
Why Images Break WordPress Speed
Images break WordPress speed because the CMS makes publishing easy. That is wonderful until someone uploads a 3000px screenshot, inserts it full-width, and lets mobile users download the original file. I have seen this more times than I want to admit.
The first audit step is simple: find the LCP element. If it is an image, check the delivered size, format, dimensions, and preload behavior. The Core Web Vitals guide explains the metric side.
Start With FlyingPress: Image Optimization Built Into WordPress
My first choice is the one most guides miss. If you already run FlyingPress for caching, it does image optimization natively in the WordPress admin, with no extra plugin and no separate subscription. You open the Images tab, pick a format and compression level, and it handles the rest.
Here is exactly what the built-in optimizer gives you:
- Format: convert to WebP, AVIF, or keep the original.
- Compression: Lossy or Lossless, controlling the quality-to-size balance.
- Auto-optimize new uploads: every image you add is processed automatically.
- Device resizing: images are sized to the visitor’s screen instead of shipping one huge file.
- Safety net: originals are kept so you can restore them, or delete them to reclaim disk space.
- Exclusions: skip specific images by filename or keyword.

This isn’t theory. On one of my sites, FlyingPress has processed over 135,000 images from the media library through this single panel. Because processing runs on FlyingPress servers, your host never has to grind through the encoding. If you’re weighing the plugin itself, I break down the caching side in my FlyingPress review.
The honest catch: FlyingPress is a premium caching plugin. This path only makes sense if you already use it (or plan to) for performance. If you don’t, the free and paid options below cover the same ground.
Not on FlyingPress? Use ShortPixel or EWWW
If FlyingPress isn’t part of your stack, these are the two dedicated plugins I recommend before anything else. They cover the two ends of the spectrum: cloud convenience and local control.
- ShortPixel for hands-off cloud optimization: aggressive compression, WebP and AVIF, plus the Adaptive Images CDN that serves the right format to each browser automatically. Best for most content sites.
- EWWW Image Optimizer for local control: compresses on your own server with no per-image credits, so it’s ideal if you’re privacy-conscious, cost-sensitive, or managing several sites.
Both convert to modern formats and exclude the LCP image from lazy loading when configured correctly. I tested these two against six other plugins, and the full comparison, with reduction percentages and pricing, is further down this guide.
The Free, Official Route: WordPress Performance Lab Plugins
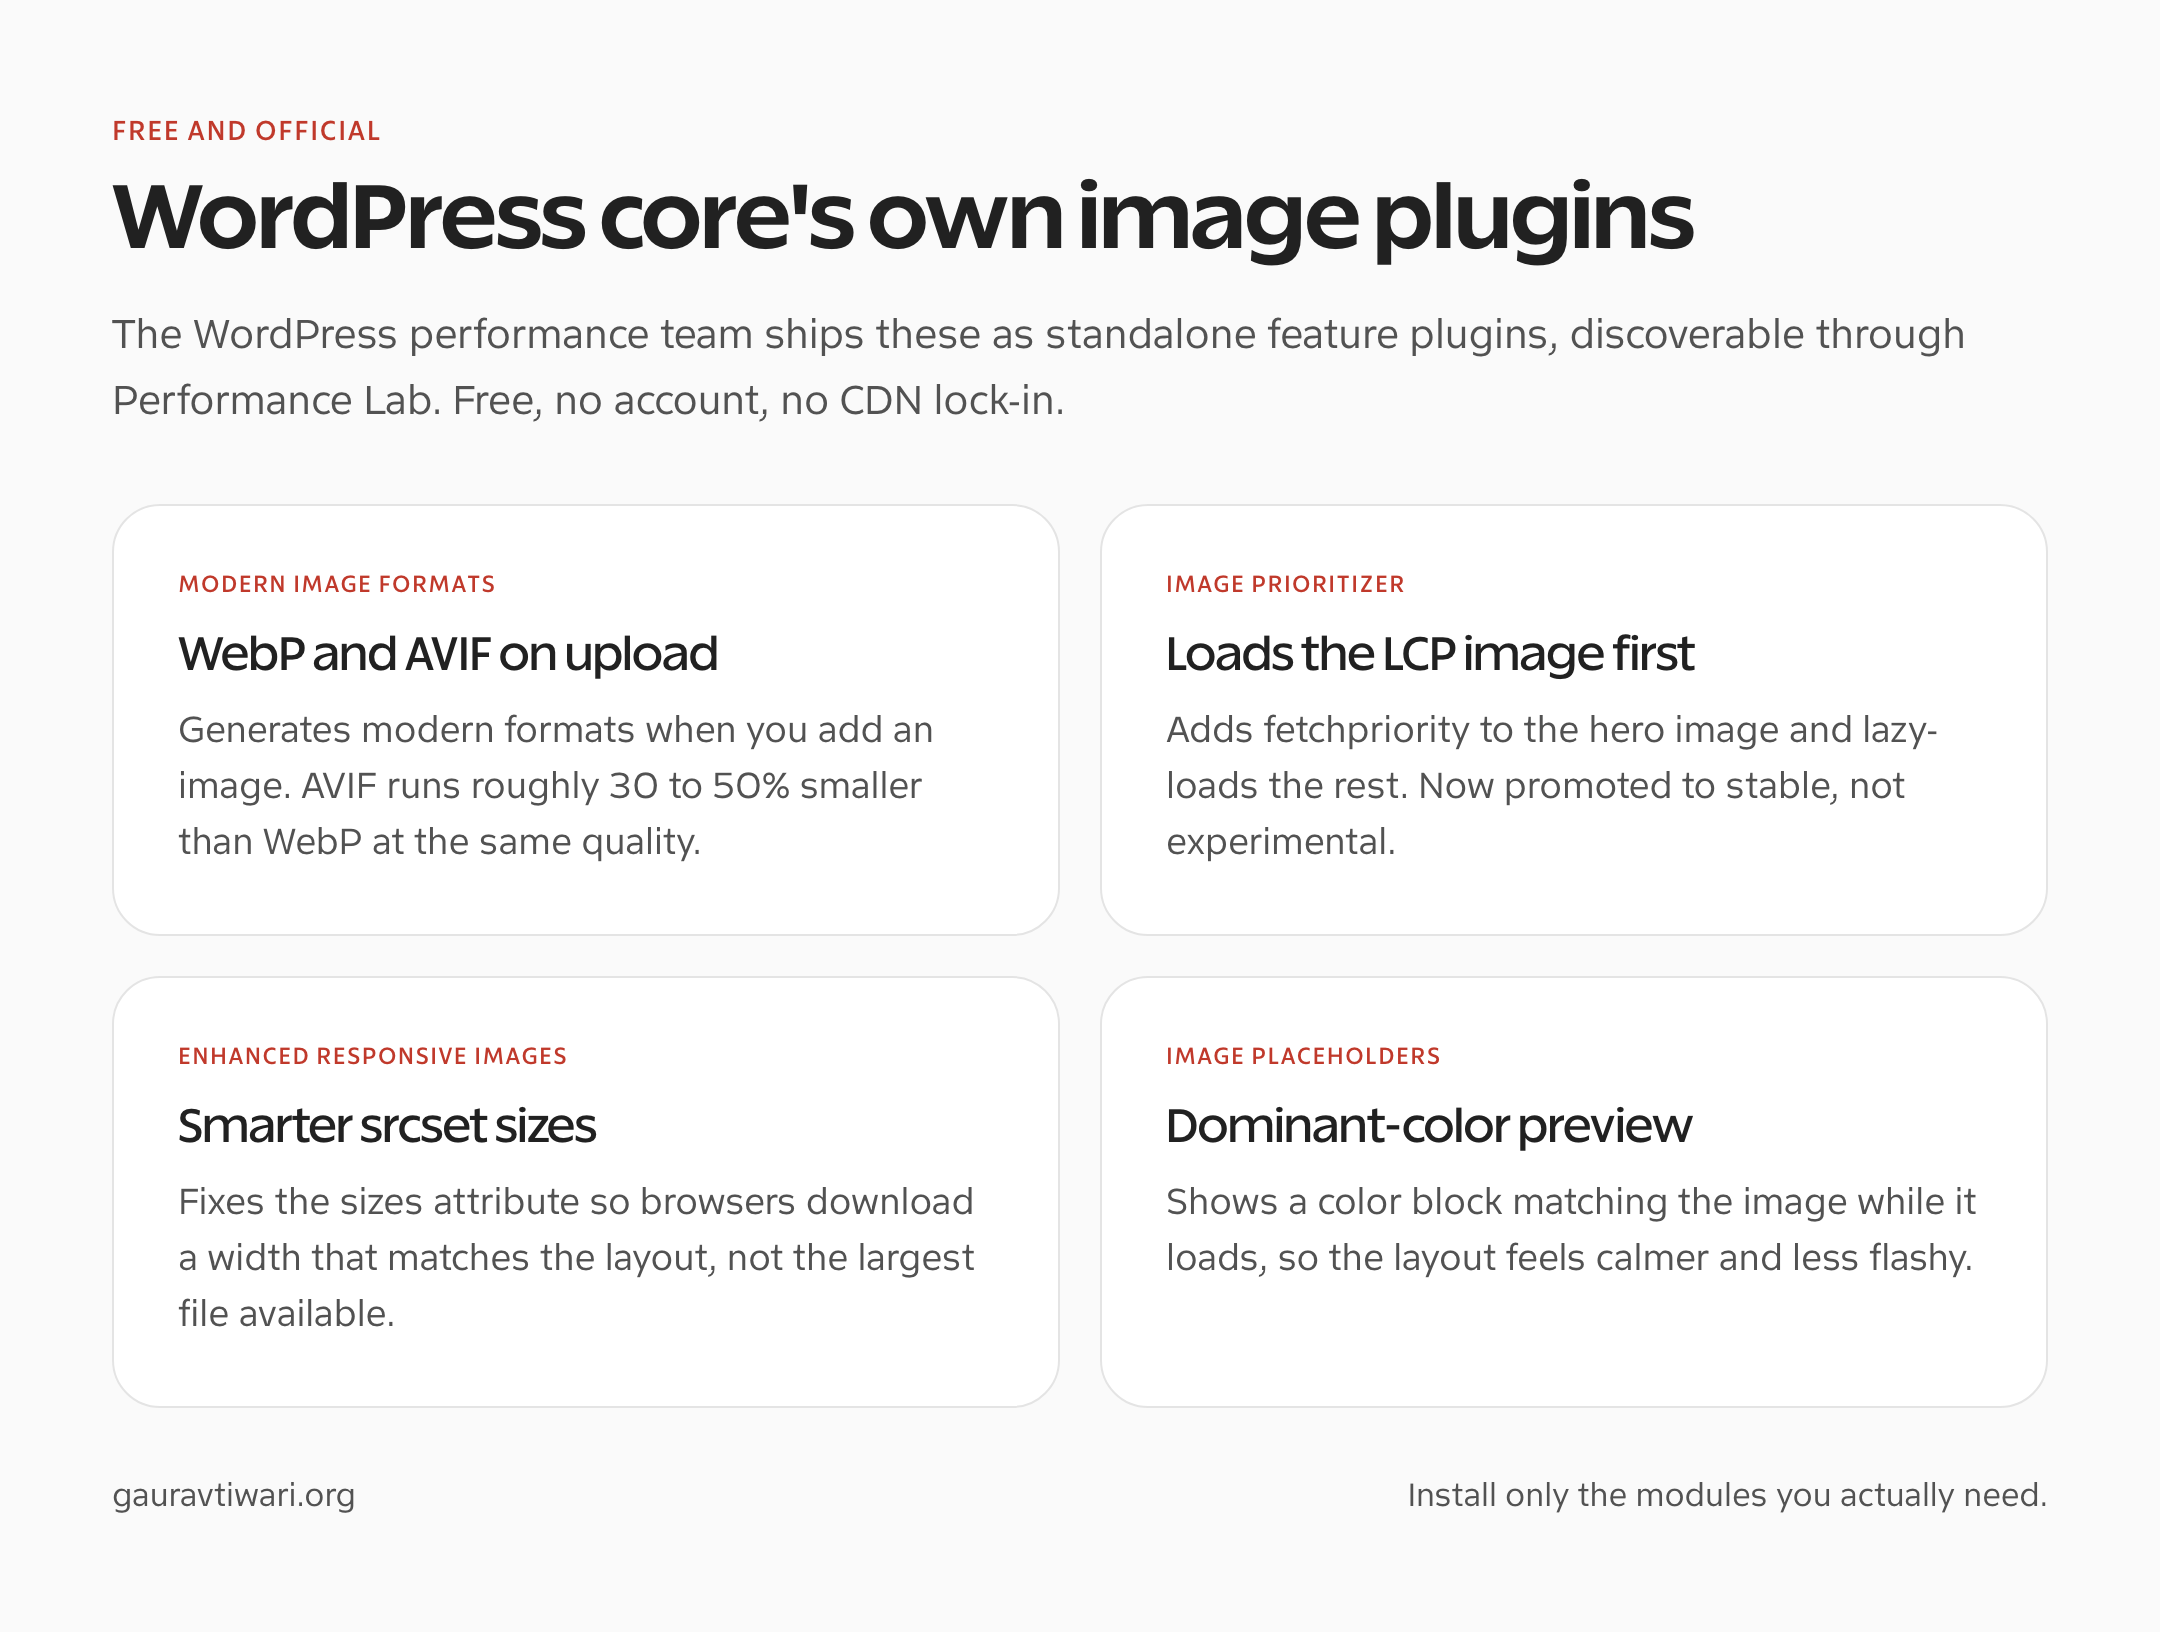
The WordPress core performance team ships its own image tools as standalone feature plugins, and they cost nothing. They’re the closest thing to “official” image optimization, and each one does a single job well:
- Modern Image Formats: generates WebP (and AVIF, which runs roughly 30 to 50% smaller than WebP) when you upload an image.
- Image Prioritizer: adds
fetchpriorityto the LCP image and lazy-loads the rest. It’s now stable, not experimental. - Enhanced Responsive Images: fixes the
sizesattribute so browsers pick a width that matches the layout instead of the biggest file. - Image Placeholders: shows a dominant-color background while the image loads, which calms the layout shift.
Install the Performance Lab plugin from the WordPress.org directory to discover and activate each module, or install any of the four standalone plugins directly. This is the route I’d send anyone who wants results without a paid subscription.
Formats: WebP, AVIF, and When JPEG Still Exists
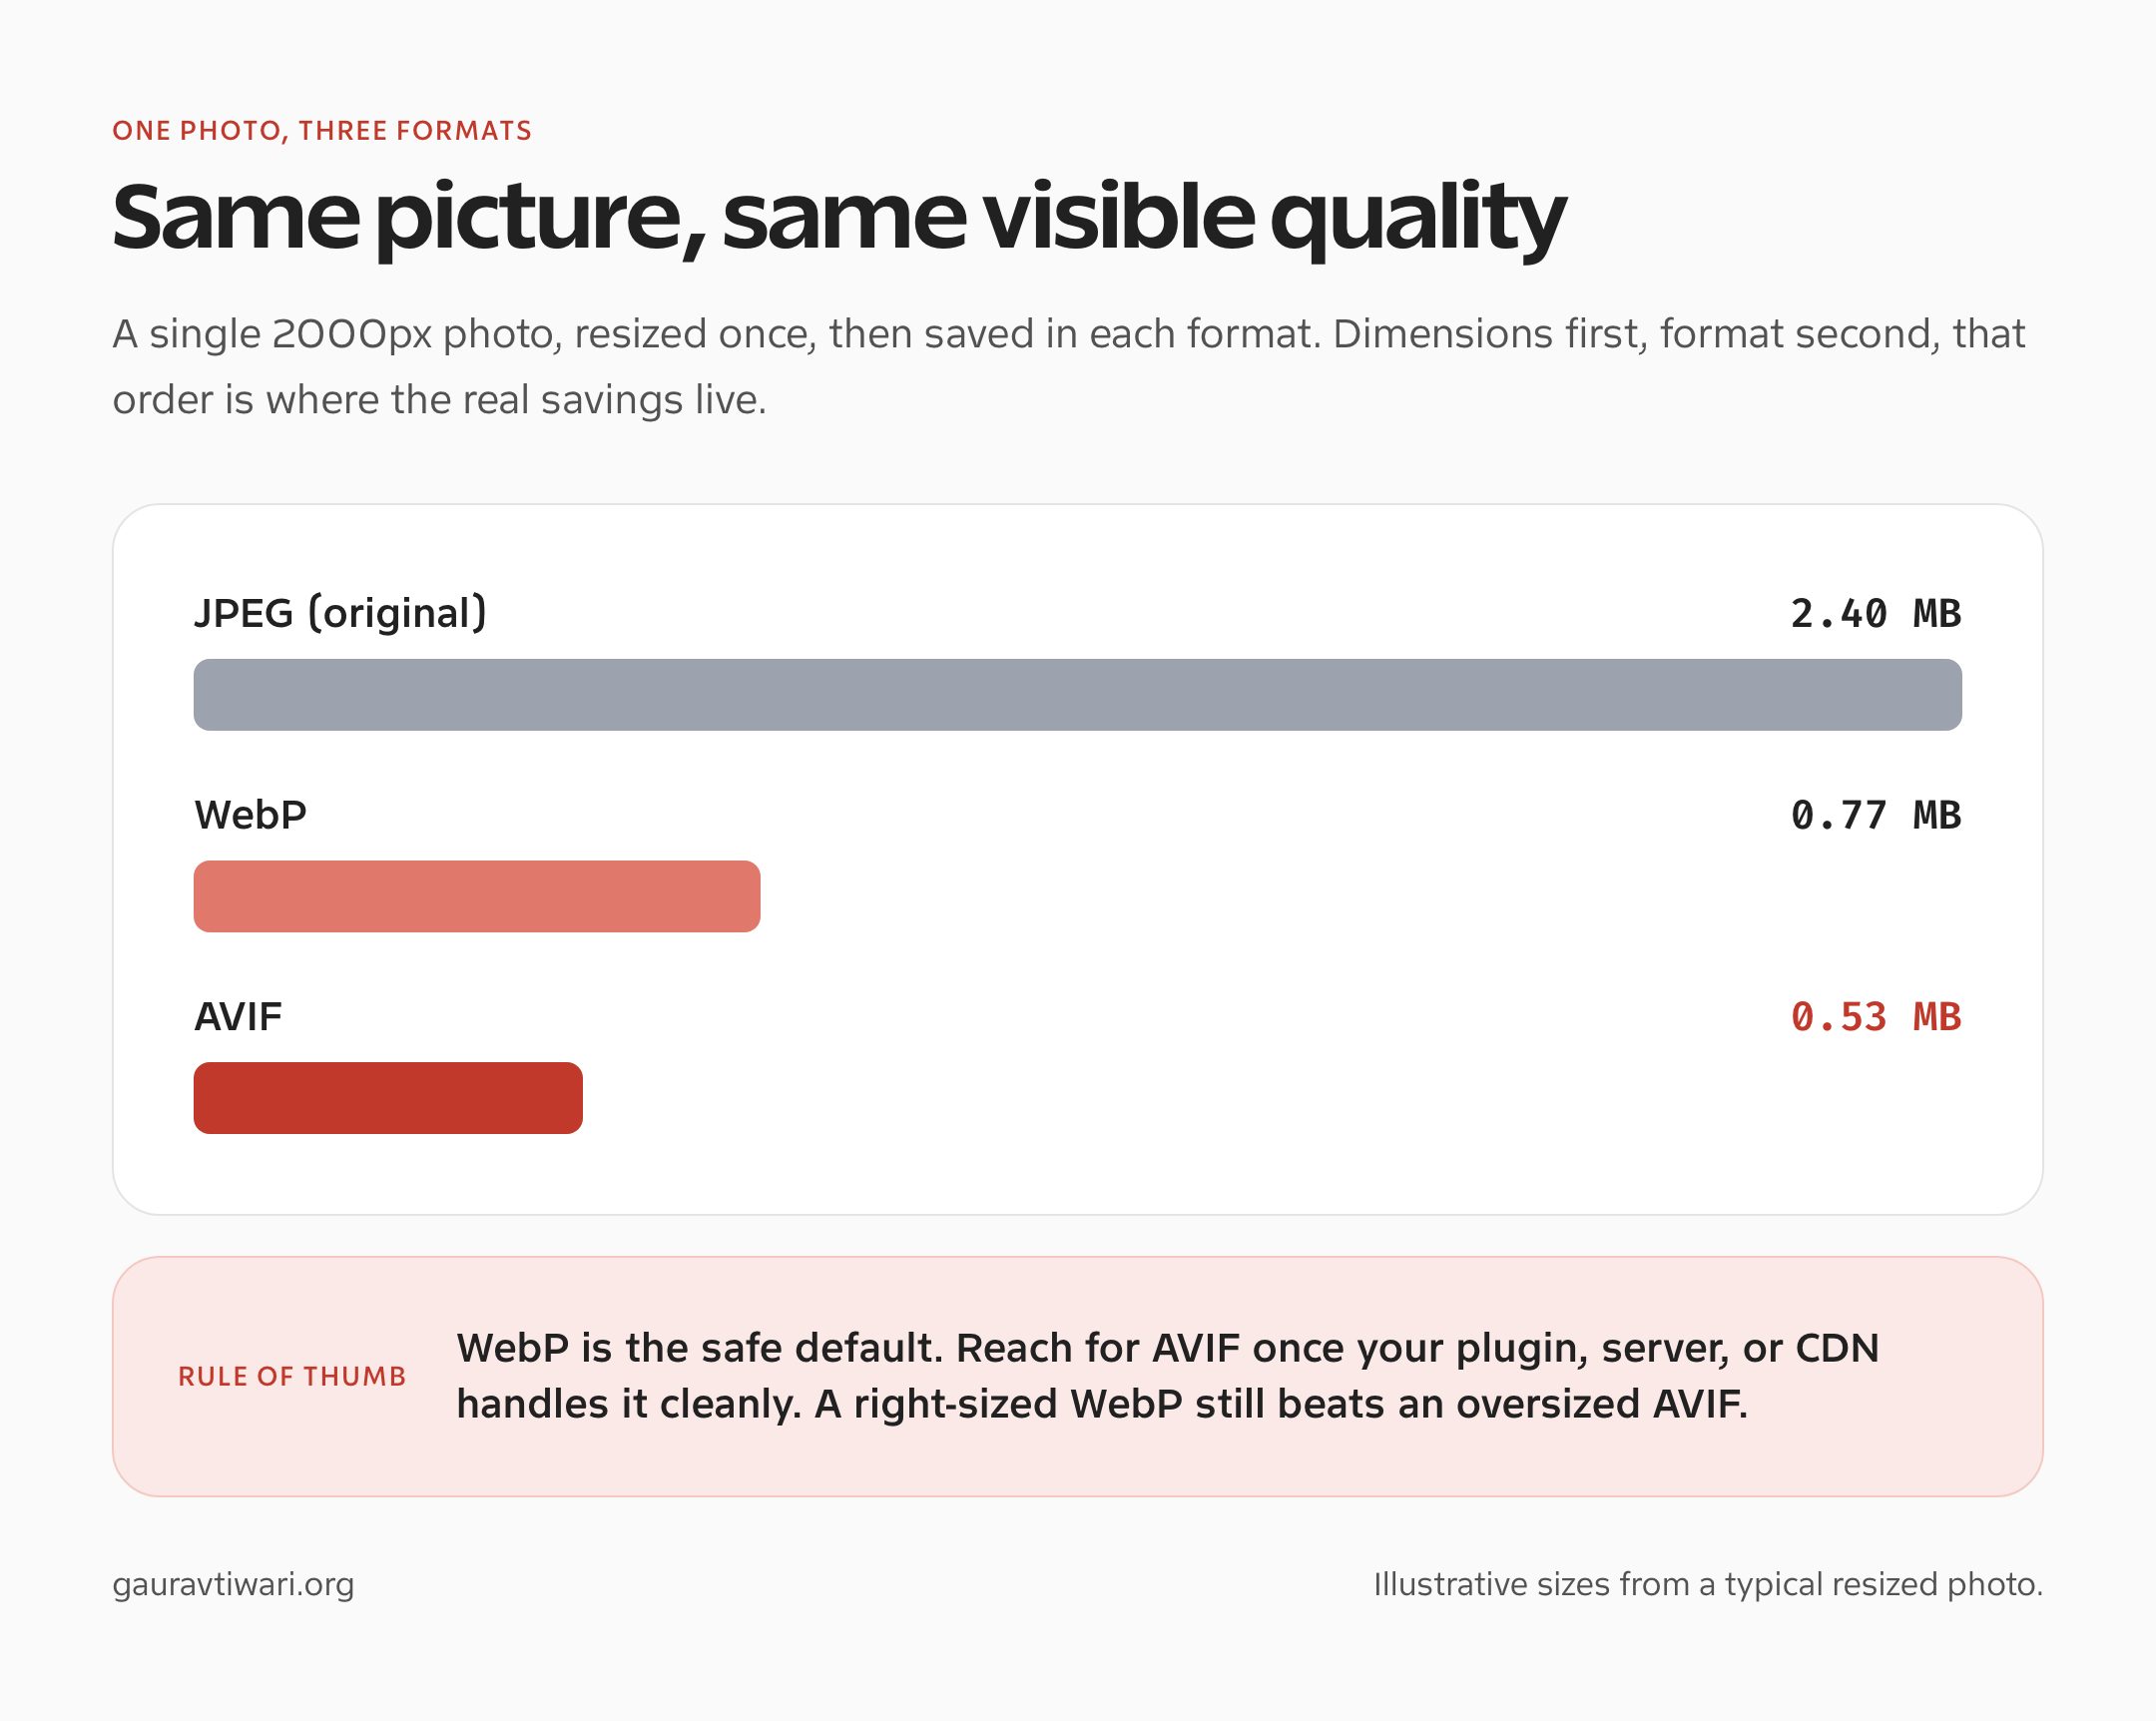
WebP is the safe default. AVIF is usually smaller at similar quality, but the encoding can be slower and tooling varies. JPEG still has a place for compatibility and source files, but it should not be the only format you serve on a performance-focused WordPress site.
Do not chase file format like it is a religion. A correctly sized WebP beats an oversized AVIF. The order that saves time: dimensions first, compression second, format third, delivery fourth.
Running Your Own Server? Install the Image Libraries
If you manage your own VPS or dedicated server, you don’t need a SaaS optimizer at all. WordPress can generate WebP and AVIF natively, but only if the right encoders are installed at the system level. This is the zero-credit, zero-monthly-fee path, and it’s the one I use on self-managed boxes.
What WordPress actually needs on the server:
- Imagick (or GD) with modern-format support so PHP can encode WebP and AVIF. WordPress 6.5+ outputs AVIF automatically when Imagick supports it.
- libwebp for WebP encoding and libavif / libheif (backed by libaom) for AVIF.
- Optional but faster: libvips for lower-memory processing, plus mozjpeg and pngquant for tighter JPEG/PNG compression.
On a Debian or Ubuntu server, the install is short:
# Install ImageMagick + PHP Imagick + WebP/AVIF encoders
sudo apt update
sudo apt install -y imagemagick php-imagick webp libavif-bin

# Reload PHP so the extension loads (match your PHP version)
sudo systemctl restart php8.3-fpm

# Verify the formats are available
convert -list format | grep -Ei "webp|avif"
php -r 'print_r(Imagick::queryFormats("WEBP")); print_r(Imagick::queryFormats("AVIF"));'
Then confirm it inside WordPress at Tools, Site Health, Info, Media, where it reports which formats the image editor supports. Once AVIF and WebP show up there, every new upload gets modern formats without a single third-party service.
Cloudflare R2: Cheap Image Storage That Compounds
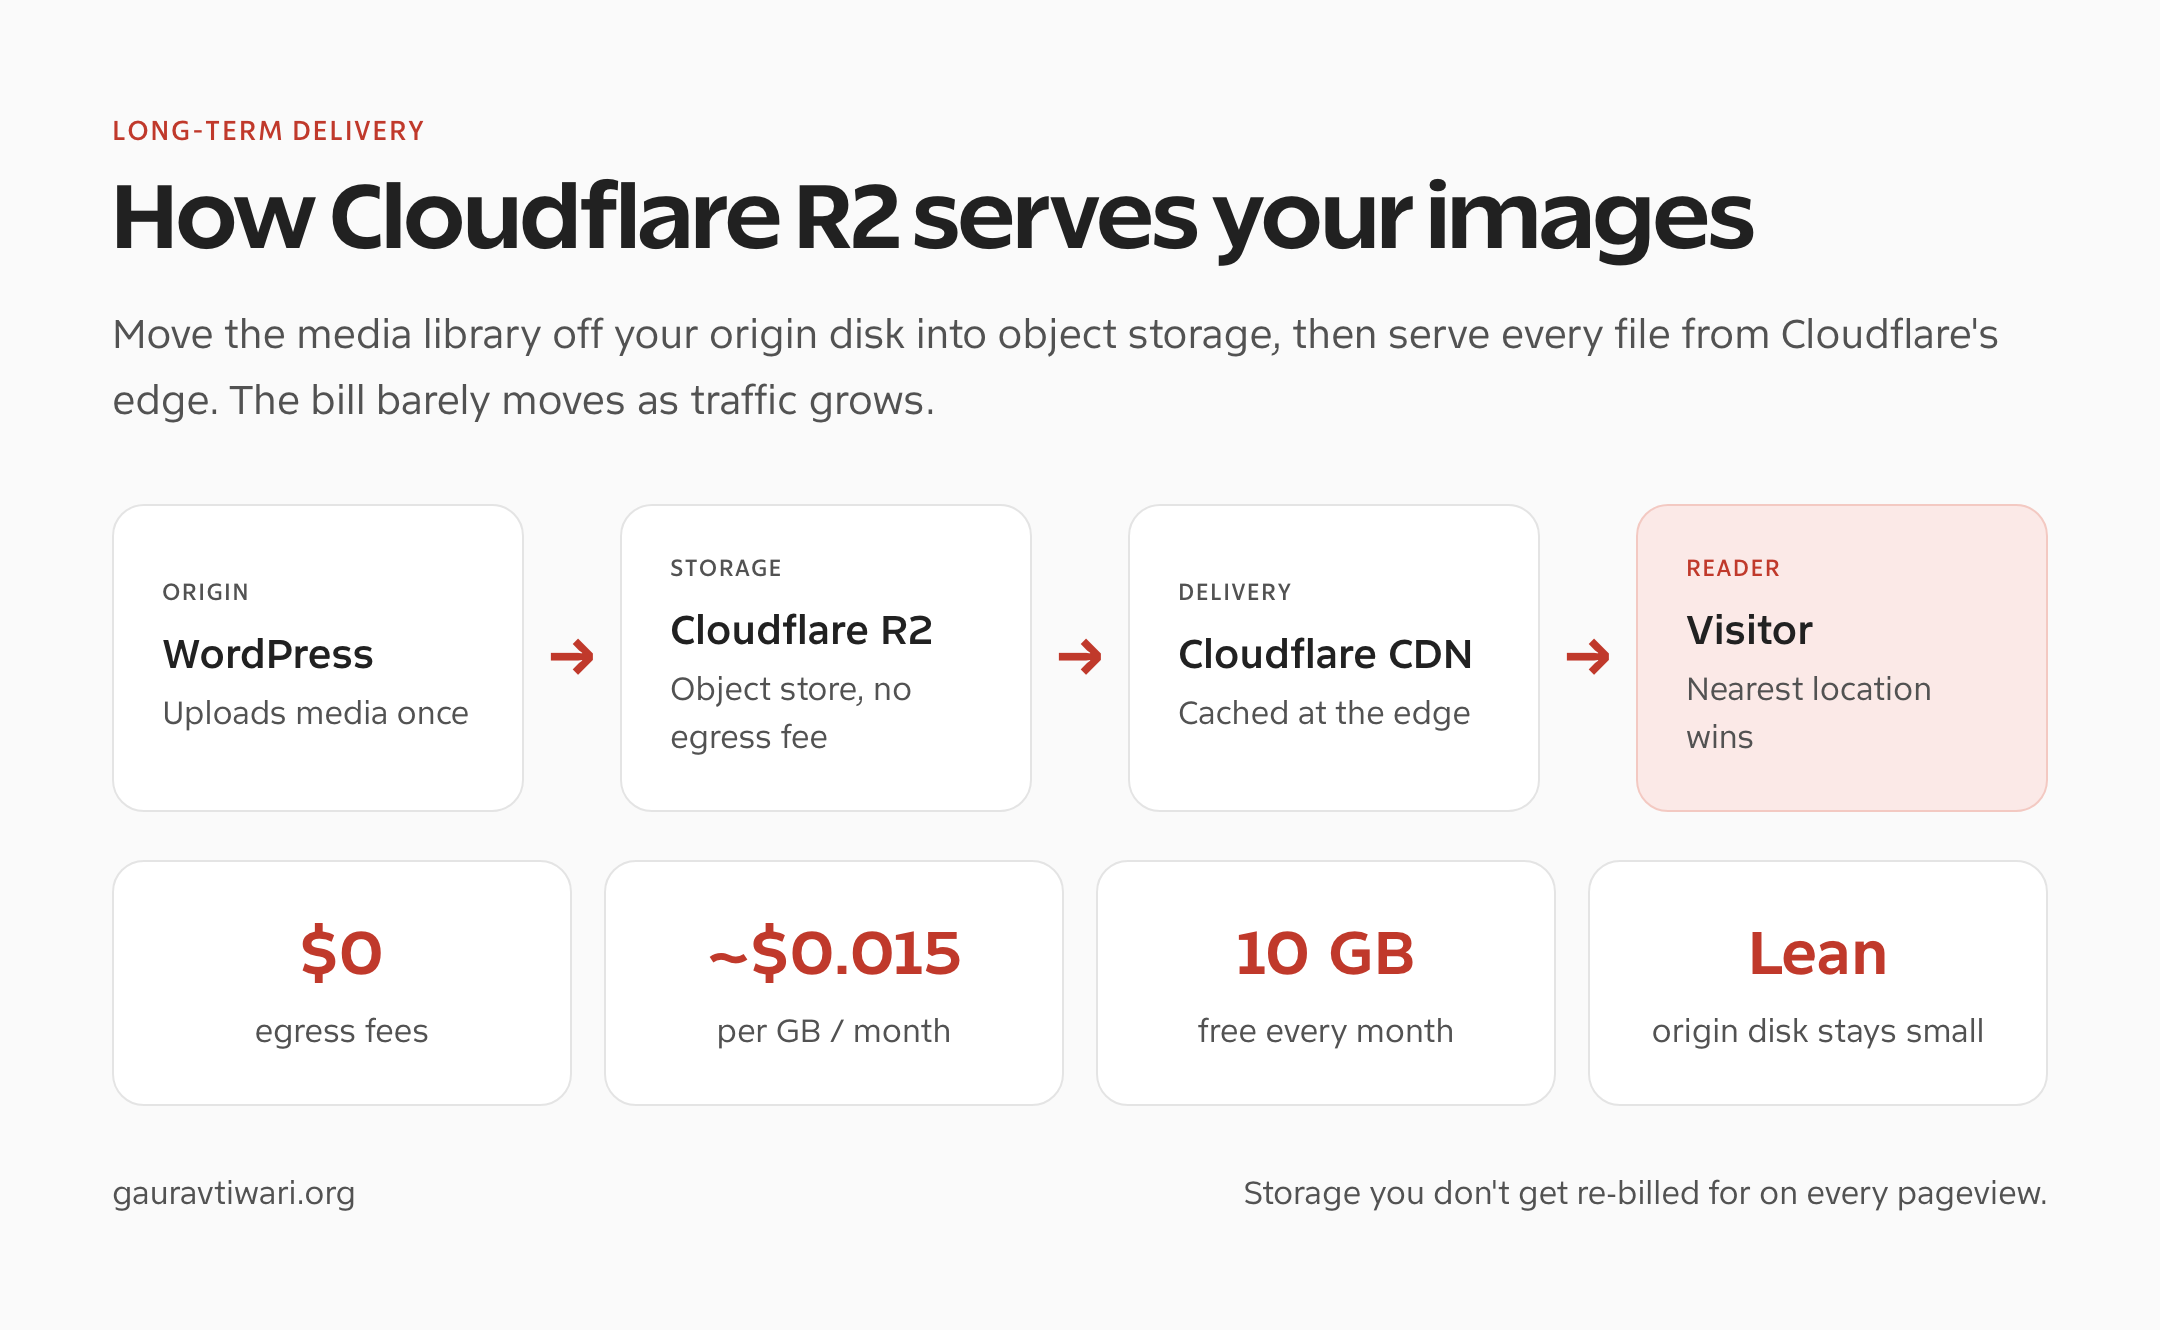
Optimizing images is half the job. Storing and delivering them cheaply, forever, is the other half. I serve this site’s entire media library from Cloudflare R2 (every image on this page loads from r2.gauravtiwari.org), and it’s the setup I’d keep for the long run.
Why it pays off as the site grows:
- Zero egress fees: unlike Amazon S3, R2 never bills you for bandwidth. A viral post costs the same as a quiet one.
- Cheap storage: roughly $0.015 per GB per month, with the first 10 GB free.
- Lean origin: the media library moves off your host’s disk, so backups and server plans stay small even with tens of thousands of images.
- Edge delivery: files cache on Cloudflare’s global network, so a reader in Sydney and one in Berlin both get a nearby copy.
- S3-compatible: standard offload plugins connect to it, so setup is a known path, not a science project.
The long-term logic is simple: egress-billed CDNs get more expensive every time traffic climbs, while R2 storage cost barely moves. Pair it with FlyingPress or ShortPixel for optimization and you’ve split the two jobs cleanly, one tool makes images small, R2 keeps them cheap to store and fast to serve. For the wider delivery picture, see my WordPress CDN guide.
Lazy Loading Rules That Matter
Lazy loading is useful below the fold and harmful on the LCP image. WordPress lazy-loads many images by default, but performance plugins can change that behavior. Always check the rendered HTML of the hero image.
- Do not lazy-load the hero image when it is the LCP element.
- Add width and height attributes so layout stays stable.
- Use responsive
srcsetsizes instead of one huge image. - Lazy-load below-the-fold gallery and related-post images.
- Preload only the image that is truly needed early.
This is where FlyingPress and Perfmatters can help, but only if you understand what they are changing.
When You Need an Image CDN
A normal CDN caches files. An image CDN can resize, compress, convert formats, and deliver variants from edge locations. That matters when your site has many images, global readers, or inconsistent upload habits.
For control, I like Cloudflare R2 for WordPress media. For simple paid delivery, Bunny CDN is usually easier. For a broader comparison, use the published WordPress CDN guide.
The Image Optimization Checklist
- Set maximum upload dimensions before authors add thousands of images.
- Pick one optimizer, FlyingPress if you have it, otherwise ShortPixel, EWWW, or the Performance Lab plugins. Don’t stack them.
- Compress originals and keep backups if the tool supports it.
- Serve WebP or AVIF for modern browsers.
- Check that featured images use the right registered size.
- Exclude the LCP image from lazy loading.
- Offload the library to Cloudflare R2 (or a CDN) for global or media-heavy sites.
- Retest LCP after changes, not only total page size.
The goal is not the smallest possible file. The goal is a sharp-enough image that arrives early, holds layout space, and does not punish mobile readers.
How I tested
Same 50-image test set on every plugin: 30 JPEGs (photos, average 3.1MB each before upload), 15 PNGs (screenshots and graphics, average 180KB each), 5 transparent PNGs (logos and icons). Clean WordPress 6.8 install. GeneratePress theme. No other optimization plugins active during each test.
Metrics I tracked per plugin:
- Average file size reduction (%)
- WebP output size vs source
- AVIF support (yes/no)
- CDN included (yes/no)
- Free tier credits per month
- First-month pricing for 10,000 images
Quality check: each optimized image was compared to the source at 2x zoom on a 27-inch monitor. Any visible artifact counted as a fail at that compression level.
WordPress Image Optimization Test Notes
One lesson held across every plugin: the biggest gains come from fixing oversized originals and choosing the right format, not from arguing over dashboard scores. Here’s what the numbers showed.
- WordPress 6.5 added AVIF support, and AVIF can be much smaller than JPEG at similar quality when the server supports it.
- WebP remains the safer default for broad compatibility, especially on older stacks and conservative hosting setups.
- ShortPixel, Imagify, EWWW, Optimole, Smush, and Converter for Media all solve slightly different problems. Pick by delivery model, not brand familiarity.
- Do not lazy-load the LCP image. Lazy-load below-the-fold images, galleries, and decorative media.
- A CDN helps when visitors are global or the media library is heavy. It does not fix uploading oversized hero images in the first place.
Summary table
| Plugin | Avg reduction | WebP | AVIF | CDN | Free tier | 10K images |
|---|---|---|---|---|---|---|
| ShortPixel | 68% | Yes | Yes | Yes | 100/mo | $9.99/mo |
| Imagify | 64% | Yes | Yes | No | 20MB/mo | $9.99/mo |
| Optimole | 62% | Yes | Yes | Yes | 5,000/mo | $22.52/mo |
| EWWW | 55% | Yes | Yes | Yes (add-on) | Unlimited (local) | $7/mo |
| Smush | 52% | Pro only | No | Pro only | 5MB/image | $7.64/mo |
| Converter for Media | 58% | Yes | Pro | No | Unlimited (local) | Free |
| reSmush.it | 48% | No | No | No | Unlimited | Free |
Every Image Optimization Plugin I Tested
Here are the standalone plugins from the summary table in detail, ranked by how they performed on the 50-image test set. Each one links to its official WordPress.org page so you can install it straight from your dashboard.
ShortPixel Image Optimizer
Best for: sites over 500 images that need aggressive compression plus CDN delivery in one subscription.
ShortPixel (free on WordPress.org) hit the highest reduction ratio in every category tested. JPEGs compressed 72% at glossy. PNGs compressed 64%. WebP conversion produced files 8 to 12% smaller than competitors on the same source set.
The ShortPixel Adaptive Images CDN is what separates it. You install the plugin, enter an API key, and every image is served from their CDN with the right format for the visitor’s browser: WebP for Chrome, AVIF for newer Safari, JPEG fallback for old browsers. No manual configuration.
Pricing: $9.99/month for 30,000 image credits. AVIF is free with the CDN add-on. Free tier: 100 credits/month, enough for a small blog.
The catch: the credit system gets confusing. One uploaded image uses one credit per generated size (thumbnail, medium, large, WebP, AVIF). That’s about 5 credits per image. Budget accordingly.
Imagify
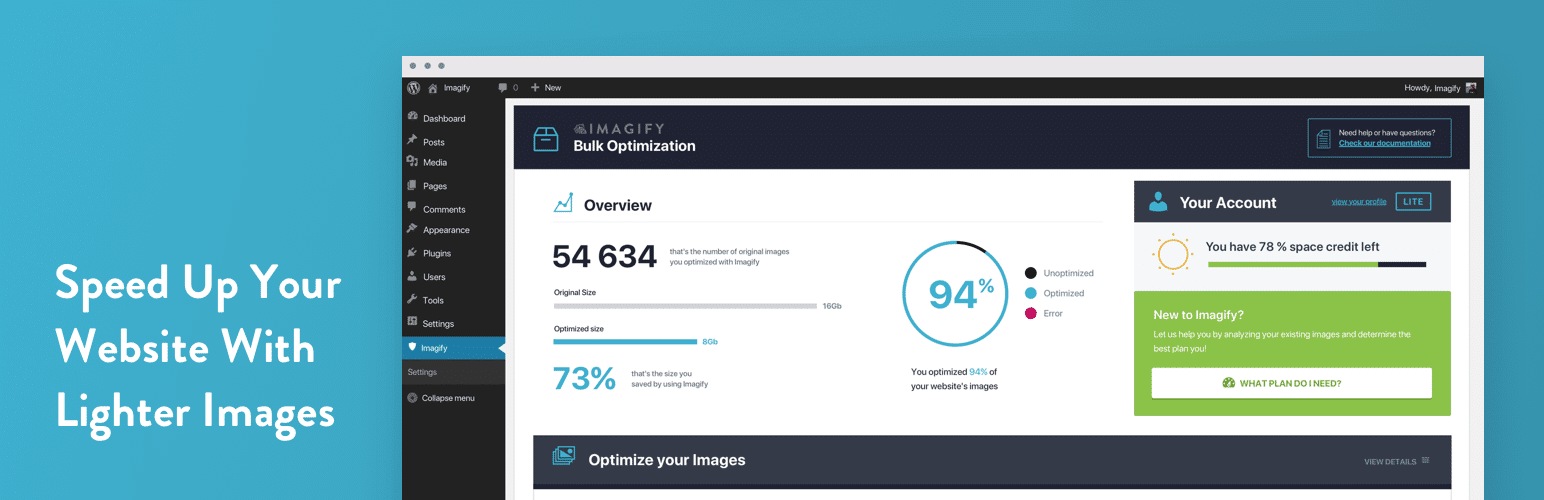
Best for: sites already running WP Rocket that want a bundled plugin ecosystem.
Imagify (free on WordPress.org) is made by WP Media, the same team as WP Rocket, so the integration is cleaner. Compression is slightly less aggressive than ShortPixel (64% vs 68% on the same test) but the quality-to-size ratio is excellent.
Three compression levels: Normal, Aggressive, Ultra. I test at Aggressive. Ultra introduces visible artifacts on photos.
Pricing: $9.99/month for 500MB of monthly optimization (roughly 10,000 images). Free tier: 20MB/month, barely usable.
The catch: no CDN. You optimize and serve locally. Fine on fast hosts; on slow hosts a CDN matters more than compression.
Optimole
Best for: photography portfolios, travel blogs, and sites that need on-the-fly image resizing.
Optimole is CDN-first. You don’t optimize on your server at all: the plugin rewrites every image URL to Optimole’s CDN, which processes, resizes, and serves on demand based on the visitor’s device and connection.
Compression: 62% average. Slightly behind ShortPixel, but the on-the-fly resizing (a 400px image to mobile, 1600px to desktop, from one source) wins back real-world page weight.
Pricing: $22.52/month for 25,000 visits (not images). Free tier: 5,000 visits/month, which is generous.
The catch: the visits-based pricing gets expensive fast. A site with 100,000 monthly visits needs the $77/month plan, and at that point Cloudflare Images is cheaper.
EWWW Image Optimizer

Best for: sites that want to optimize images without cloud dependencies or ongoing credits.
EWWW Image Optimizer (free on WordPress.org) runs compression locally on your server using binaries (jpegtran, optipng, pngquant). No API calls, no credits, no monthly limits on the free tier.
Compression: 55% average. Lower than cloud alternatives because local binaries can’t match ShortPixel’s server-side algorithms.
The API add-on (Easy IO, $7/month for 10K images) moves compression to their cloud and adds WebP/AVIF plus a basic CDN. It is the cheapest paid option in this list.
The catch: the UI looks like 2014, because it was. Functional but frustrating. Local compression also needs your host to allow the binaries; most shared hosts do, some don’t.
Smush
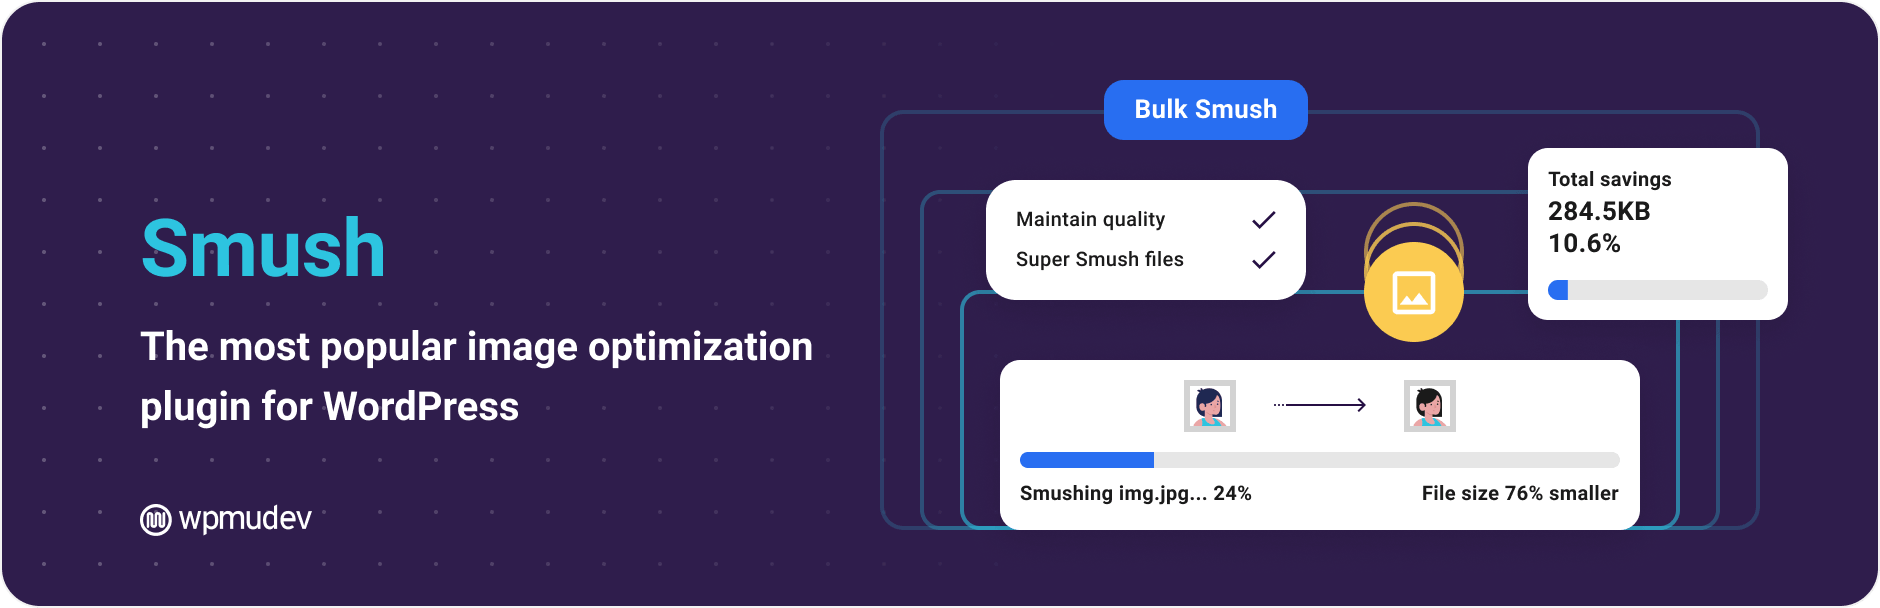
Best for: sites already in the WPMU DEV ecosystem that want one bundled plan.
Smush is the most installed image optimization plugin on WordPress (over 1 million active installs), but that comes from bundling with WPMU DEV, not from being the best compressor.
Compression: 52% on the free tier, around 58% on Pro with Ultra. Still behind ShortPixel.
The 5MB per-image limit on the free tier is the dealbreaker. Any photo from a decent phone camera is over 5MB, and the plugin skips those or pushes you to upgrade.
Pricing: free tier limited. $7.64/month for Pro (unlimited file size, WebP, CDN). $12.50/month for the full WPMU DEV Hub.
The catch: WebP requires the Pro plan. That is table stakes now, and every competitor includes it free. Pay for ShortPixel instead.
Converter for Media (formerly WebP Converter for Media)

Best for: small personal sites under 500 images where you just need free WebP conversion.
Converter for Media (the plugin many people still know as WebP Converter for Media) does one job well: it bulk-converts existing images to WebP and serves them via .htaccess rewrite rules. No dashboard, no credits, no cloud, no API key.
Compression: 58% on WebP conversion, slightly better than EWWW local. It converts format rather than compressing the original JPEG, so pair it with a local compressor or just use ShortPixel if you want both.
Pricing: free. The Pro version ($69/year) adds AVIF and bulk actions over 10,000 images.
The catch: no automatic WebP on upload unless you enable auto-convert (which adds overhead), and on Nginx hosts the .htaccess rules don’t work, so you need manual Nginx config.
reSmush.it
Best for: honestly, skip it. It is here because it is popular, not because I recommend it.
reSmush.it is a free cloud service that compresses via an external API. Lossy only, no WebP, no AVIF, no CDN. The API has been slow and intermittently down in every test I’ve run over the past two years.
Compression: 48%. The worst on this list.
The catch: a free external service with no contract and no recourse if it goes down or changes. Use EWWW local or Converter for Media instead.
Which one should you pick?
Small personal site, under 500 images: Converter for Media. Free, does WebP, done.
Blog or content site, 500 to 10,000 images: ShortPixel. Pay the $9.99/month, get the CDN, and never think about image optimization again. If you run FlyingPress, use its built-in optimizer instead.
WooCommerce store with product photography: ShortPixel or Optimole. ShortPixel for a fixed monthly cost, Optimole if on-the-fly resizing matters more than per-credit pricing.
Agency managing multiple client sites: EWWW API. The $7/month plan covers multiple domains under one account, cheaper than ShortPixel once you run 5+ sites.
Existing WP Rocket user: Imagify. Bundled support, clean integration, one vendor for cache and images.
Frequently Asked Questions
What is the best WordPress image optimization plugin?
If you already run FlyingPress, use its built-in image optimization and skip separate plugins. If you don’t, ShortPixel is the best cloud all-rounder, EWWW is best for local control, and the free WordPress Performance Lab plugins cover the essentials at no cost.
Does FlyingPress optimize images without another plugin?
Yes. FlyingPress has native image optimization in its Images tab: convert to WebP or AVIF, choose lossy or lossless compression, auto-optimize new uploads, resize to the visitor’s screen, and keep or restore originals. You don’t need a separate image plugin or subscription.
What are the WordPress Performance Lab image plugins?
They are free, official feature plugins from the WordPress core performance team: Modern Image Formats (WebP and AVIF on upload), Image Prioritizer (fetchpriority on the LCP image), Enhanced Responsive Images (a smarter sizes attribute), and Image Placeholders (dominant-color loading backgrounds). Install the Performance Lab plugin to manage them, or add each one standalone.
Should I use WebP or AVIF on WordPress?
Use WebP as the safe default and AVIF when your plugin, server, or CDN handles it cleanly. AVIF is roughly 30 to 50% smaller than WebP at similar quality, but a correctly sized WebP still beats an oversized AVIF.
How do I enable AVIF on my own server?
Install the Imagick PHP extension compiled with libavif or libheif support (plus libwebp for WebP). On Debian or Ubuntu: sudo apt install imagemagick php-imagick webp libavif-bin, then restart PHP-FPM. WordPress 6.5 and newer output AVIF automatically once Imagick supports it. Confirm under Tools, Site Health, Info, Media.
Can image optimization fix LCP?
Yes, when the LCP element is an image. Resize it, compress it, serve a modern format, prioritize or preload it, and make sure it is not lazy-loaded. That combination usually moves LCP more than any server tweak.
How does Cloudflare R2 help with images in the long run?
Cloudflare R2 stores your media library with zero egress fees and storage around $0.015 per GB per month (the first 10 GB free), then serves files from Cloudflare’s edge. Because there are no bandwidth charges, your cost stays flat as traffic grows, unlike egress-billed CDNs. Pair it with an optimizer so images are both small and cheap to serve.
Disclaimer: This site is reader-supported. If you buy through some links, I may earn a small commission at no extra cost to you. I only recommend tools I trust and would use myself. Your support helps keep gauravtiwari.org free and focused on real-world advice. Thanks. - Gaurav Tiwari