How to Record Mac Screen with Sound?
Apple’s built-in media application QuickTime Player is the most popular and easy-to-use screen recording solution for Mac devices. It allows the user to record full or partial screens, edit screen recordings, and record voice-overs using the built-in microphone.
However, if you need to record audio along with your screen recording for professional needs, QuickTime cannot produce satisfying output on its own. You need a tool like SoundFlower to record the Mac screen with quality sound.
This post discusses exactly how you can record your screen with the audio input on Mac computers like iMac & Macbooks using QuickTime and SoundFlower.
Table of Contents
Step 1: Install and Setup SoundFlower
To record both screen and audio on Mac, you need to install SoundFlower on your Mac.
SoundFlower is a Free MacOS kernel extension that allows routing audio from one application to act as input for another app.
Suppose you are playing your favorite song on iTunes, and you want to record it in a screen record. SoundFlower can make the iTunes song act as the input to QuickTime screen recording without relying on a microphone or speakers.
This application is an extension to Macbooks that allow the passing of information from one program to another, making receiving and sending audio conveniently.
How to use Soundflower?
- Once you download and install SoundFlower on your Mac, restart your system. It will refresh all the controls to avoid troubles during the recording session.
- Now, go to the System Preferences and select the Sound tab.
- Choose the Output tab and select SoundFlower(2ch) as active output for the current recording. It will restrict the transmission of audio signals to speakers and directly transfer them to SoundFlower.
Step 2: Start Recording with QuickTime Player

Once you are done with adjustment for sound recordings, head towards the QuickTime window to start the recording process.
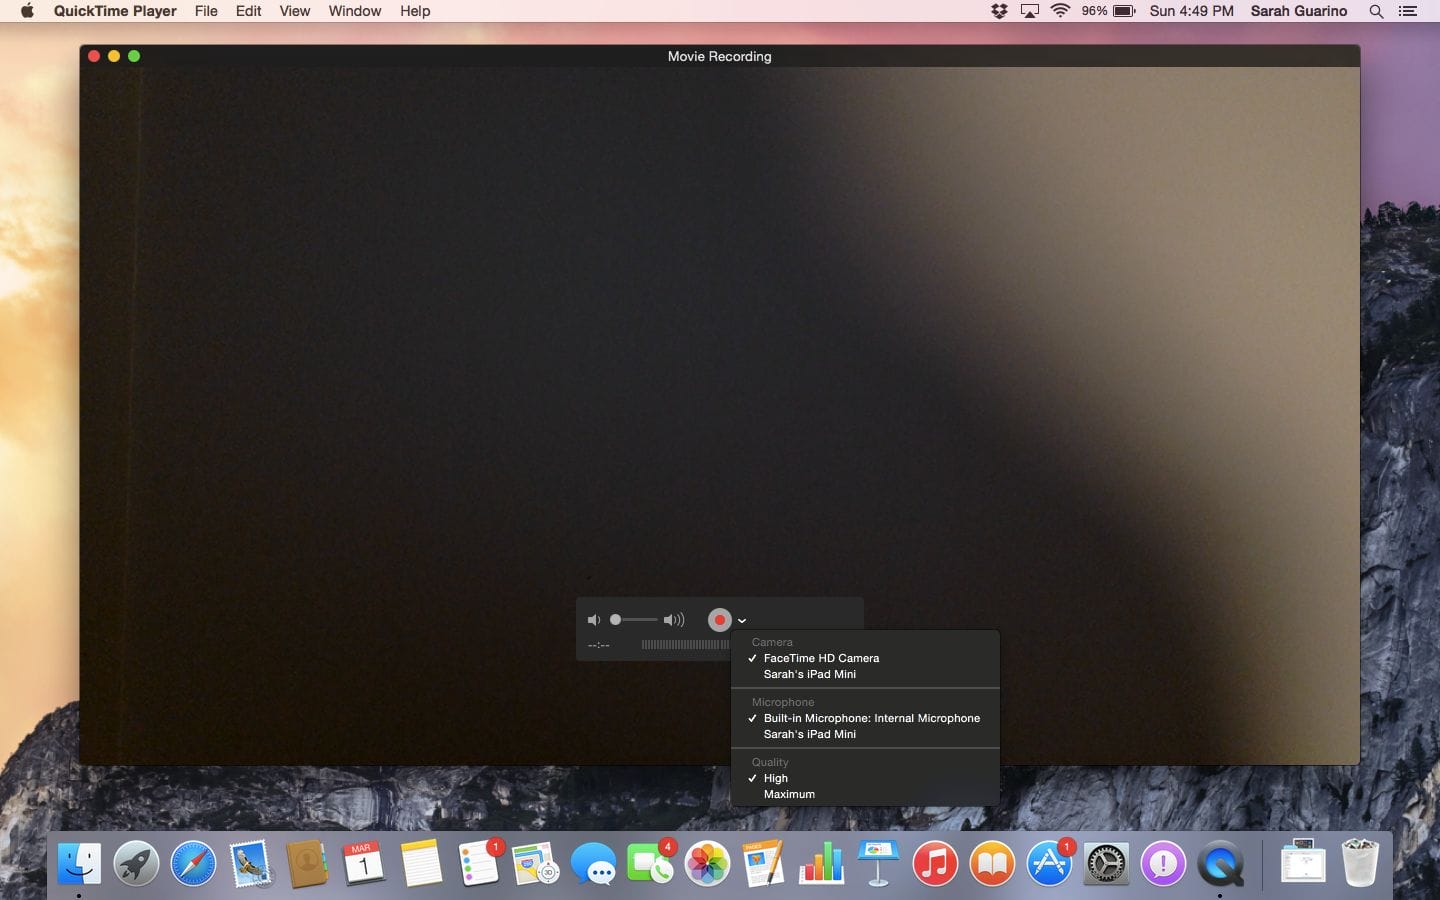
- Click on File tab available on the top bar and select New Screen Recording from the drop-down menu. You will have a small box in front of you having a red button in the center.
- Tap on the little arrow placed on the right side of that red button.
- It will open a new drop-down menu letting you choose the quality and audio source.
- Select SoundFlower (2ch) as an audio source and keep the quality high. Now click on the red button.
- The QuickTime will ask you whether you want to record the whole screen, whole window or a particular area of the screen.
- You can select the screen area you want to be recorded.
- After making the selection of the screen for recording, tap on the Start Recording button.
- Once your recording is complete, click on the QuickTime icon in the menu bar or select Stop Screen Recording.
Step 3. Get it done!
Once you get your screen and audio recording, disconnect SoundFlower from the audio input so you can get back the audio on the speakers. Go to System Preferences and select the Sound tab. Click on the Output tab and select Internal Speakers as a source for producing sounds.
Apple’s default audio and video player QuickTime also allows easy editing of video and audio files.
Its basic video-editing features allow trimming video files, merging multiple multimedia files, and splitting and rearranging video clips. This software is extremely handy for those who make desktop screen recording videos for uploading to YouTube or sharing on other platforms.
Those who make tutorials for gameplay usually use video and audio recording to make the video engaging and give the viewer a full and exciting experience to watch the video.
However, it is not designed for long and more complex video recordings and you need to take the support of SoundFlower to record the screen with audio.
