Kadence Element Hooks: Complete Setup Guide (2026)
I needed to add an affiliate disclosure above every blog post without editing 400+ templates. Kadence Element Hooks solved it in under 3 minutes, no code needed.
After running 800+ client projects through Gatilab, I’ve tested hooks in Astra, GeneratePress, and Kadence. Kadence Pro’s implementation stands out for its placement depth, conditional logic, and auto-expiry feature that no other WordPress theme matches.
This guide walks you through every step of setting up Kadence Element Hooks, from activation to publishing your first hook, with real examples from my own site.
Skip to:
What Are Element Hooks?
Element hooks let you inject custom content (HTML, blocks, or full layouts) into specific locations on your WordPress site without editing template files. Think of them as visual “insertion points” that WordPress themes expose through their architecture.
Common WordPress hooks include wp_head, wp_footer, and the_content. Kadence Pro wraps these (and dozens more) in a visual interface, so you don’t need to write a single line of PHP.
You can add affiliate forms, modals, animation, etc on your site easily by using this feature.
It is present mostly in the pro versions of leading WordPress themes, such as Astra, GeneratePress, and Kadence.
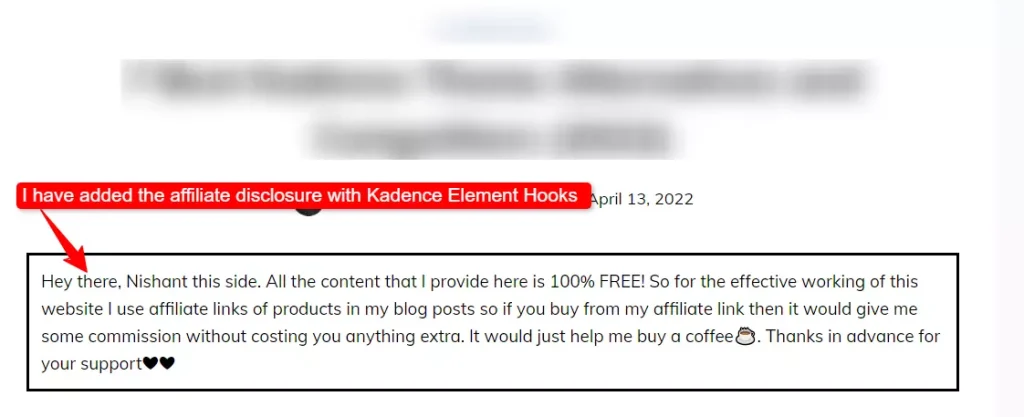
In Kadence, I added the affiliate disclosure with Kadence Element Hooks.
It was much easier as compared to adding affiliate disclosure manually to each of my blog posts.
Now let’s walk through setting up Kadence Element Hooks step by step.
How to Setup and Configure Kadence Element Hooks on Your Site?
Here is a step-by-step tutorial to use Kadence Elements and Element Hooks feature on your website:
Step 1 – Setting up Kadence Element Hooks
First to use the Kadence Element Hooks feature on your website you have to first turn it on.
As I have previously mentioned that Kadence Hooks feature is only present in its pro version.
So, to use it, you have to invest in its pro version.
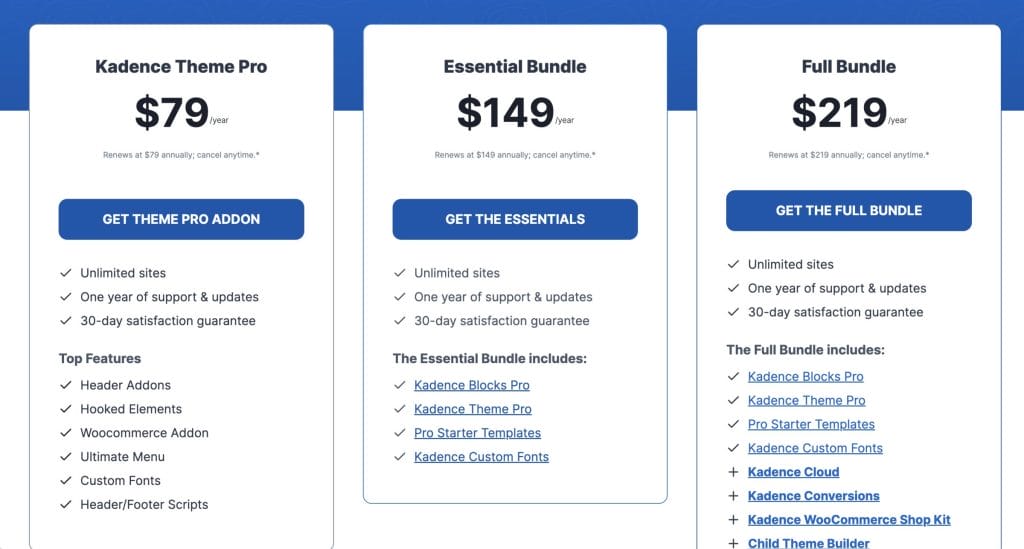
The Pro plan starts at $59/year and includes Element Hooks alongside header/footer builders, conditional logic, and WooCommerce integration.
To know more about the features of the Kadence Pro theme read my Kadence theme review article.
For beginner bloggers, the Kadence Theme Pro plan gives you the best value, including Hooks, header builder, and WooCommerce support.
Along with the regular pricing you can use the coupon code “TAKE10” to get a flat 10% off on all the Kadence Pro plans.
You can even read my Kadence coupon code article to know the step-by-step tutorial to get 10% off on all Kadence Pro plans.
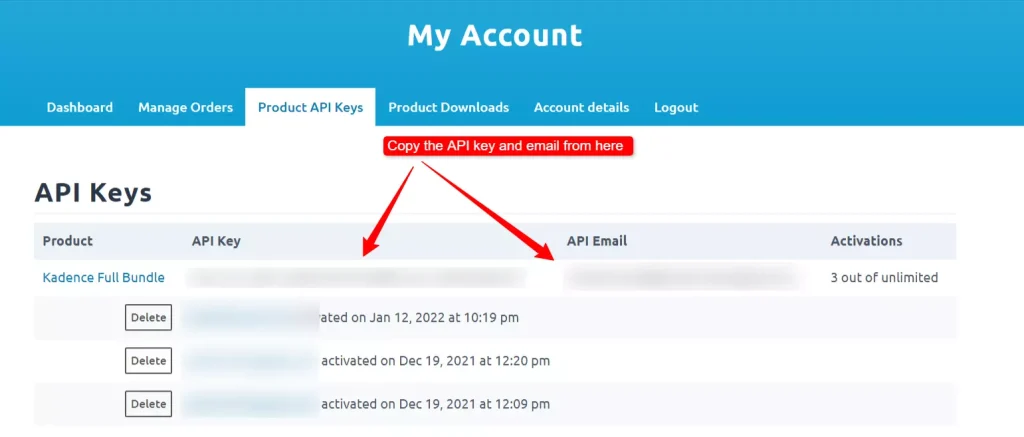
After buying any of the Kadence Pro plans just go to your account, click on the product API keys tab and copy the API key and your email address from there.
Next, go to your WordPress website dashboard and there click on the Kadence link under the appearance tab.
On the right sidebar just add the email and API key you have just copied and after that click on activate button.
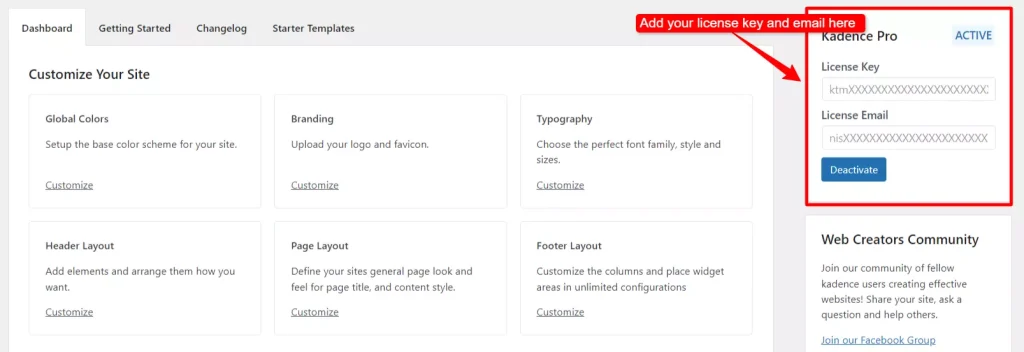
Voila! Kadence Pro would be activated on your website. After that just scroll down and turn on the Kadence elements feature.
Step 2 – Creation of Kadence Element Hooks
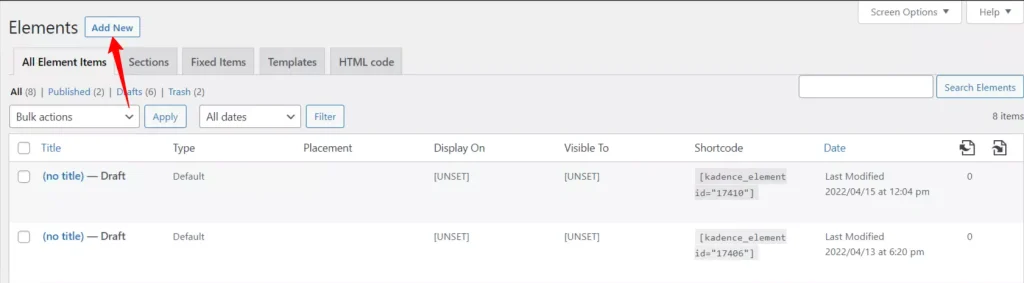
After turning on the hooks feature in the Kadence theme just go to the Elements section and there click on add new button to make a new element.
Next, you have to choose what type of Element you want to create.
You have four options to choose from:
- Content Section
- Fixed Section
- Templates
- HTML Editor
Let’s look at all of them in-depth:
1. Content Section
The first type of hook is the content section one in which you can use either Kadence Blocks or any other page builder to design the element.
For example, the affiliate disclosure that I am using at the start of my blog posts is made with this type of hook.
If you include affiliate links in your blog posts then you might be familiar with the term affiliate disclosure in which you have to disclose to your blog readers that you use affiliate links in your blog posts which helps you get some commissions.
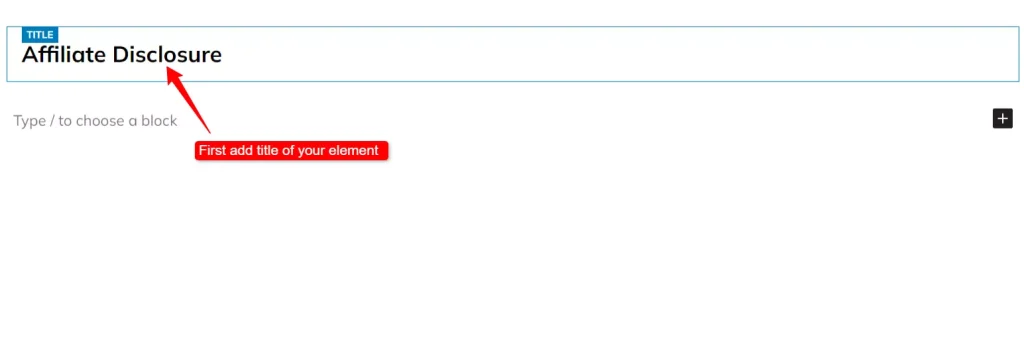
To make an affiliate disclosure with Kadence hooks you first have to add the title of the element which in my case is “Affiliate disclosure”.
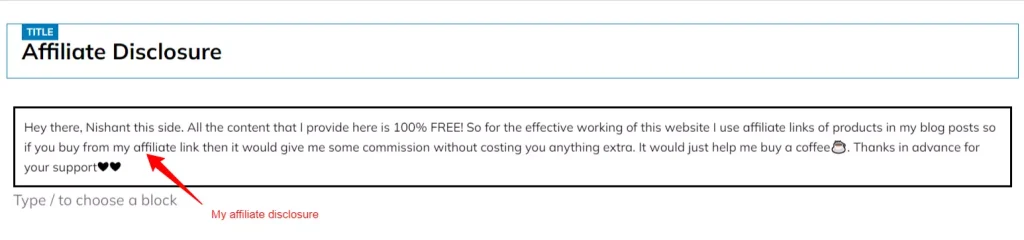
After doing that you can use Kadence blocks or any other page builder to design the affiliate disclosure that you want to show on your website.
As you can see that in my affiliate disclosure I have creatively told my blog readers that I use affiliate links in my blog posts.
Similarly, you can also make your own creative affiliate disclosure with the help of Kadence Element Hooks.
After making the element you have to choose where you want it to display on your website which I have explained in step 3.
But before that let’s see other types of hooks present in Kadence theme.
2. Templates
The templates hook is quite similar to the content section hook except for its placement options.
Along with that, the process of creation of the hook is similar too you can either use Kadence blocks or any other page builder to design it.
Using this type of hook you can replace a specific element of your site with the one you have created using this hook.
Here are all the placement options that you get in the placement hook:
- Replace header
- Replace sidebar
- Replace the above content hero
- Replace single post content
- Replace archive loop item Content
- Replace footer
- Replace 404-page content
3. Fixed Section
The fixed section is a useful hook that you can use to add fixed elements like fixed header, footer, and more on your site.
This hook can be really beneficial if you are promoting a special offer and want to get more sales on it.
For example, many bloggers use the fixed header hook to promote sales and special offers of the affiliate products they are promoting.
You can use Kadence Blocks or any other page builder to design the banner you want to display on your site and after that, you have to choose the location you want to add that banner.
Here are all the placement options you get in the fixed section hook:
- Fixed on top
- Fixed above transparent header
- Fixed top after scroll
- Fixed bottom after scroll (no space below footer)
- Fixed bottom after scroll
- Fixed on bottom
- Fixed bottom (no space below footer)
4. HTML Editor
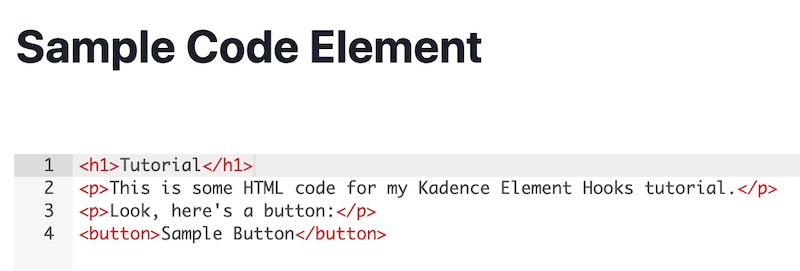
The last and the simplest hook present in the Kadence theme is its HTML editor hook.
After choosing this type of element you would be welcomed with a basic HTML editor where you can add the HTML code you want to display on your site.
Using this hook you can only add HTML to your site and not any other language like PHP which I am sure that Kadence would surely add in the future.
Step 3 – Choose the Hooks Placement
After adding the title and content within the hook now is the time to configure its settings.
To see all the Element settings just click on the Element settings icon present on the right side of the top bar.

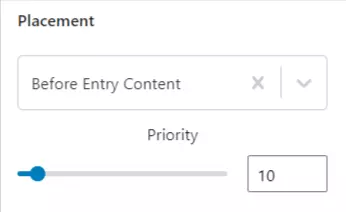
The first setting present is the placement setting, which you can use to choose which part of your site you want to display the element.
Kadence Element hooks offers you extensive placement options.

Here are all the placement options present in Kadence Hooks:
General Hooks Placement
- Body
- Before site wrapper
- After site wrapper
- Header
- Before Header
- After header
- Replace header
- Content Wrap
- After all content
- Before all content
- Above Content Hero Title
- Single: Above Title Content
- Archive: Above Title Content
- Replace Above Content Hero Title
- Content and Sidebar
- Before content
- After content
- After sidebar
- Replace sidebar
- Before Sidebar
- Single Inner Content
- Before Inner Content
- Before Inner Title Area
- Before Inner Title
- After Inner Title
- After Inner Title Area
- Before Entry Content
- After Entry Content
- After Inner Content
- Inside the content
- Before first heading tag
- After first heading tag
- After the first paragraph
- After second paragraph
- After third paragraph
- After fourth paragraph
- Comments
- Before comments
- After comments
- Before comments list
- After comments list
- Archive Inner Content
- Before archive inner title
- After archive inner title
- Footer
- Before footer
- After footer
- Replace footer
- 404 Page
- Before 404-page content
- After 404-page content
- Replace 404-page content
- Mobile menu off-canvas area
- Before Mobile off-canvas content
- After mobile off-canvas content
- Header Account Login Modal
- Left of Login Form
- Before Login Form
- After Login Form
- Right of Login Form
- Replace Login Modal
- Custom
- Custom Hook
WooCommerce Hooks Placement
- WooCommerce Content
- Before WooCommerce Content
- After WooCommerce Content
- WooCommerce Product
- Before Single Product
- Single Product Image
- Before Single Product Image
- After Single Product Image
- Single Product Summary
- Before Add to Cart Form
- After Add to Cart Form
- Single Product Share
- Single Product Tabs
- After Single Product
- WooCommerce Archive
- Before Shop Loop
- Before Loop Item
- Loop Item Image
- Loop Item Title
- Loop Item Price
- After Shop Loop Item
- After Shop Loop
- WooCommerce Account
- Before Login Form (Logged Out View)
- After Login Form (Logged Out View)
- Before Account Navigation
- After Account Navigation
- Account Content (Logged In View)
- Account Dashboard
- WooCommerce Cart
- Before Cart Content
- Before Cart Table
- After Cart Table
- Cart Totals
- After Cart Content
- WooCommerce Side Cart
- Before Side Cart Content
- Before Side Cart List Items
- After Side Cart List Items
- Before Side Cart Buttons
- After Side Cart Buttons
- After Side Cart Content
- WooCommerce Checkout
- Before Checkout Form
- Before Customer Details
- After Customer Details
- Order Review
- After Order Review Contents
- Before Order Review Total
- After Order Review Total
- After Checkout Form
- WooCommerce Order Received
- Before Order Received Content
- After Order Received Content
- Shop Widget Toggle Off-Canvas Area
- Before Widget Toggle Off-Canvas Content
- After Widget Toggle Off-Canvas Content
LearnDash Hooks Placement
- LearnDash Focus Mode
- Focus Mode: Before Sidebar Navigation
- Focus Mode: After Sidebar Navigation
- Focus Mode: Before Title
- Focus Mode: Before Content
- Focus Mode: After Content
- LearnDash Course Page
- Before Course Content
- After Course Content
- LearnDash Group Page
- Before Group Content
- After Group Content
Kadence Element Hooks offer you a plethora of placement options that you can use to add anything anywhere on your site.
I have tried hooks of other themes like Astra and GeneratePress but none of them offered so many placement options.
And that is the reason why I like the Kadence Pro theme so much because of the presence of so many unique features that you won’t get in any other WP theme.
One of the best things that I found in Kadence Elements is its feature to create custom headers, sidebars, footers, etc.
You can use its placement options like replace header, footer, sidebar, etc and after that, you can choose which pages or posts you want to display that element to.
Pro Tip – You can add a custom sidebar made by Kadence Elements in your money posts where you can display affiliate banners of the product you are promoting. This would help you skyrocket your affiliate sales.
For my affiliate disclosure, I will choose the before-entry content placement option which would help me show affiliate disclosure just after the title of my blog posts.
Step 4 – Configure Display Settings
After choosing the placement of the element hook now is the time to configure its display settings.
Through display settings, you can choose on which pages, posts, categories, etc you want to display the element hook.
Note – If you don’t choose where you want to display the hook on your site then it would show “UNSET” on the display setting tab which means that it won’t show on your website. So, to show the element on your website always configure its display settings.
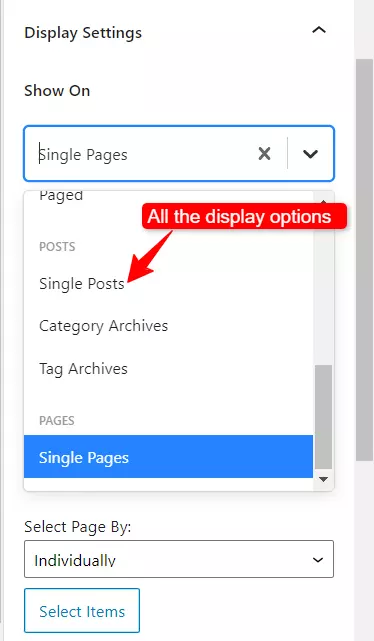
Here are all the display options present in Kadence Element Hooks:
Kadence General Display Options
- General
- Entire Site
- Front Page
- Blog Page
- Search Results
- Not Found (404)
- All Singulars
- All Archives
- Author Archives
- Date Archives
- Paged
- Posts
- Single Posts
- Category Archives
- Tag Archives
- Pages
- Single Pages
Kadence WooCommerce Display Options
- Products
- Single Products
- Products Archive
- Category Archives
- Tag Archives
LearnDash Hooks Placement
- Courses
- Single Courses
- Course Category Archives
- Course Tags Archives
- Courses Archive
- Lessons
- Single Lessons
- Lesson Category Archives
- Lesson Tag Archives
- Topics
- Single Topics
- Topic Category Archives
- Topic Tag Archives
- Quizzes
- Single Quizzes
- Submitted Essays
- Single Submitted Assignments
- Assignments
- Single Assignments
You can choose the entire site display option to show the element on your whole site or you can choose the blog page option to show the element only on your blog page.
Along with that, there are many other display options present in Kadence Hooks that you can tweak yourself.
You can even add different rules for showing the elements on your website.
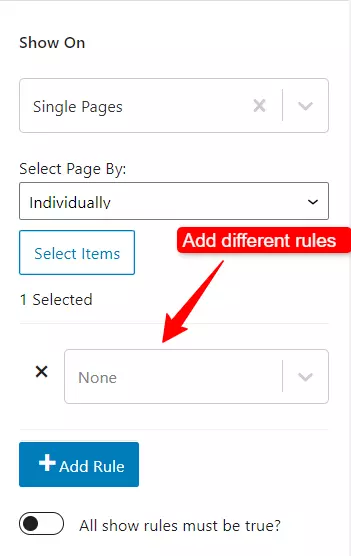
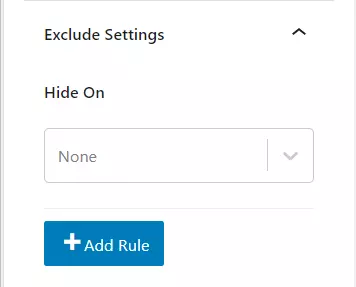
Or you can use exclude some pages, posts, etc from showing the element using the exclude settings.
In the case of affiliate disclosure, I would add it to all my blog posts as I use affiliate links in almost all my blog posts.

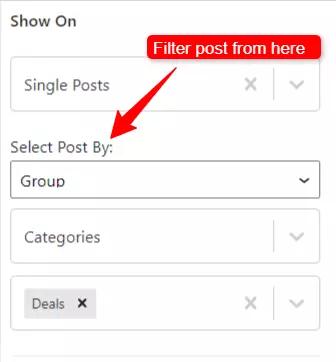
Even you can filter the posts that you want to add affiliate disclosure to.
For example, I have only shown the affiliate disclosure on the deals category blog posts present on my website.
The best display setting according to me is its 404-page setting which you can use to replace the boring regular 404 page on your site with the custom-crafted one.
The best part? You can do that without any coding needed just by using Kadence Blocks or any other page builder.
Step 5 – Configure User Settings
The next setting is the user settings which you can use to show the elements to a specific set of users on your site.
For normal blog websites, it might not be a big deal but it can be really beneficial if you are running a membership-based website.
For example, you have a membership website in which you are charging an amount of money to remove ads from your website.
With the help of Kadence elements, you can add ads to your website and set them to the logged-out users settings.
In this way, the ads will only be shown to the logged-out users (regular users) and won’t be shown to the users which have login access (users who pay subscription).
To create this type of membership website you can use Kadence Pro (for the account and hooks feature) and along with that any membership plugin.
Now here are all the users and roles you can show the element to:
- Basic
- All Users
- Logged out users
- Logged in users
- Specific Role
- Administrator
- Editor
- Author
- Contributor
- Subscriber
In my case, I would like to show my affiliate disclosure to all my website users so I have chosen the all users setting.
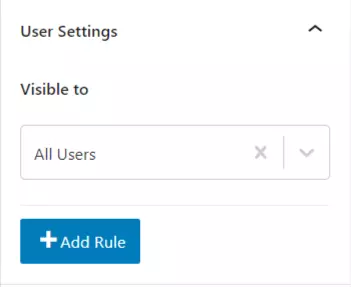
Note – If you don’t configure the user settings then it would show “UNSET” which means that the element won’t work until you configure it.
Step 6 – Configure Device Settings (Optional)
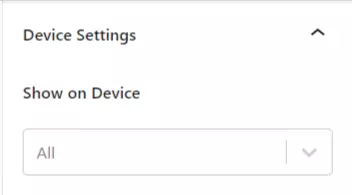
The next setting is the device settings which you can use to show your element on a specific device.
Note – If you remain the device settings unconfigured then your element hook would be shown on every device.
You can choose between mobile, desktop, and tablet to display your element on.
For example, using the device settings you can show your table of content present in your site’s sidebar to only desktop devices.
In my case, I would like to display my affiliate disclosure element to all the devices so I remained it as it is.
Now it’s time to move to step 7 where I will tell you about the expiry settings which is one of my favorite features of Kadence Element Hooks.
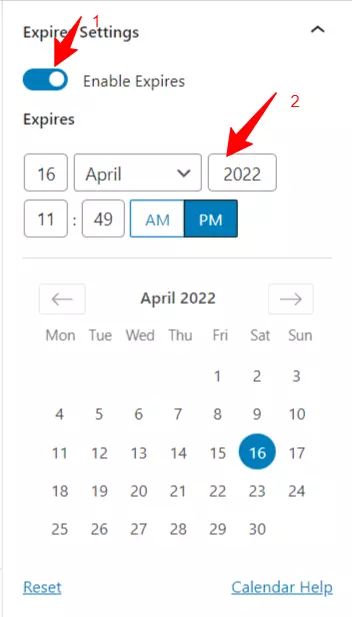
Step 7 – Set the Expiry Date (Optional)
Kadence Element Hooks offer you the feature to expire your element hooks automatically.
Let me give you a practical use case of the expiry feature.
Suppose you are a SaaS company that is conducting a sale on its products for a specific duration.
To promote that you want to add a fixed banner on the top of all your website pages.
You can easily do that by using the fixed element hook which I have told you about at the start of this article.
Along with that, you can add an expiry date to it (when your sale would end), and after doing that the element would be automatically expired on its expiry date.
The expiry feature is quite unique in Kadence Element Hooks which I haven’t found in any other theme hooks feature.
In the case of affiliate disclosure, I don’t want to expire it so I have kept this setting turned off.
Step 8 – Publish the Element
At last, you have to publish the element you have created.
To publish the element just click on the publish button and voila the element is published.

Along with affiliate disclosure, you can add almost anything using the Kadence Elements feature.
For example modal, fixed header, custom 404 page, etc.
So, if you want to add features like these to your site then make sure to use the pair of Kadence Pro (for Kadence Elements) + Kadence Blocks.
How Is Kadence Element Hooks Different?
There are several Kadence theme competitors present in the market which are offering the element hooks feature even before the Kadence theme was launched in the market.
Some of my favorite themes which offer hooks feature are Astra and GeneratePress.
However, no one can match the features and functionalities you get in the Kadence Element Hooks.

For example, the interface and usage of Kadence hooks are super simple even beginners can easily use them.
However, that’s not the case with hooks feature present in other themes.
Along with that Kadence Element Hooks comes with extensive placement options, expiry settings, and more that you won’t get in any other theme hooks.
So, if you want to use the real power of hooks then make sure to use the Kadence Element Hooks feature that you get in Kadence Pro Theme.
Over to You
Kadence Element Hooks is a powerful feature of the Kadence Pro theme.
You can do virtually anything to your website using this feature even if you are a noob in website designing.
Hope you have got some value from this in-depth tutorial on Kadence Element Hooks.
So, what are you waiting for go for Kadence Pro and use the Kadence Element feature on your website now?
Disclaimer: This site is reader-supported. If you buy through some links, I may earn a small commission at no extra cost to you. I only recommend tools I trust and would use myself. Your support helps keep gauravtiwari.org free and focused on real-world advice. Thanks. - Gaurav Tiwari