Best Digital pH Meters and pH Testers for Hydroponics (Buying Guide)
I killed an entire batch of basil in my hydroponic setup because I ignored pH for two weeks. The nutrient solution drifted to 7.8, and every plant turned yellow and wilted. That $40 mistake taught me a lesson I haven’t forgotten: if you’re growing without soil, a decent pH meter isn’t optional. It’s the single most important tool in your setup after the lights.
I’ve tested over a dozen pH meters since I started my indoor garden back in 2019. Some were garbage. Some lasted years. I’m sharing the ones I’d actually spend my own money on in 2026, along with everything you need to know about picking, calibrating, and maintaining a pH meter for hydroponics, aquariums, pools, or water testing.
Also see: Online pH Calculator
Best pH Meters and Testers in 2026
I’ve narrowed this list to meters I’d actually recommend to a friend. Not every pH pen on Amazon deserves your money, and I’m not going to pad this list with ten options just for the sake of it. Here are the two I keep coming back to.
1. Apera Instruments AI209 PH20 Waterproof pH Tester

APERA INSTRUMENTS AI209 Value Series PH20 Waterproof pH Tester Kit ±0.1 pH Accuracy
- Easy auto. calibration with buffer recognition; auto. temp. compensation (ATC) ensures accuracy in various temperatures (32 to…
- Backed by Apera quality pH sensor with low impedance, ensuring high response rate
The Apera AI209 is my top pick for anyone serious about hydroponics. I’ve used Apera meters for years, and the build quality is noticeably better than the $10-15 pens flooding Amazon. You get automatic temperature compensation (ATC), which means your readings stay accurate whether your nutrient solution is at 65°F or 85°F. The auto-calibration with buffer recognition saves time too. You just dip it in the buffer solution and it figures out which one you’re using.
Accuracy is ±0.1 pH, which is plenty for hydroponics work. Lab-grade meters go to ±0.01, but you don’t need that kind of precision for growing tomatoes or lettuce. The AI209 is waterproof, comes with calibration solutions in the kit, and the sensor has low impedance for fast readings. If you’re spending $30-50 on a pH meter, this is where your money should go.
Best for: Hydroponic growers who want reliable readings without spending $100+ on a lab meter. Also works well for aquariums and pool testing.
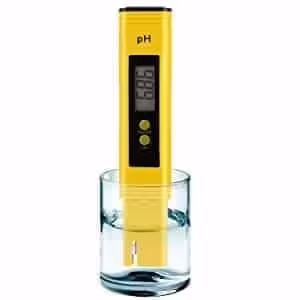
2. Digital pH Tester Pen (Budget Pick)

- A friendly reminder: Regularly cleaning your Ph meter electrode is crucial for ensuring accurate data. Contamination of the…
- 【Mini Size】The mini size ph meter we designed allows you to easily put it in your pocket, so you can take measurements…
If you’re just starting out with hydroponics or you need a pH meter for occasional pool or drinking water testing, this pocket-sized tester pen gets the job done for under $15. It covers the full 0-14 pH range with 0.01 resolution, which looks impressive on paper. In practice, I’ve found these budget pens are accurate to about ±0.1-0.2 pH after proper calibration, which is fine for most home use.
The big advantage here is the size. It fits in your pocket, runs on button batteries, and gives you a reading in about 5 seconds. The downside? You’ll need to calibrate it more often than a pricier meter, and the electrode doesn’t last as long. I’d plan on replacing it every 12-18 months with regular use. But at this price point, that’s a fair tradeoff.
Best for: Beginners, casual growers, and anyone who needs a quick pH check without a big investment. Keep calibration powder on hand and you’ll be fine.
Why pH Matters in Hydroponics
You can have the most expensive nutrients on the market, the best grow lights, and a perfectly designed system. None of it matters if your pH is off. Your plants can only absorb nutrients within a specific pH window. Outside that range, the nutrients just sit in the water doing nothing while your plants starve.
For most hydroponic crops, you want a pH between 5.5 and 6.5. I aim for about 6.0-6.2 as my sweet spot. At that range, nitrogen, phosphorus, potassium, and most micronutrients are available to your plants. Drift above 7.0 and iron, manganese, and zinc become locked out. Drop below 5.0 and calcium and magnesium absorption tanks.
There’s a bonus to keeping your solution slightly acidic: algae hate it. Most aquatic algae prefer neutral to alkaline water. By keeping your reservoir around 5.8-6.2, you’re making the environment hostile to algae growth while keeping it perfect for your plants. Two birds, one pH meter.
How pH Meters Work
A pH meter measures the concentration of hydrogen ions in your solution. More hydrogen ions means more acidic (lower pH). Fewer means more alkaline (higher pH). The scale runs from 0 to 14, with 7 being neutral.
Inside the meter, there’s a glass electrode that’s sensitive to hydrogen ions and a reference electrode that stays stable. The meter calculates the voltage difference between these two electrodes and converts it to a pH reading. That’s why calibration matters so much. If the reference point drifts, every reading you take will be wrong.
Most modern digital pH pens combine both electrodes into a single probe, which is why they’re so compact. The technology hasn’t changed much in decades. What has changed is the price. You can get a usable pH meter for $10-15 now. Ten years ago, you’d pay $50+ for the same accuracy.
Manual vs. Digital pH Testing
You’ve got two options for measuring pH: manual test kits (strips or liquid drops) and digital meters. I’ve used both, and here’s my honest take on each.
Manual pH Testing (Strips and Drops)
Manual pH kits are cheap. You can grab a pack of 100 test strips for $5-8. You dip the strip, compare the color to a chart, and you’ve got your reading. Liquid drop kits work the same way but with a vial of water and a reagent that changes color.
The problem? Accuracy. You’re eyeballing colors, and the difference between pH 6.0 and 6.5 can be hard to distinguish. If you’re colorblind, it’s even worse. I also find it annoying to deal with the color chart in low light. These kits don’t need calibration or batteries, so they’re great as a backup. But I wouldn’t rely on them as my primary testing method for a hydroponic system where precision matters.
Digital pH Meters
Digital meters give you a number on a screen. No guessing, no color matching. A properly calibrated digital meter is accurate to ±0.1 pH (or ±0.01 on lab-grade units), and you get a reading in seconds. For anyone running a hydroponic system and checking pH daily or every few days, a digital meter saves real time.
The tradeoff is maintenance. You need to calibrate regularly (I do it weekly), store the electrode properly with storage solution, and replace the meter every 1-3 years depending on how much you use it. Skip calibration and you’ll get readings that look fine but are quietly drifting, which is worse than no reading at all because you’ll adjust your solution based on bad data.
My recommendation: if you’re growing hydroponically, buy a digital meter. If you’re just checking your garden soil once a season, strips are fine.
How to Calibrate a pH Meter
Calibration is the difference between a useful tool and an expensive paperweight. I think of it like zeroing a kitchen scale. If you don’t zero it, every measurement is off by whatever the baseline error is.
You’ll need buffer solutions. These are liquids (or powders you mix with distilled water) with a known, certified pH value. Most kits come with pH 4.0 and pH 7.0 buffers. Some include pH 10.0 for a three-point calibration.
Here’s how I calibrate mine:
- Rinse the electrode with distilled water and pat it dry.
- Dip the electrode into pH 7.0 buffer solution and wait for the reading to stabilize.
- Adjust the meter to read 7.0 (most digital meters have a “CAL” button for this).
- Rinse again with distilled water.
- Dip into pH 4.0 buffer and adjust to 4.0.
- Rinse one more time. You’re done.
I calibrate once a week when I’m actively growing. If the meter has been sitting unused for a month or more, I always recalibrate before trusting any reading. And if you replace the electrode or probe, calibrate immediately. Don’t skip this step.
How to Care for Your pH Meter
I’ve seen people trash $50 pH meters in three months because they stored them wrong. The electrode is the heart of the device, and it’s more fragile than it looks. Here’s what I do to keep mine working:
- Store with electrode storage solution in the cap. Never use distilled water for storage. Distilled water will leach ions out of the reference electrode and kill accuracy over time.
- Keep the electrode wet. A dry electrode is a dead electrode. If the cap dries out, add a few drops of storage solution or pH 4.0 buffer as a temporary fix.
- Don’t touch the glass bulb. Oils from your skin coat the sensor and mess up readings. Handle it by the body only.
- Rinse with distilled water between tests. Cross-contamination between different solutions will give you bad readings.
- Calibrate regularly. Weekly if you’re testing often. Monthly at minimum.
- Store upright, away from heat. Extreme temperatures damage the electrode. Room temperature, upright, cap on.
Follow these steps and a $30 meter will last you 2-3 years. Ignore them and even a $100 meter won’t survive the season.
Frequently Asked Questions
What accuracy do I actually need in a pH meter?
For hydroponics, aquariums, and pool testing, ±0.1 pH accuracy is more than enough. Lab-grade meters with ±0.01 accuracy cost $100+ and aren’t necessary for home use. Most plants tolerate a pH range of about 0.5 units, so a ±0.1 meter gives you plenty of room to keep things dialed in.
How often should I calibrate my pH meter?
I calibrate mine once a week during active growing seasons. If you’re testing less frequently, once a month is the bare minimum. Always recalibrate after the meter sits unused for more than 30 days, after replacing the electrode, or if you get a reading that doesn’t seem right.
Can I use a pH meter for both hydroponics and aquariums?
Yes. A pH meter measures hydrogen ion concentration in any water-based solution. The same meter works for hydroponics, aquariums, swimming pools, drinking water, and even brewing. Just rinse the electrode with distilled water between different solutions to avoid cross-contamination.
Why do cheap pH meters stop working after a few months?
Usually it’s a storage problem, not a quality problem. If you store the electrode dry or in distilled water instead of proper storage solution, the reference electrode degrades and readings drift. Cheap meters also use lower-quality electrodes that wear out faster, especially with frequent use. Expect 12-18 months from a budget meter and 2-3 years from a mid-range one like the Apera AI209.
Is a pH test strip accurate enough for hydroponics?
Test strips can get you in the ballpark, but they’re not precise enough for serious hydroponic growing. The difference between pH 5.8 and 6.3 is hard to see on a color chart, and that half-unit gap matters for nutrient absorption. I keep strips as a backup, but my primary tool is always a digital meter.
What’s the ideal pH range for hydroponic plants?
Most hydroponic crops grow best between pH 5.5 and 6.5. I aim for 6.0-6.2 as my default. Leafy greens like lettuce prefer the lower end (5.5-6.0), while fruiting plants like tomatoes and peppers do well at 5.8-6.3. Check the specific requirements for whatever you’re growing, but 6.0 is a safe starting point.